Release updates for G-Accon for Xero/QuickBooks
G-Accon for Xero: Changes and Enhancements released in August, 2024
G-Accon for QuickBooks/Xero: Changes and Enhancements released in August, 2024
Watch latest videos in G-Accon Integration channel
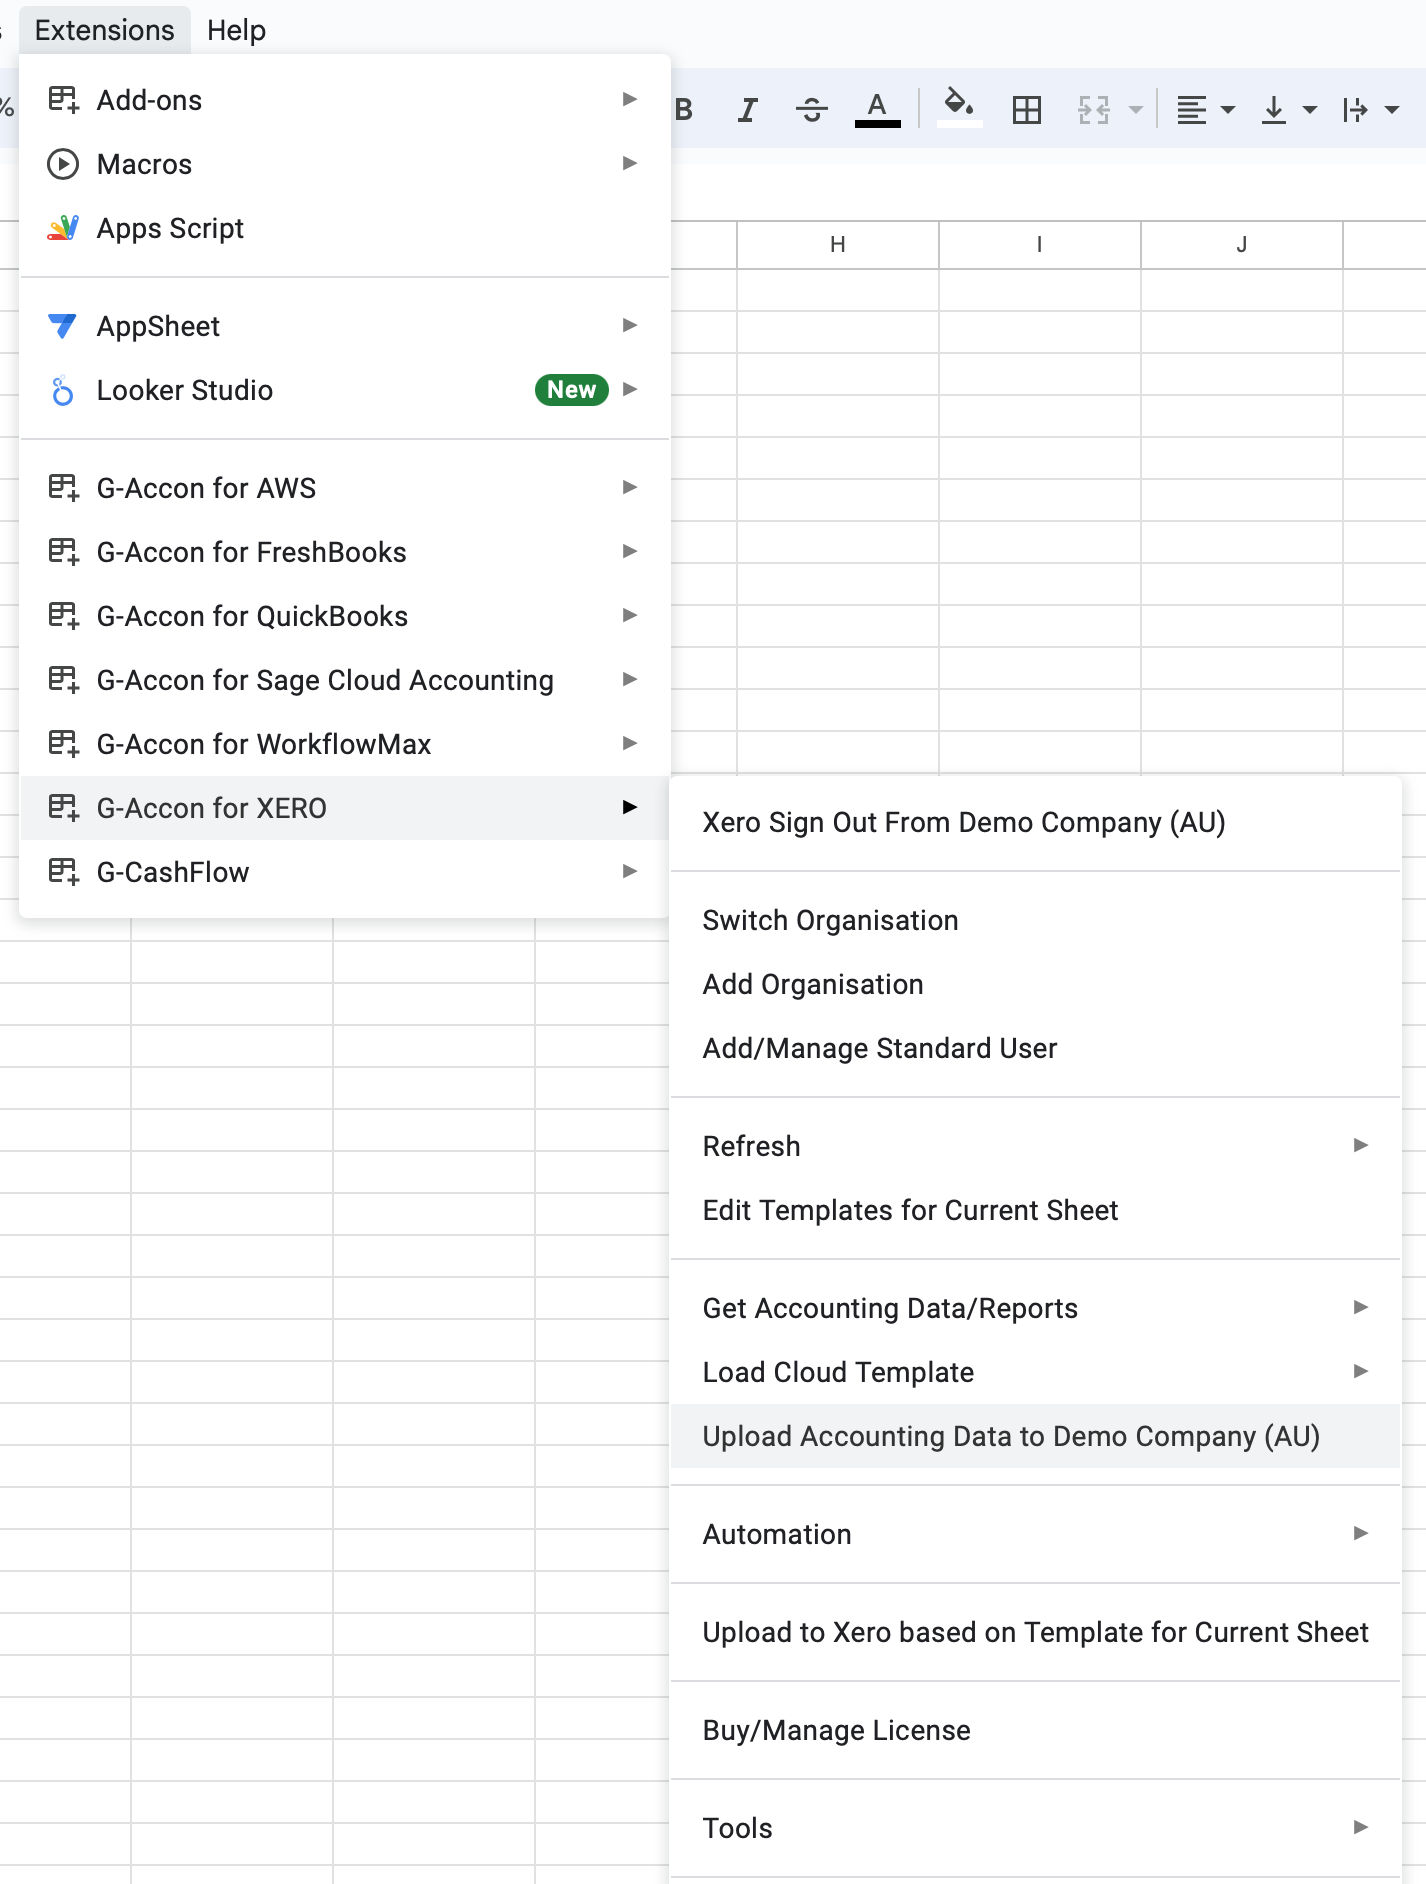
Upload Xero data from Google Sheets to Xero
The Upload process allows you to seamlessly transfer financial or business data that you have in Google Sheets directly into your Xero account. This is especially useful for managing and updating financial records, invoices, manual journals, PO, and other key data. Here's how it works:
Data and Data Structure Preparation:
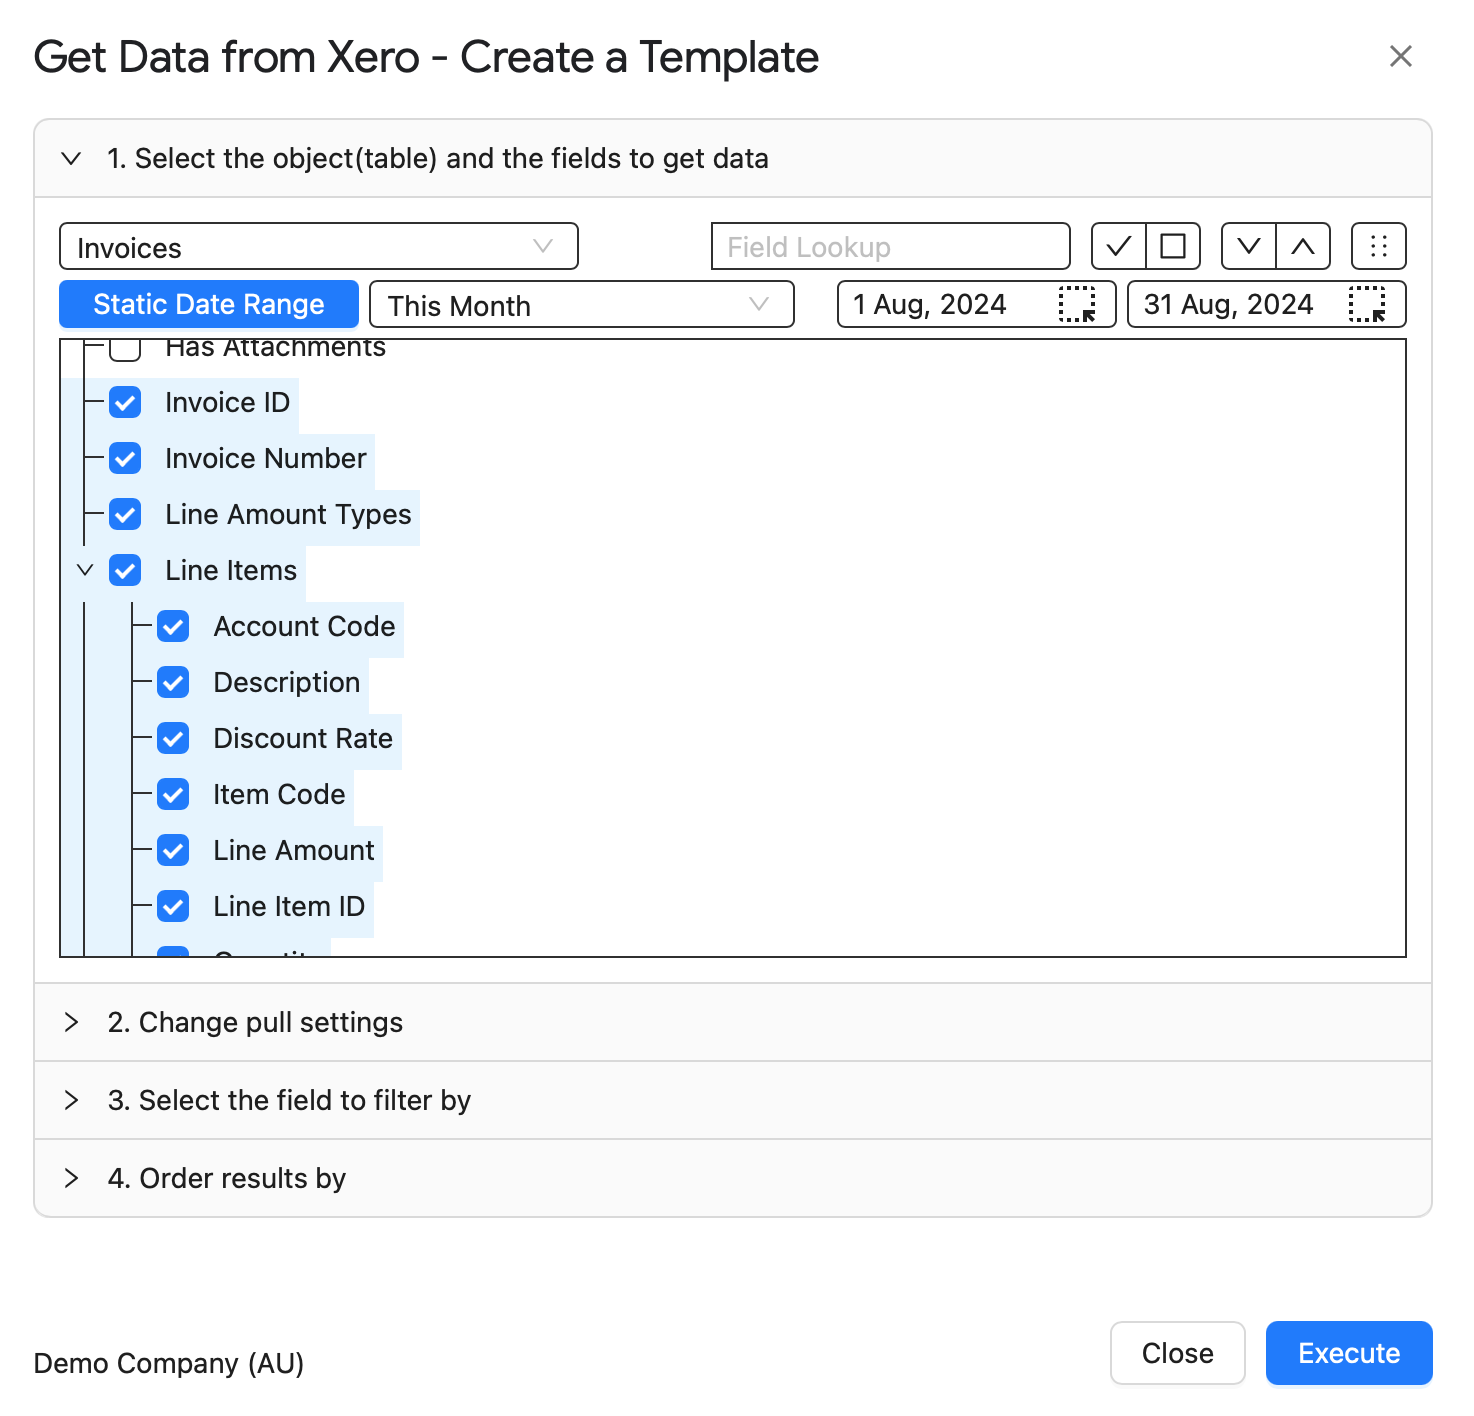
Before uploading, make sure your data in Google Sheets is set up according to Xero’s requirements. This might include correctly formatting columns, matching data types (like dates, numbers, and text), and filling in all necessary/mandatory fields. For this reason, we highly recommend to download Table from Xero to Google Sheets first by using
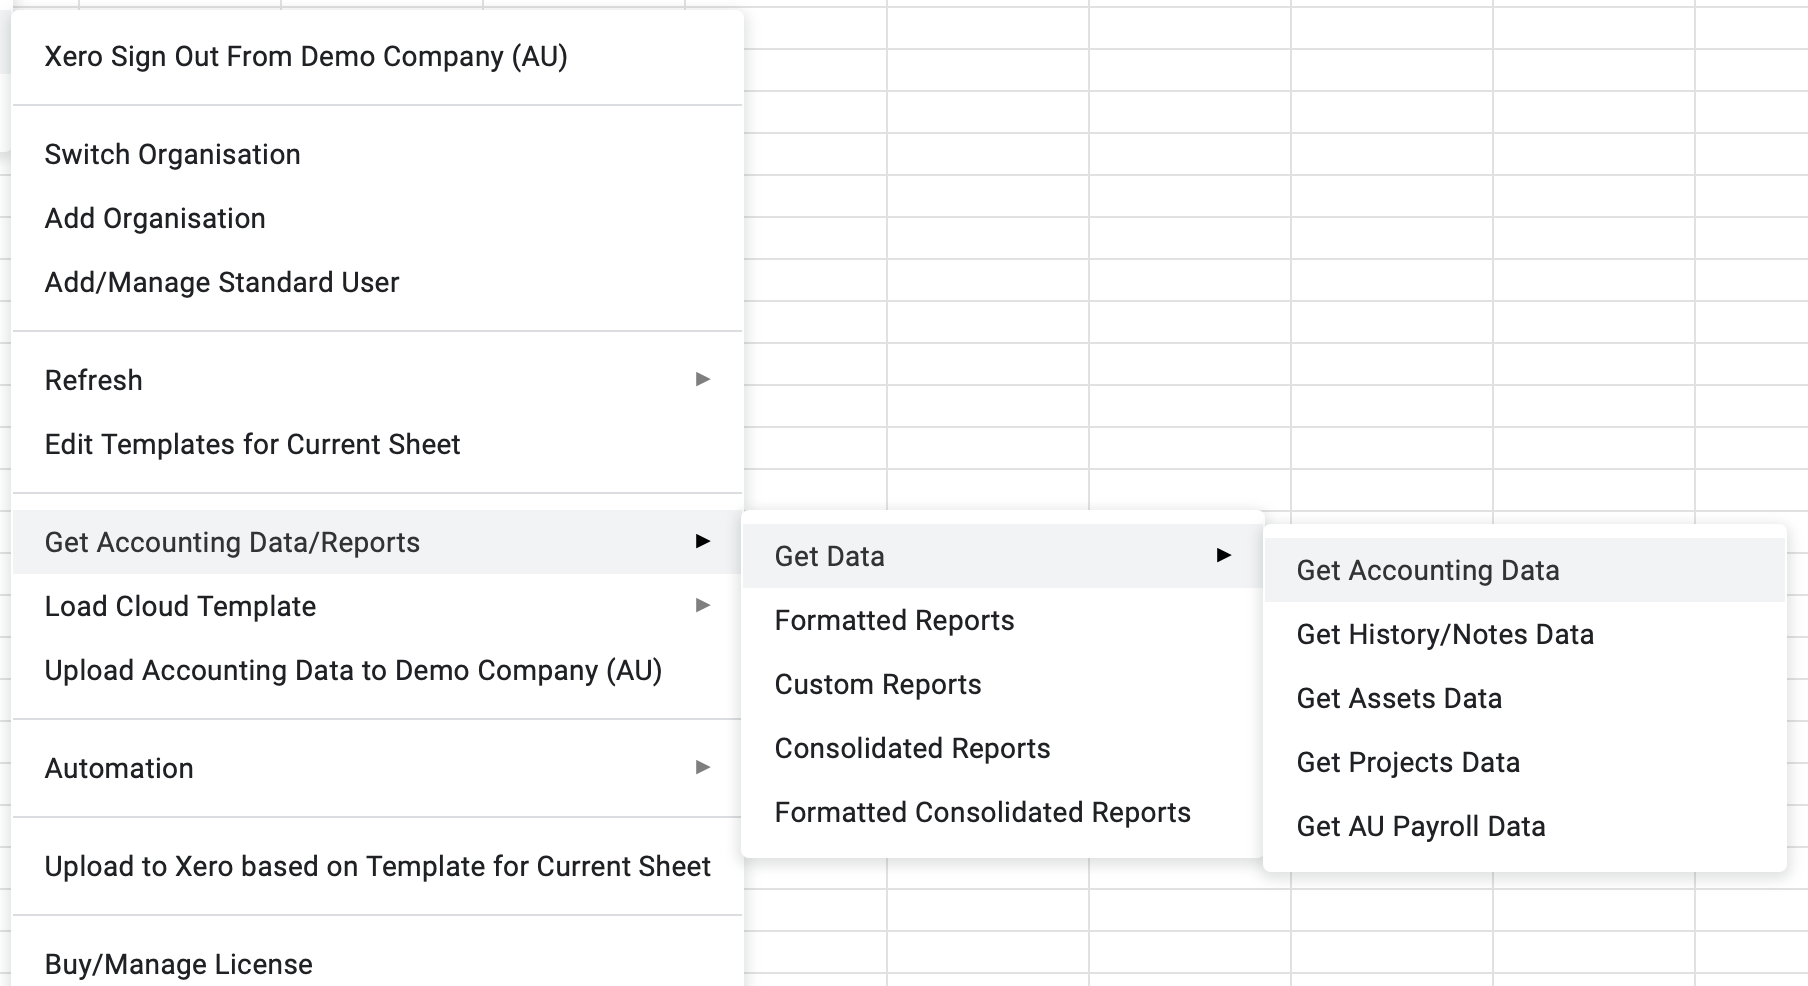
Get Accounting Data/Reports -->Get Data-->Get Accounting Data
Change the column orders if needed:
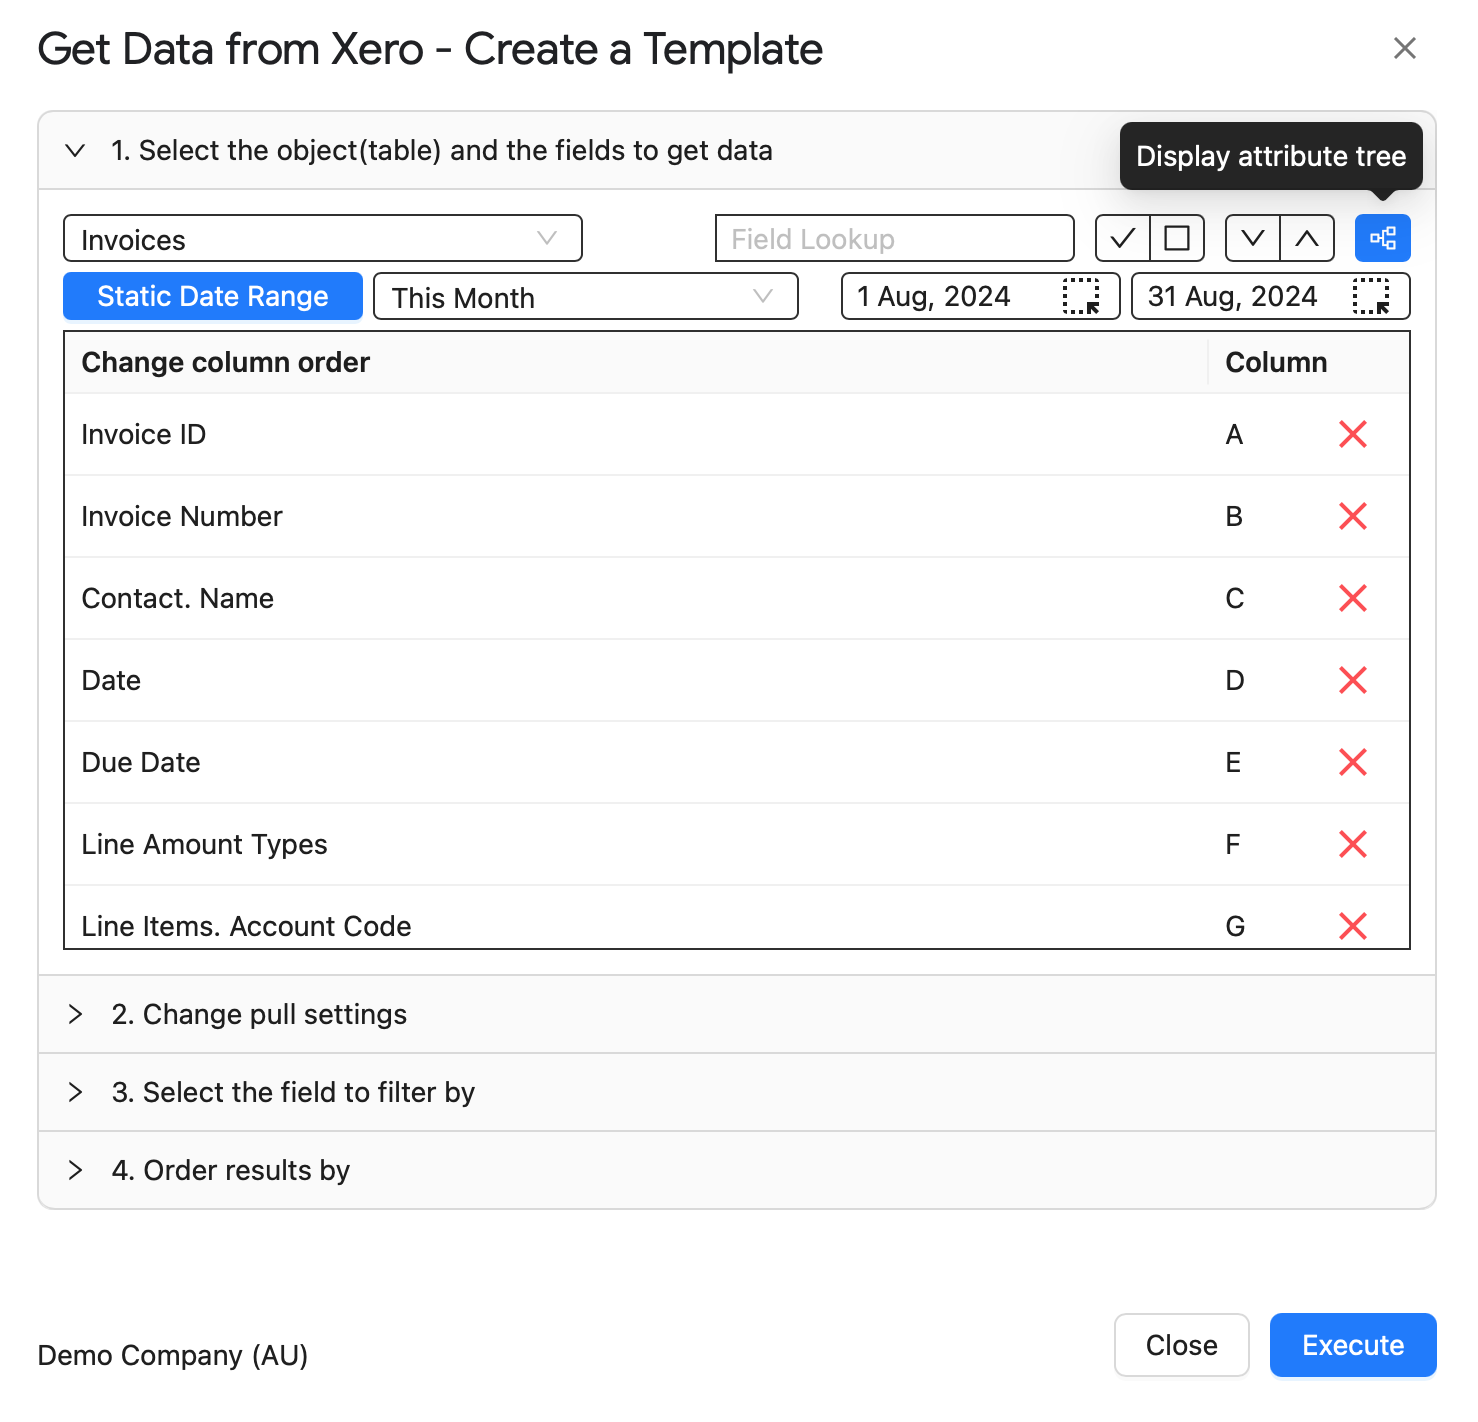
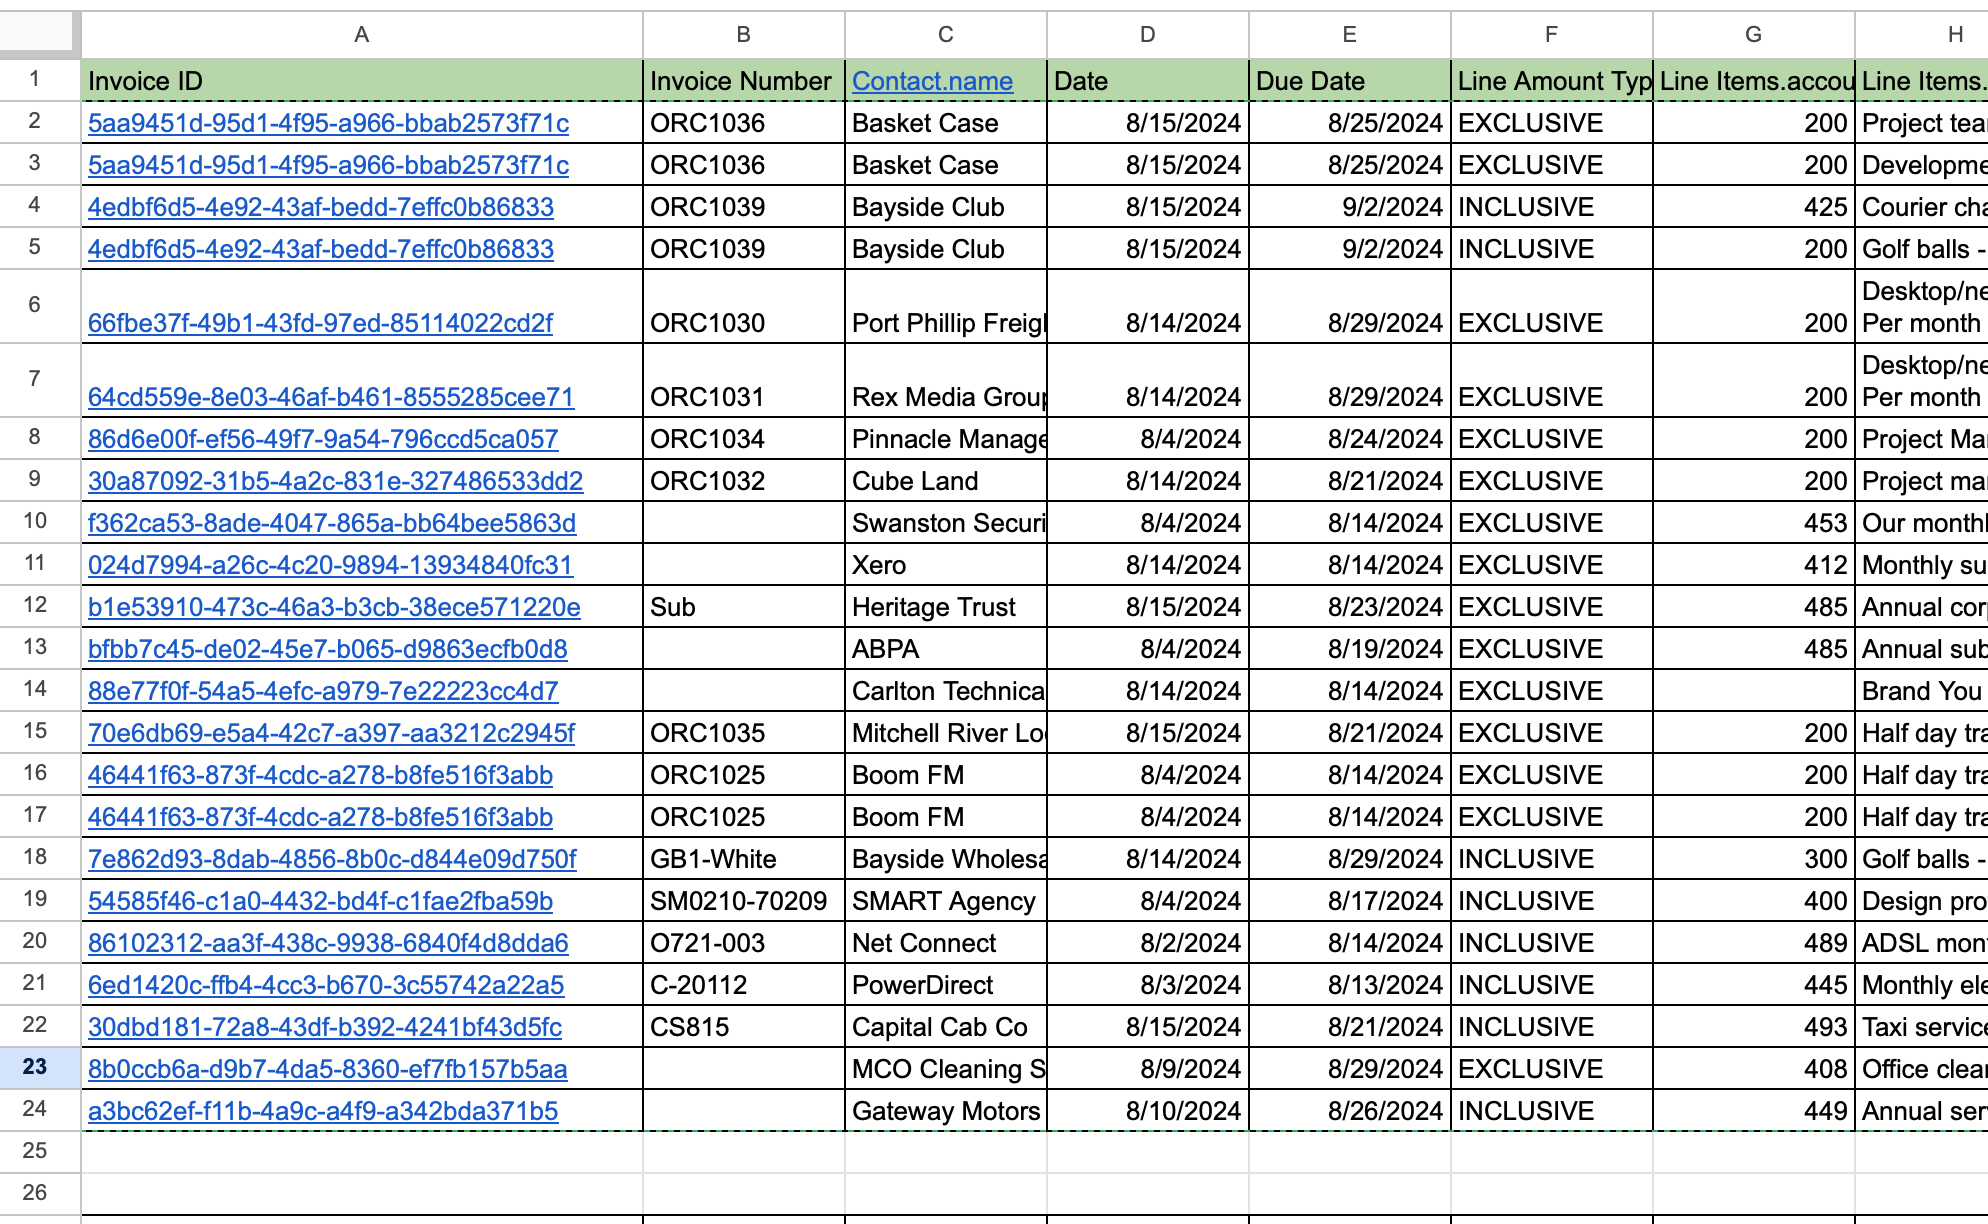
This is a Data set and Data structure downloaded from Xero into Google Sheets:
Prepare and Select Data: Choose the specific rows or data ranges in Google Sheets that you want to upload to Xero.

Create Upload Template:
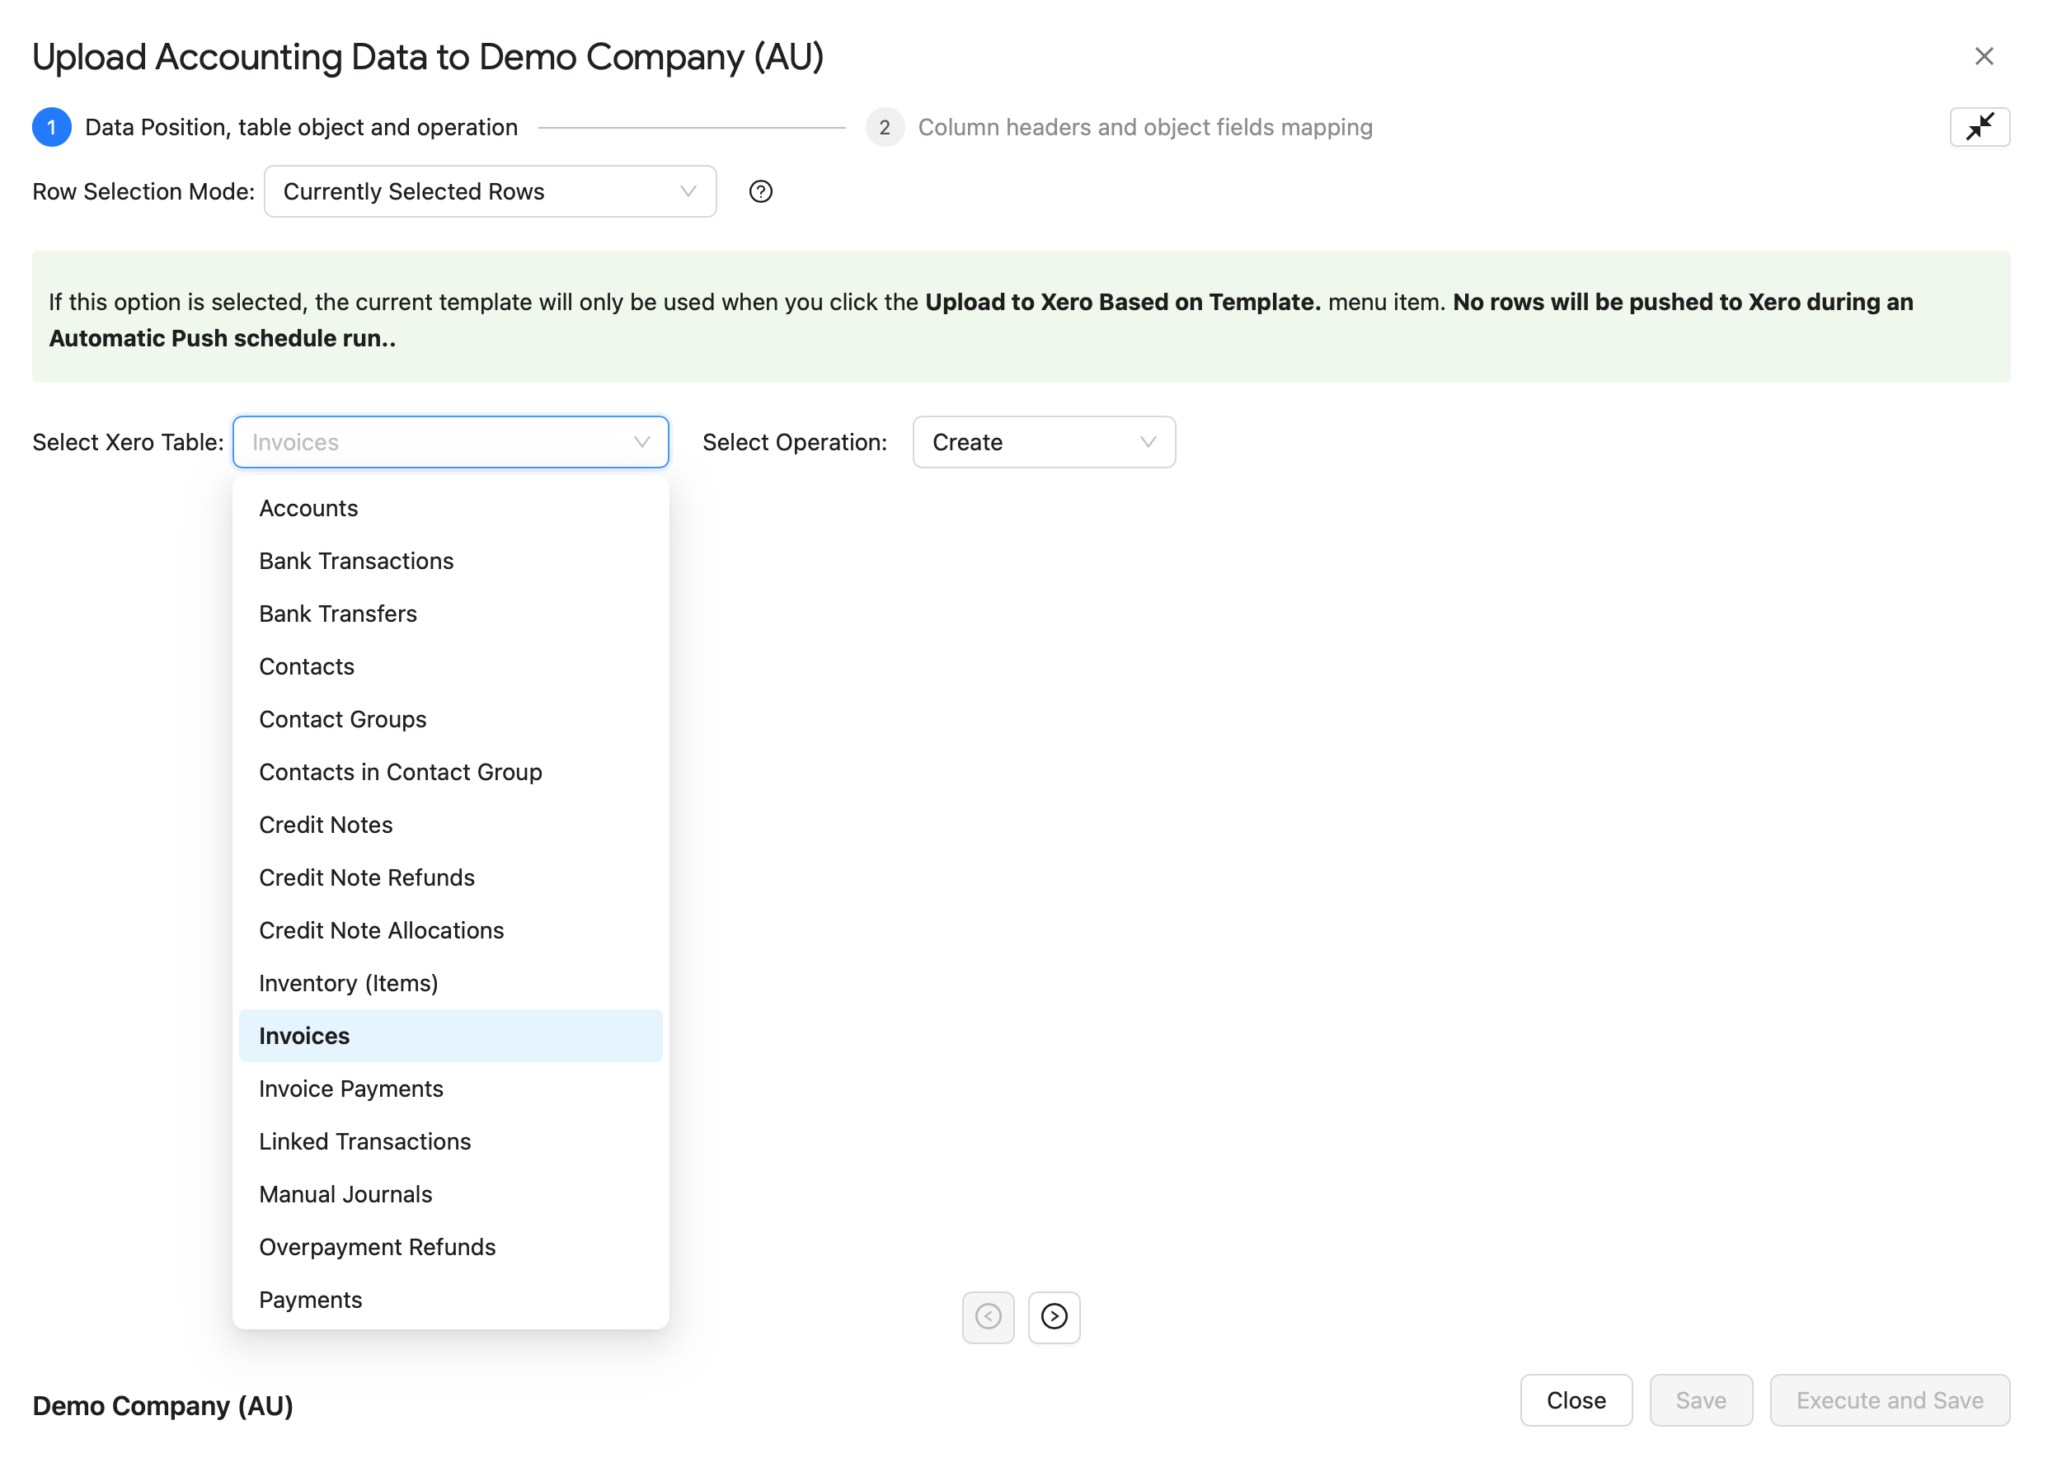
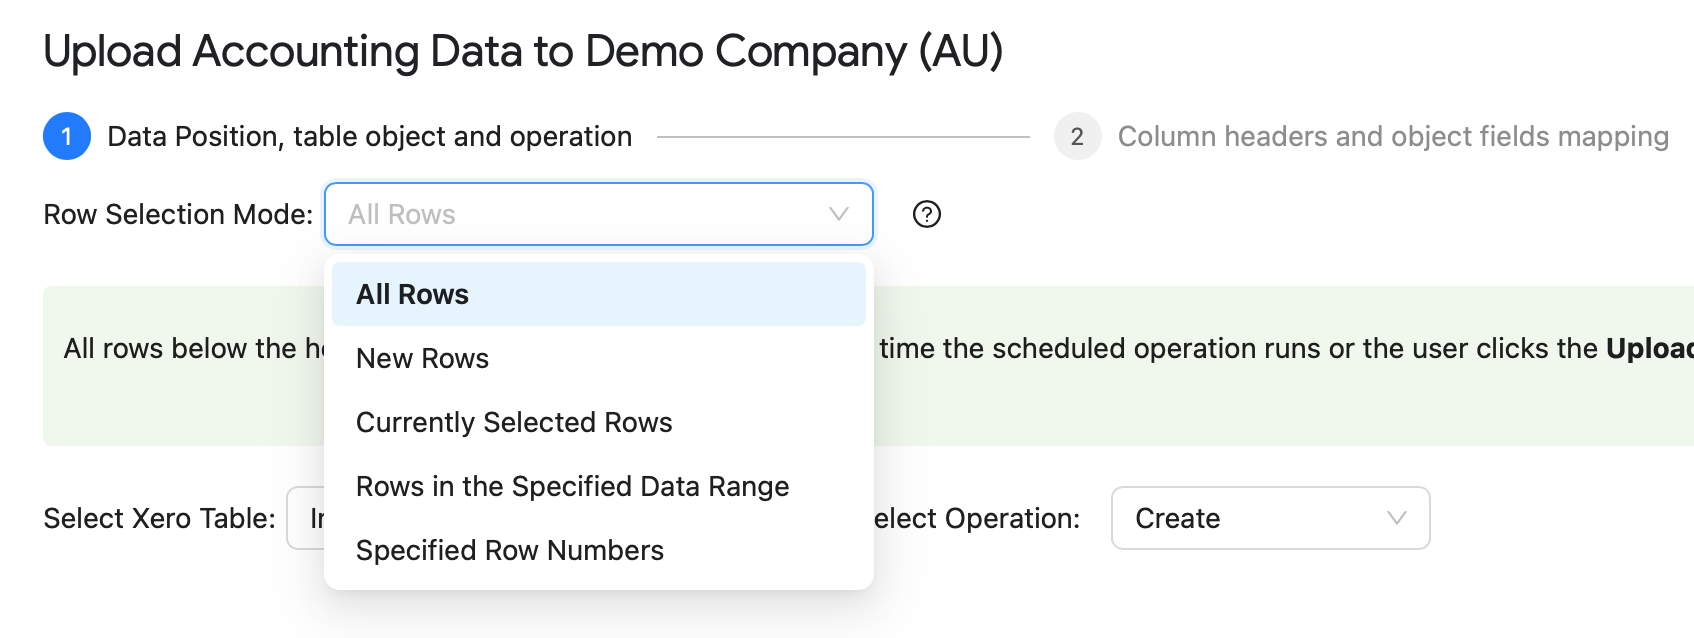
You have the following options to choose from:
"All Rows": All rows below the header row will be pushed to Xero each time the scheduled operation runs or the user clicks the Upload to Xero based on Template menu item.
"New Rows": A row is considered new if cells under Id, Success, Created, and Error are blank in that row. To mark a row for automatic data push, delete previous operation results from the Id, Success, Created, and Error columns.
"Currently Selected Rows": If this option is selected, the current template will only be used when you click the Upload to Xero Based on Template menu item. No rows will be pushed to Xero during an Automatic Push schedule run.
"Rows in the Specified Data Range": All rows from the specified range will be pushed to Xero each time the scheduled operation runs or the user clicks the Upload to Xero based on Template(s) menu item.
"Specified Rows Numbers": Only the rows, the indices of which are specified here, will be pushed to Xero each time the scheduled operation runs or when the user clicks the "Upload to Xero based on Template(s)" menu item.
"Create" allows you to create a new financial record, such as an invoice, purchase order (PO), manual journal, etc.
"Update" allows you to modify an existing financial record, such as an invoice, purchase order (PO), manual journal, etc.
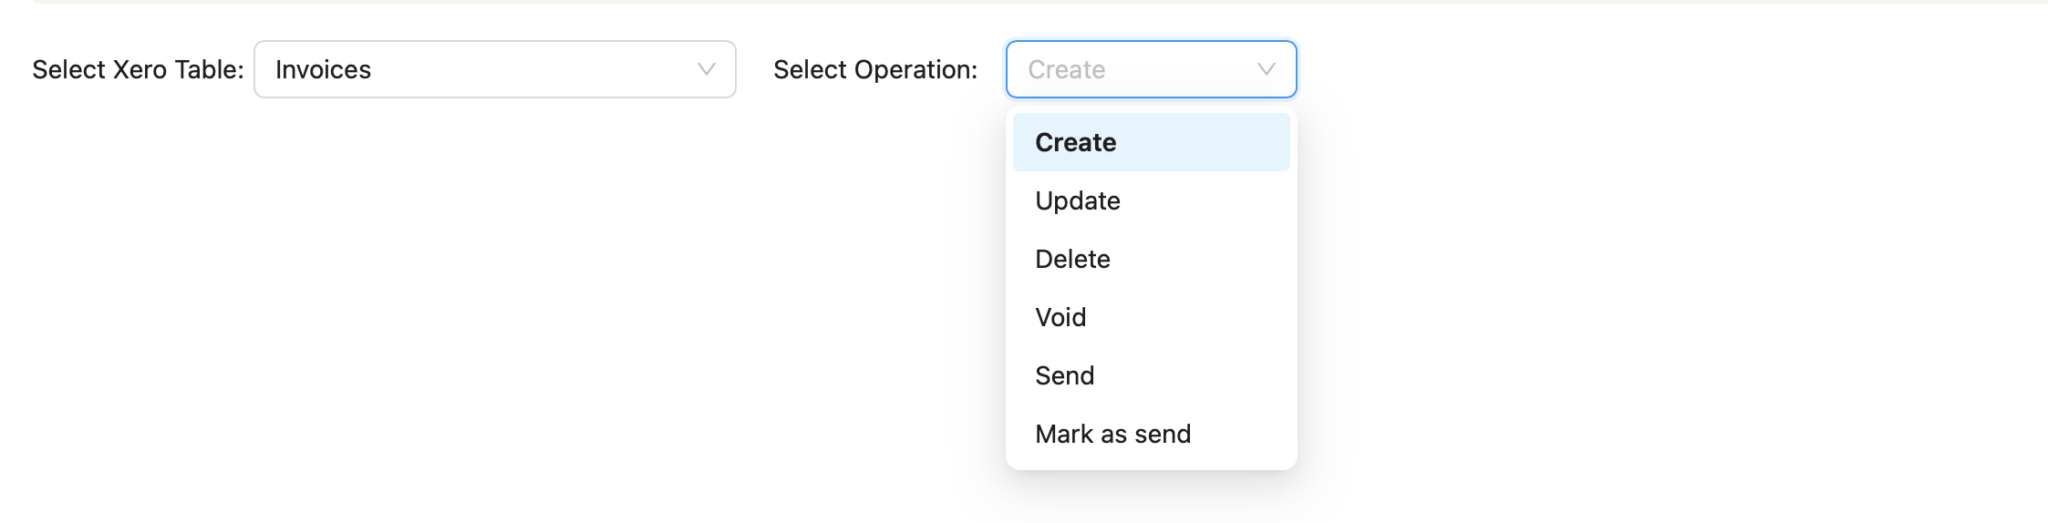
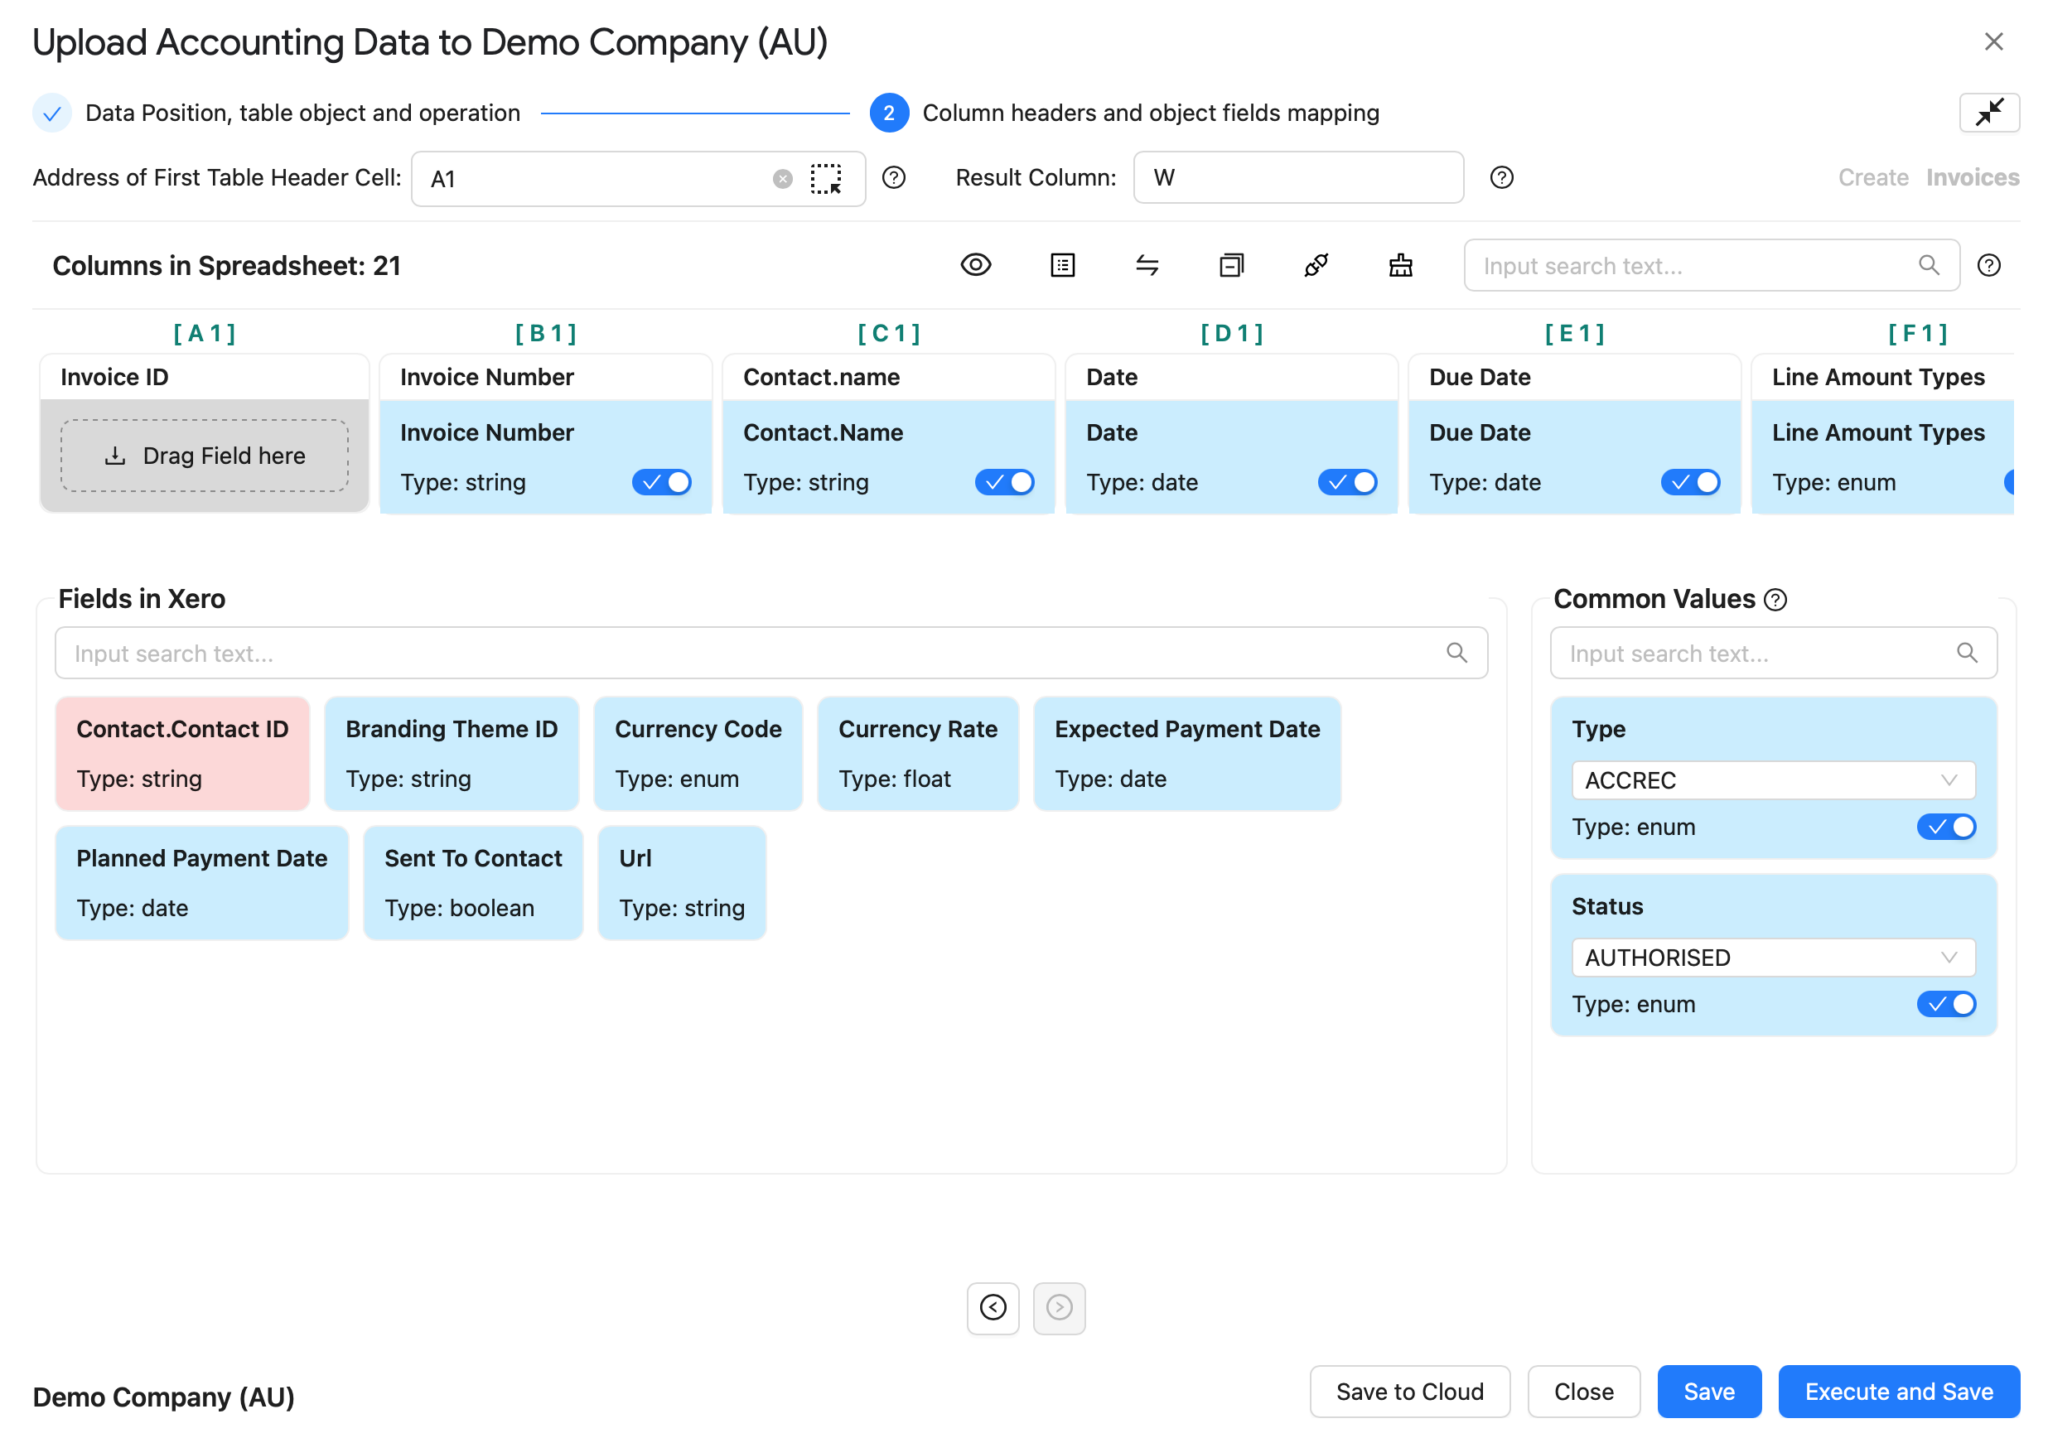
After selecting a table, selection mode, and operations, you can start the mapping process.
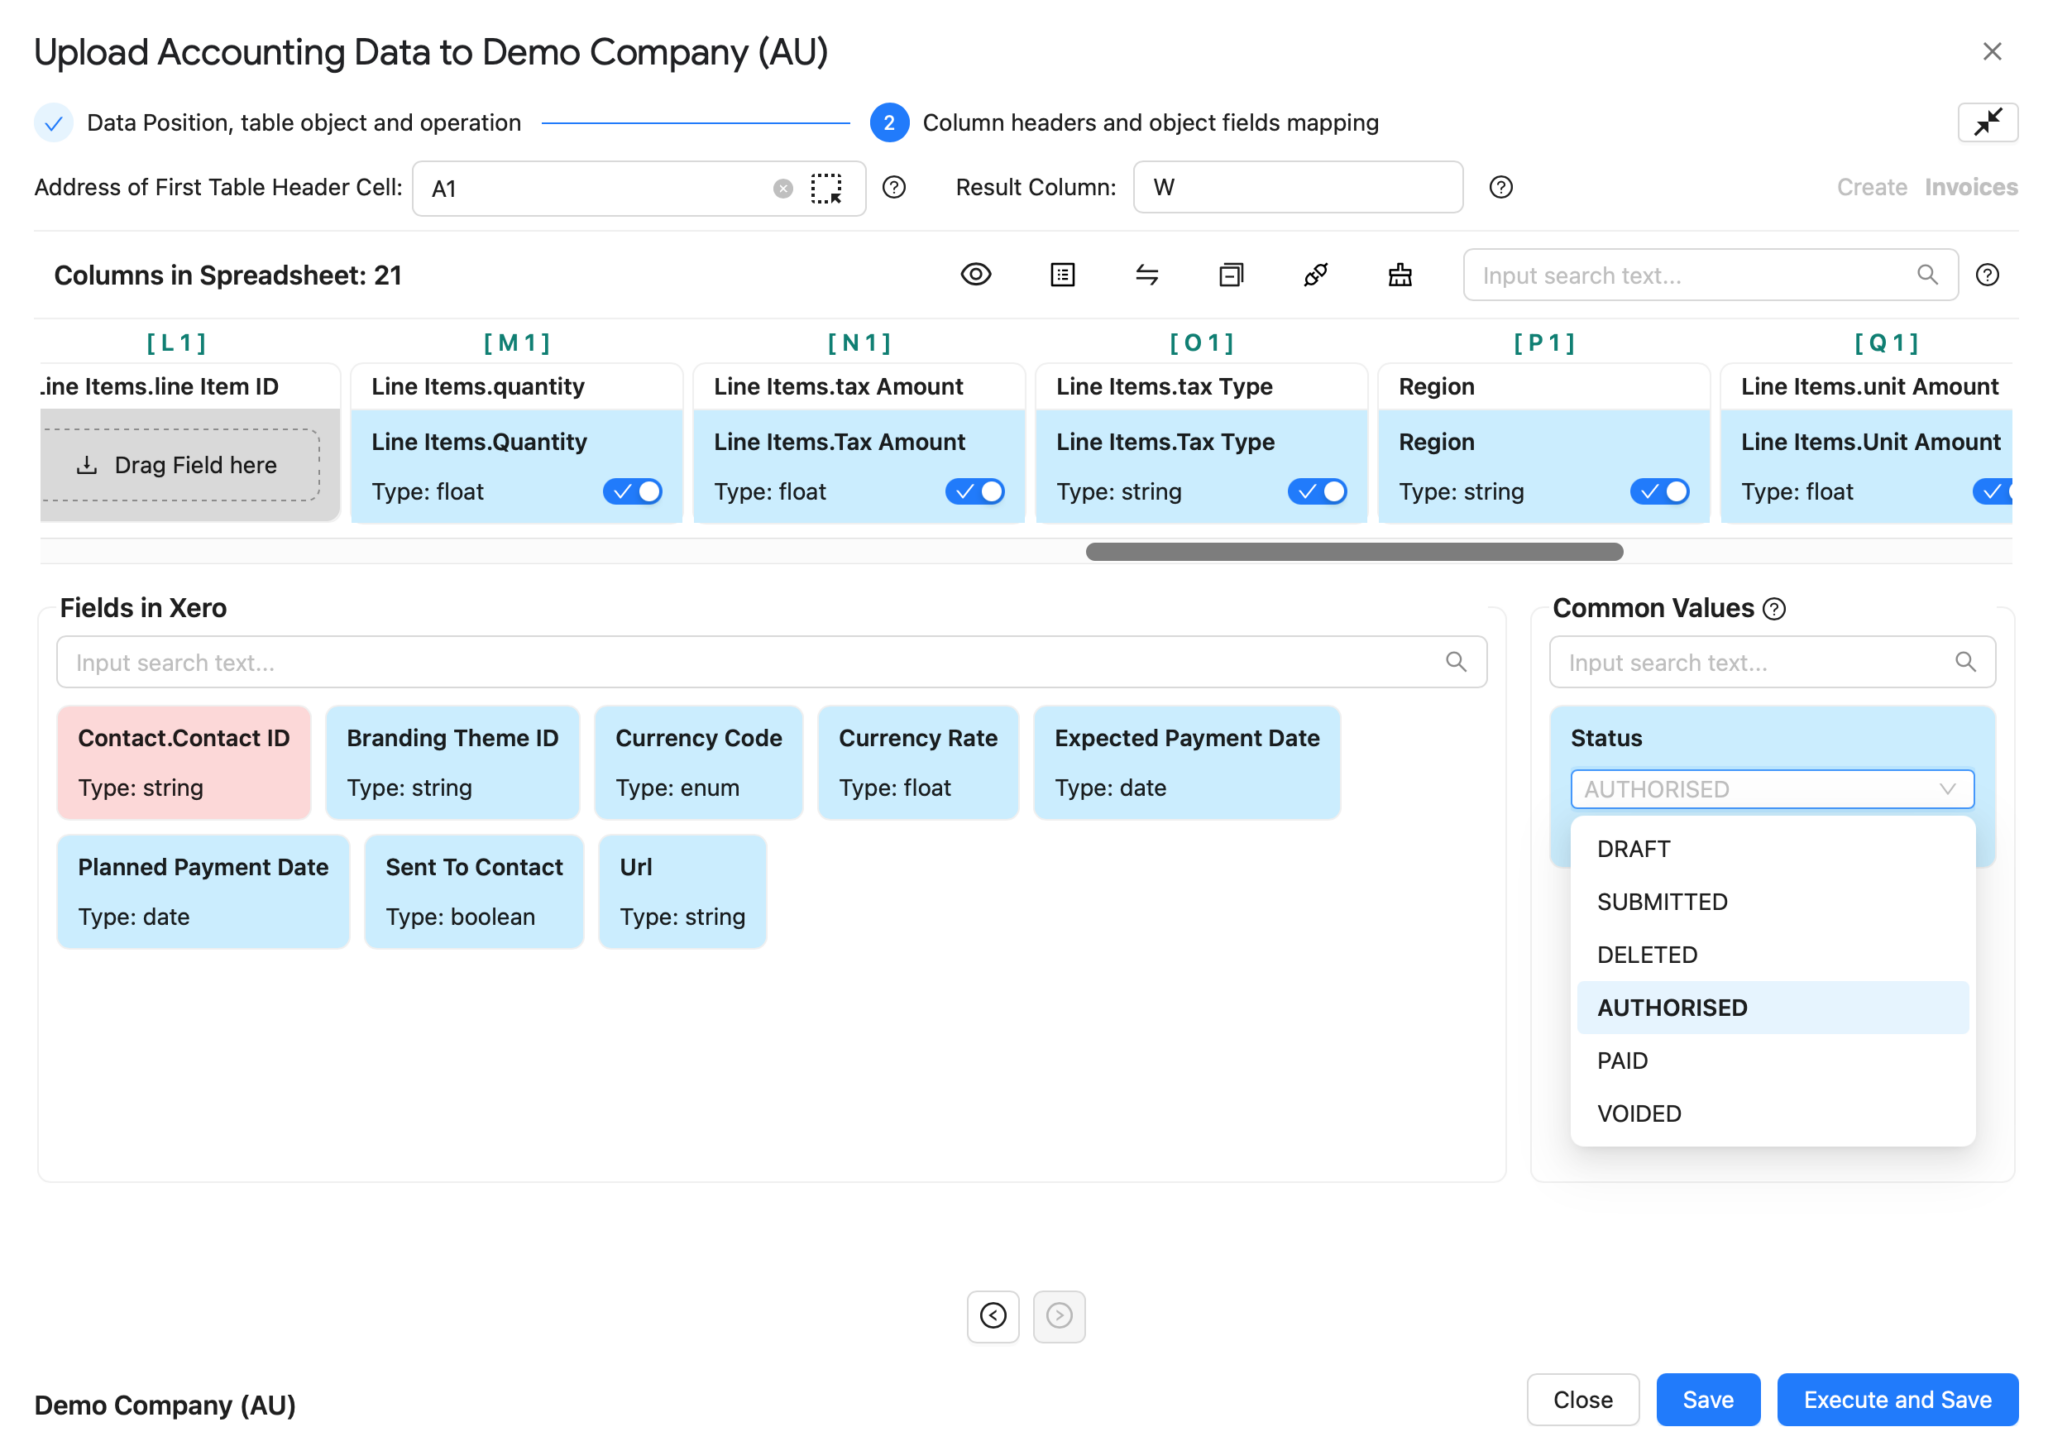
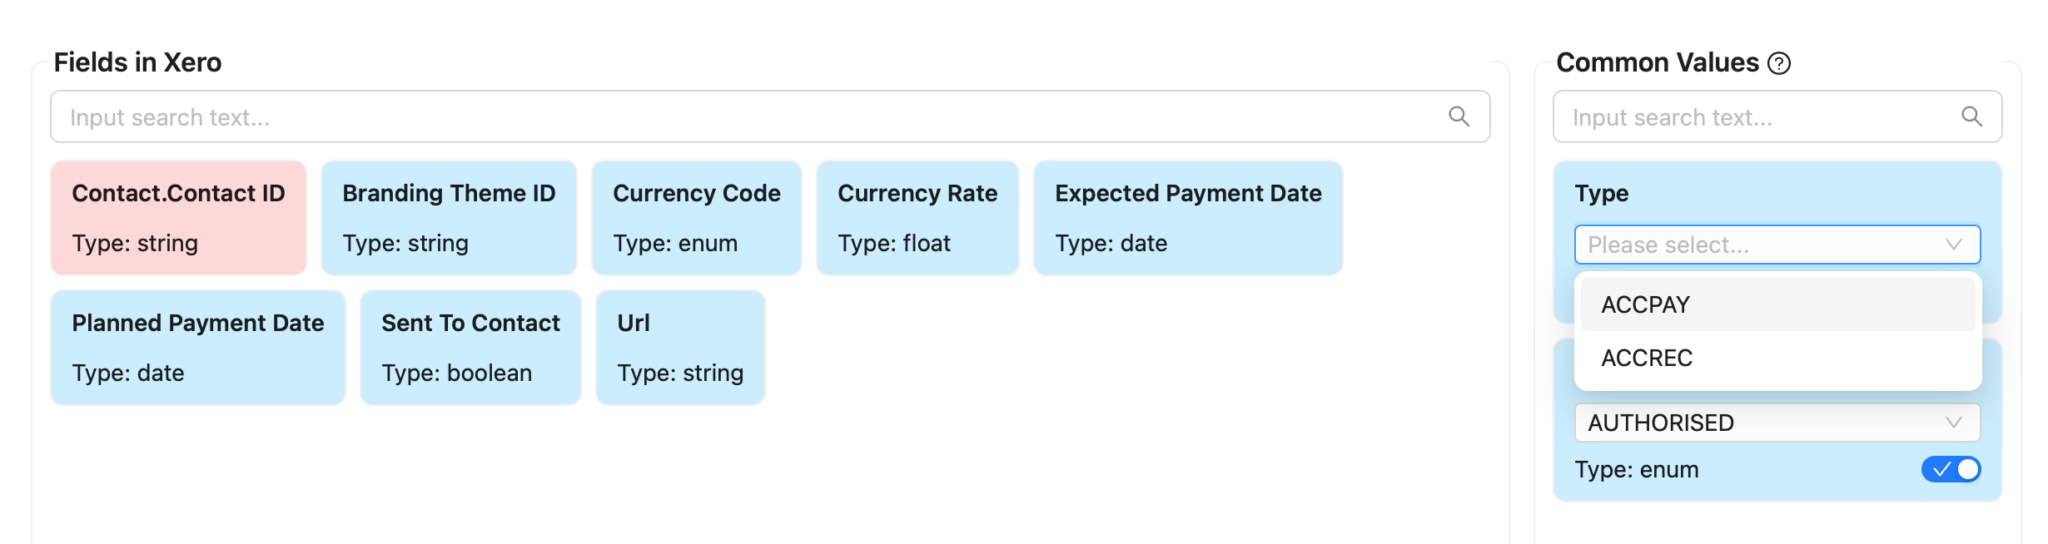
Map Fields: Match the columns in Google Sheets to the correct fields in Xero, ensuring data like customer names, invoice numbers, and amounts go to the right places.
Additional UPLOAD features:
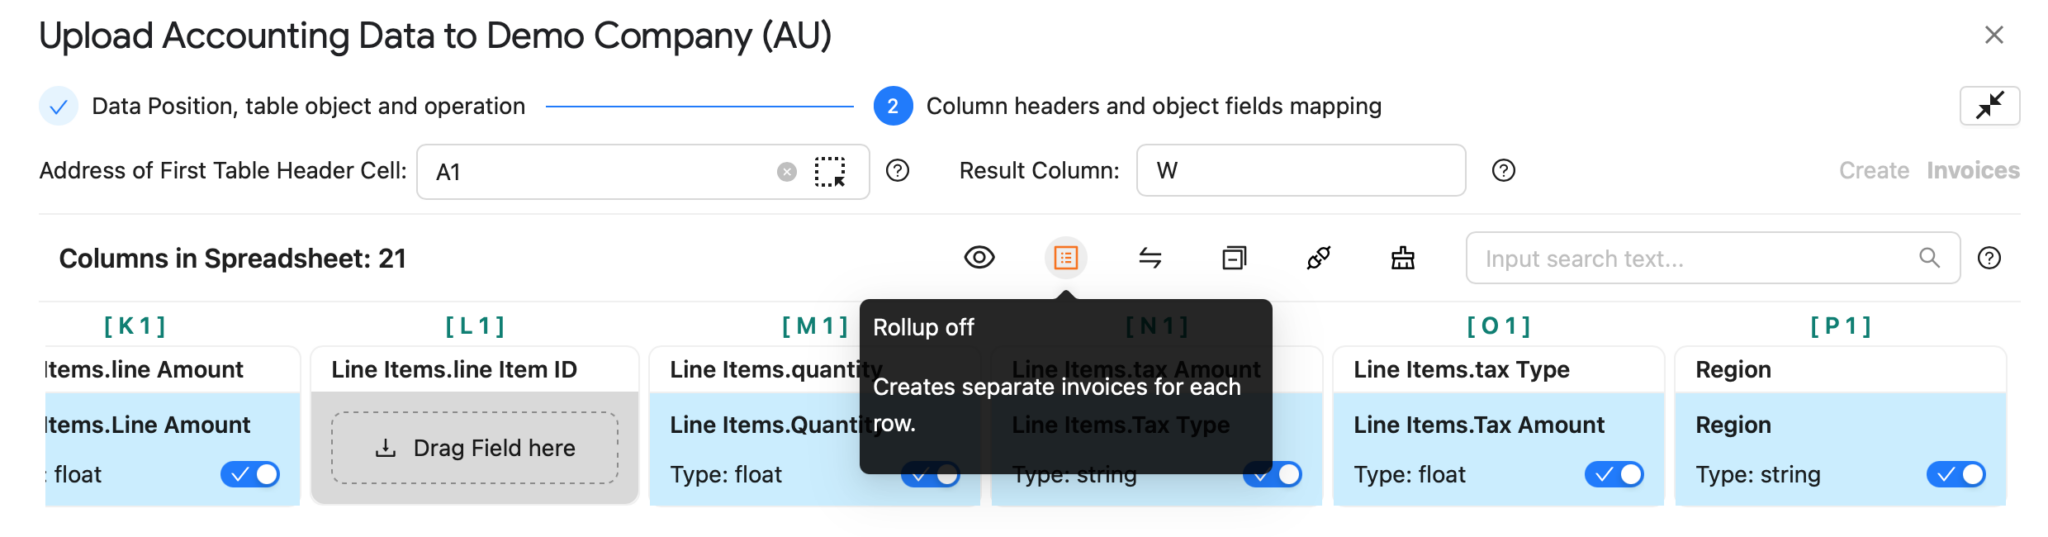
2. "Rollup On": Combines multiple line items under one single invoice in case the main attributes (Date, Status, etc) are the same
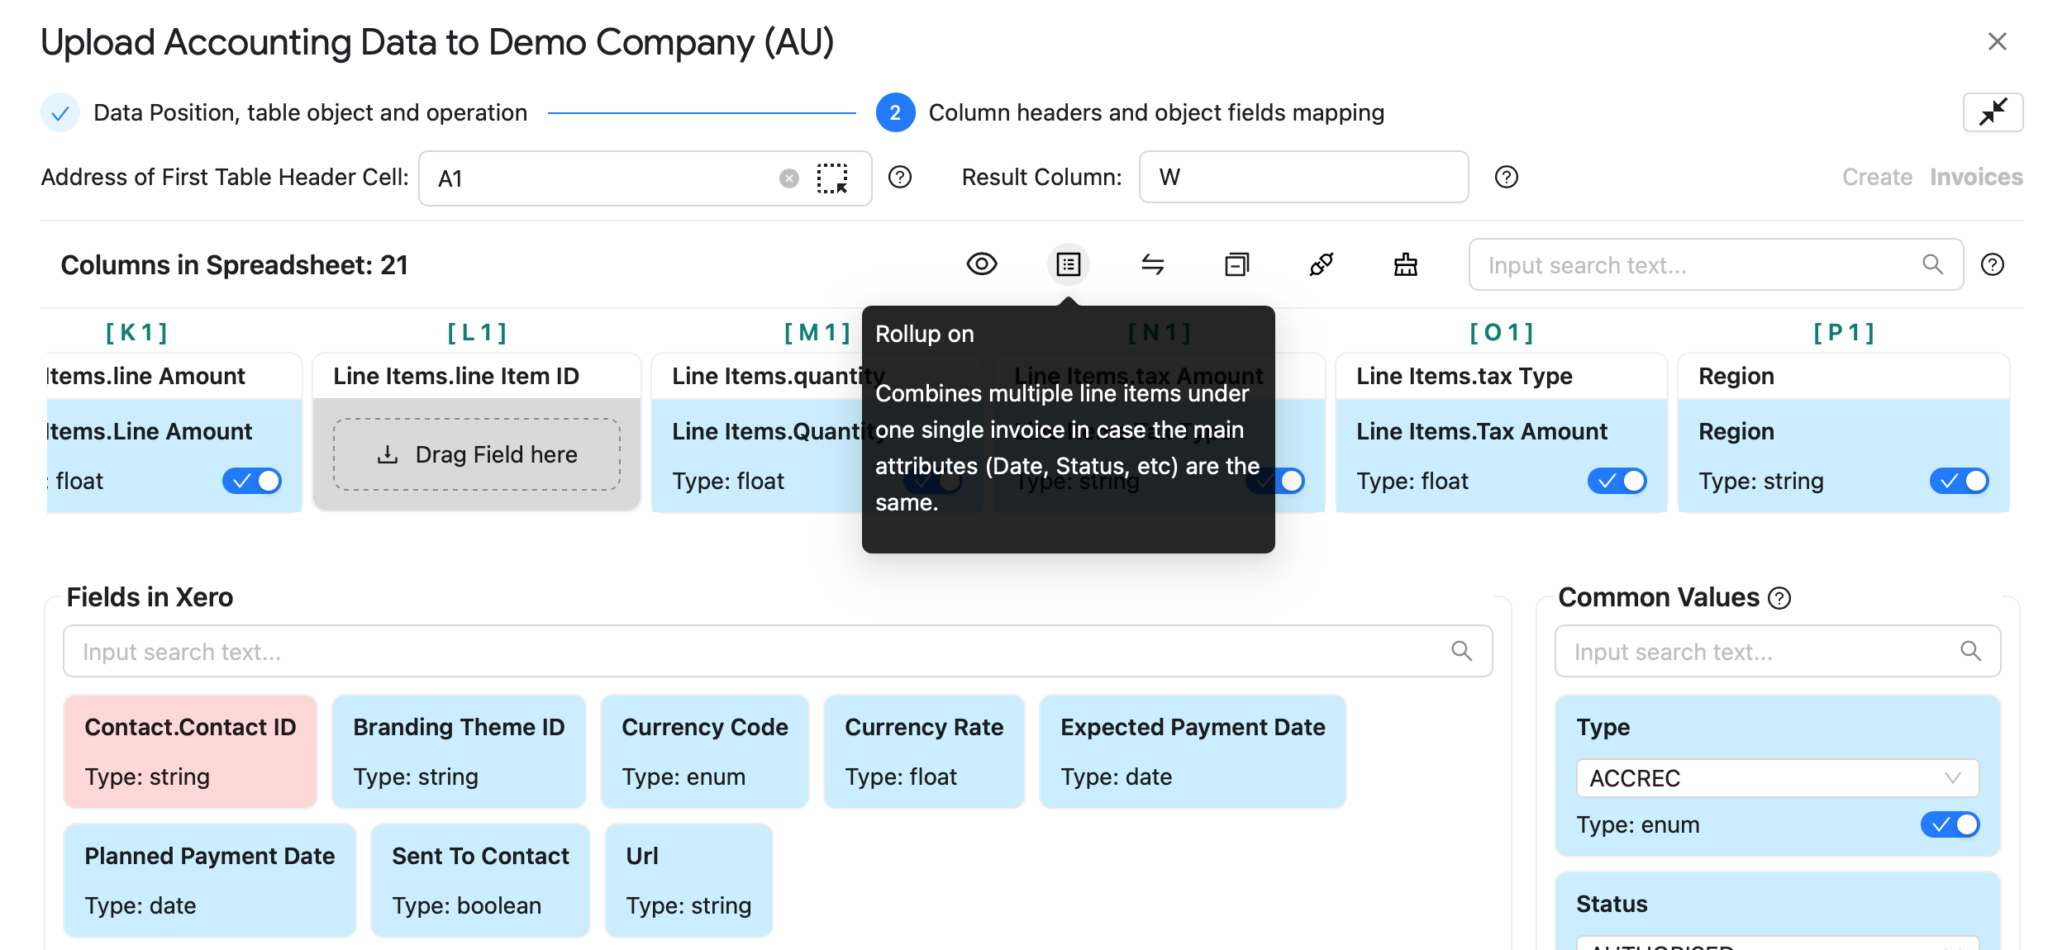
3. "Rollup Off": Creates separate invoices for each row.
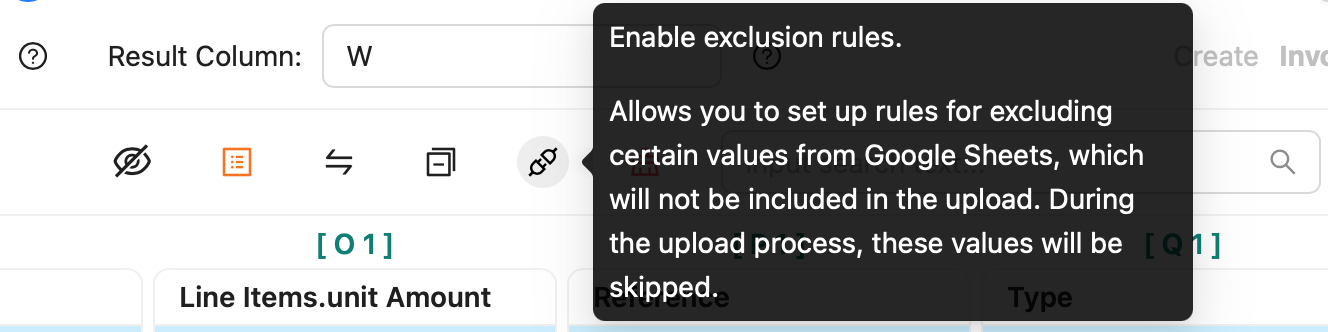
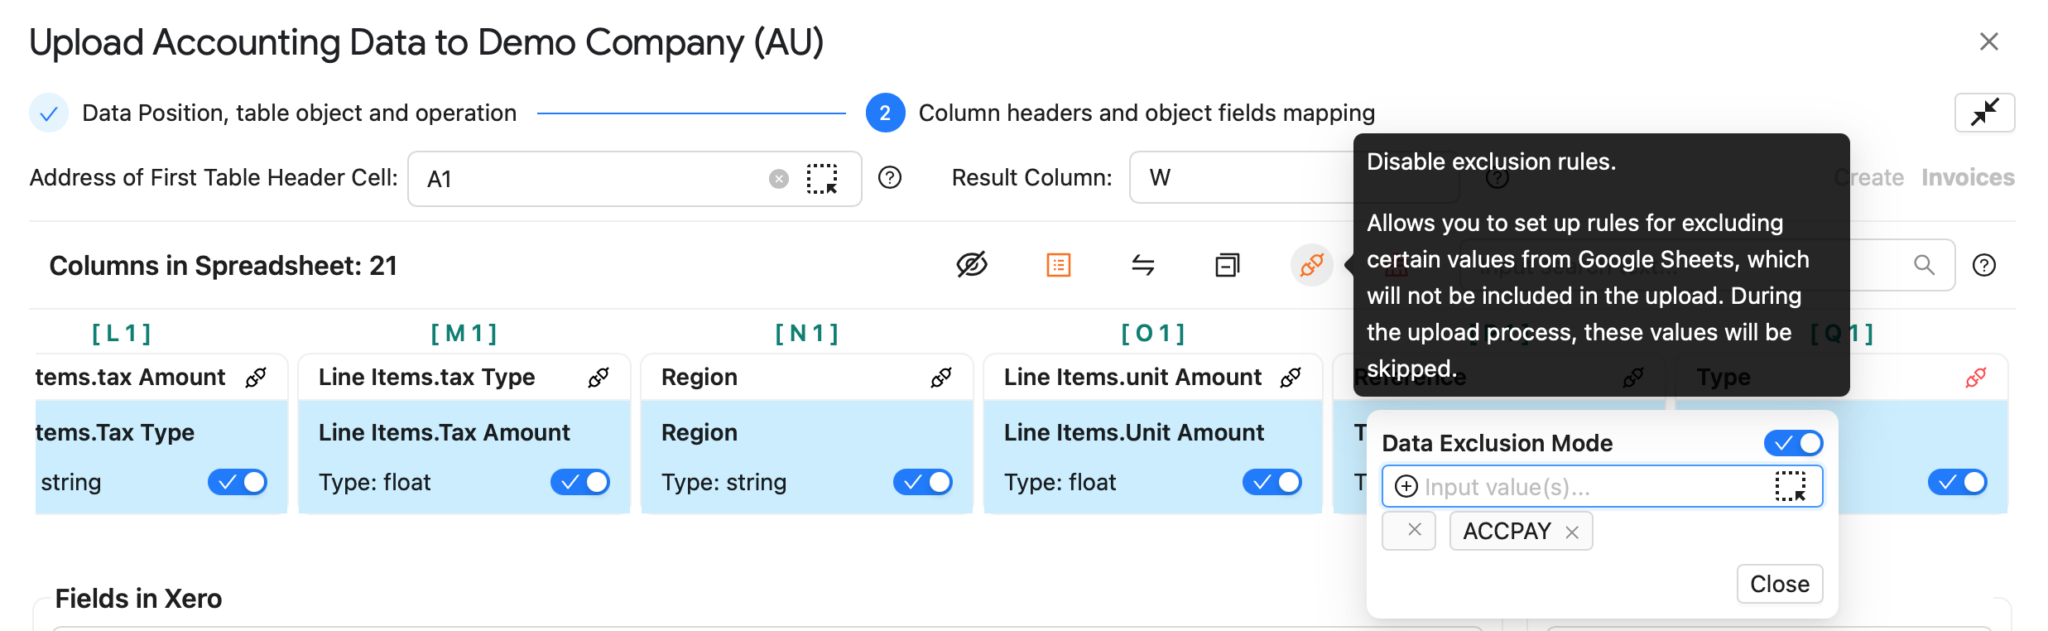
3. Enable Exclusion rules: Allows to set up rules for excluding certain values from Google Sheets, which will not be included in the upload. During the upload process, these values will be skipped.
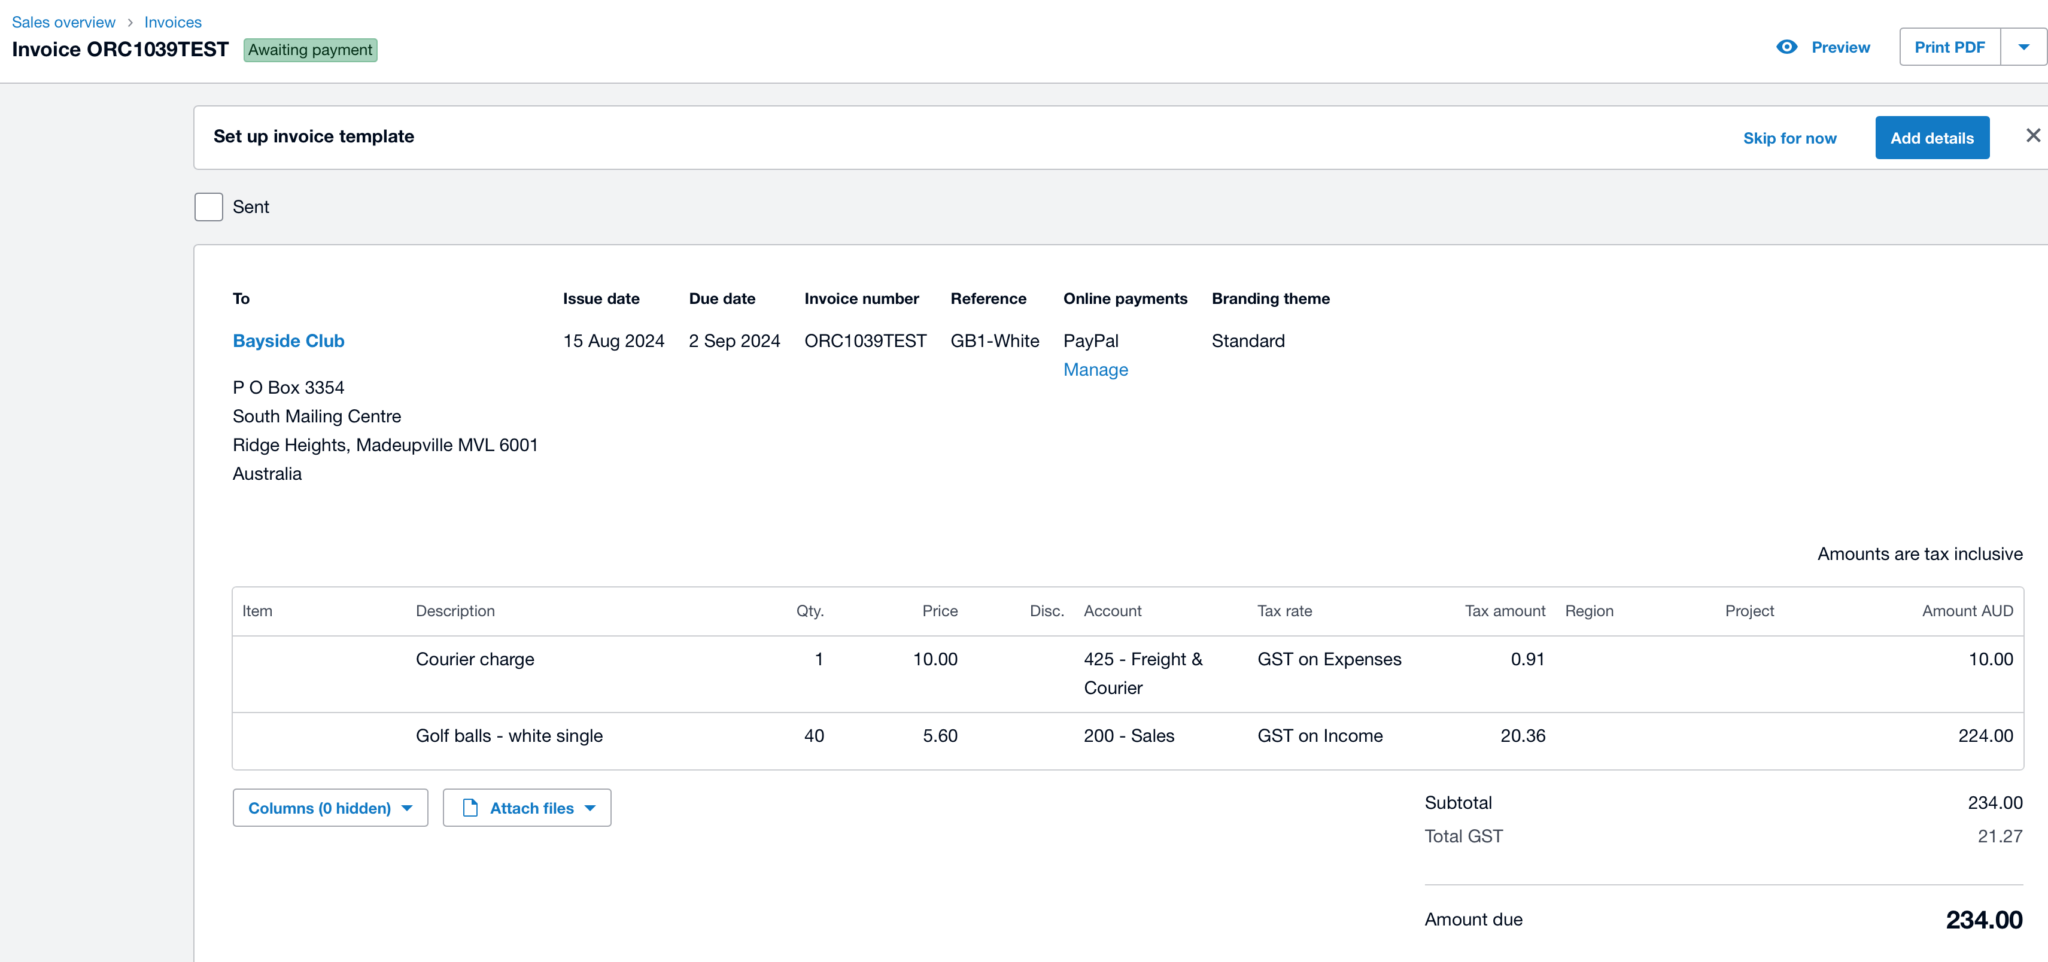
Once the mapping is complete and common values and rules are set up, click the "Execute and Save" button to create a new invoice in Xero.

You can also verify the newly created invoice in Xero by clicking on the URL:
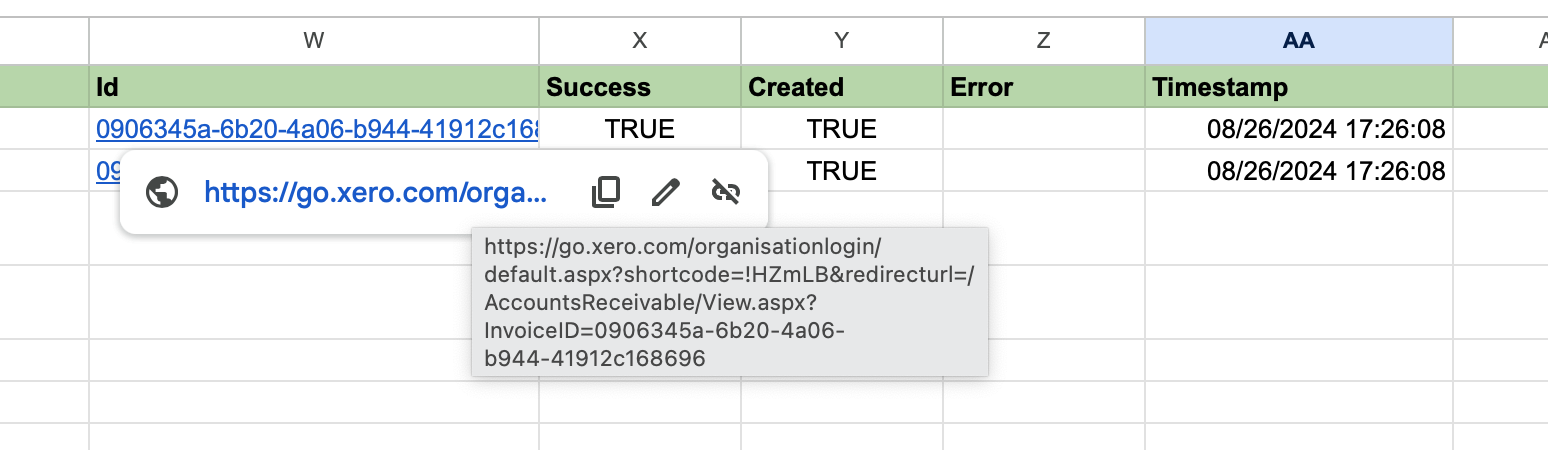
This is a new invoice created in Google Sheets and pushed to Xero:
There are mulitple benefits of using G-Accon to upload data from Google sheets to Xero
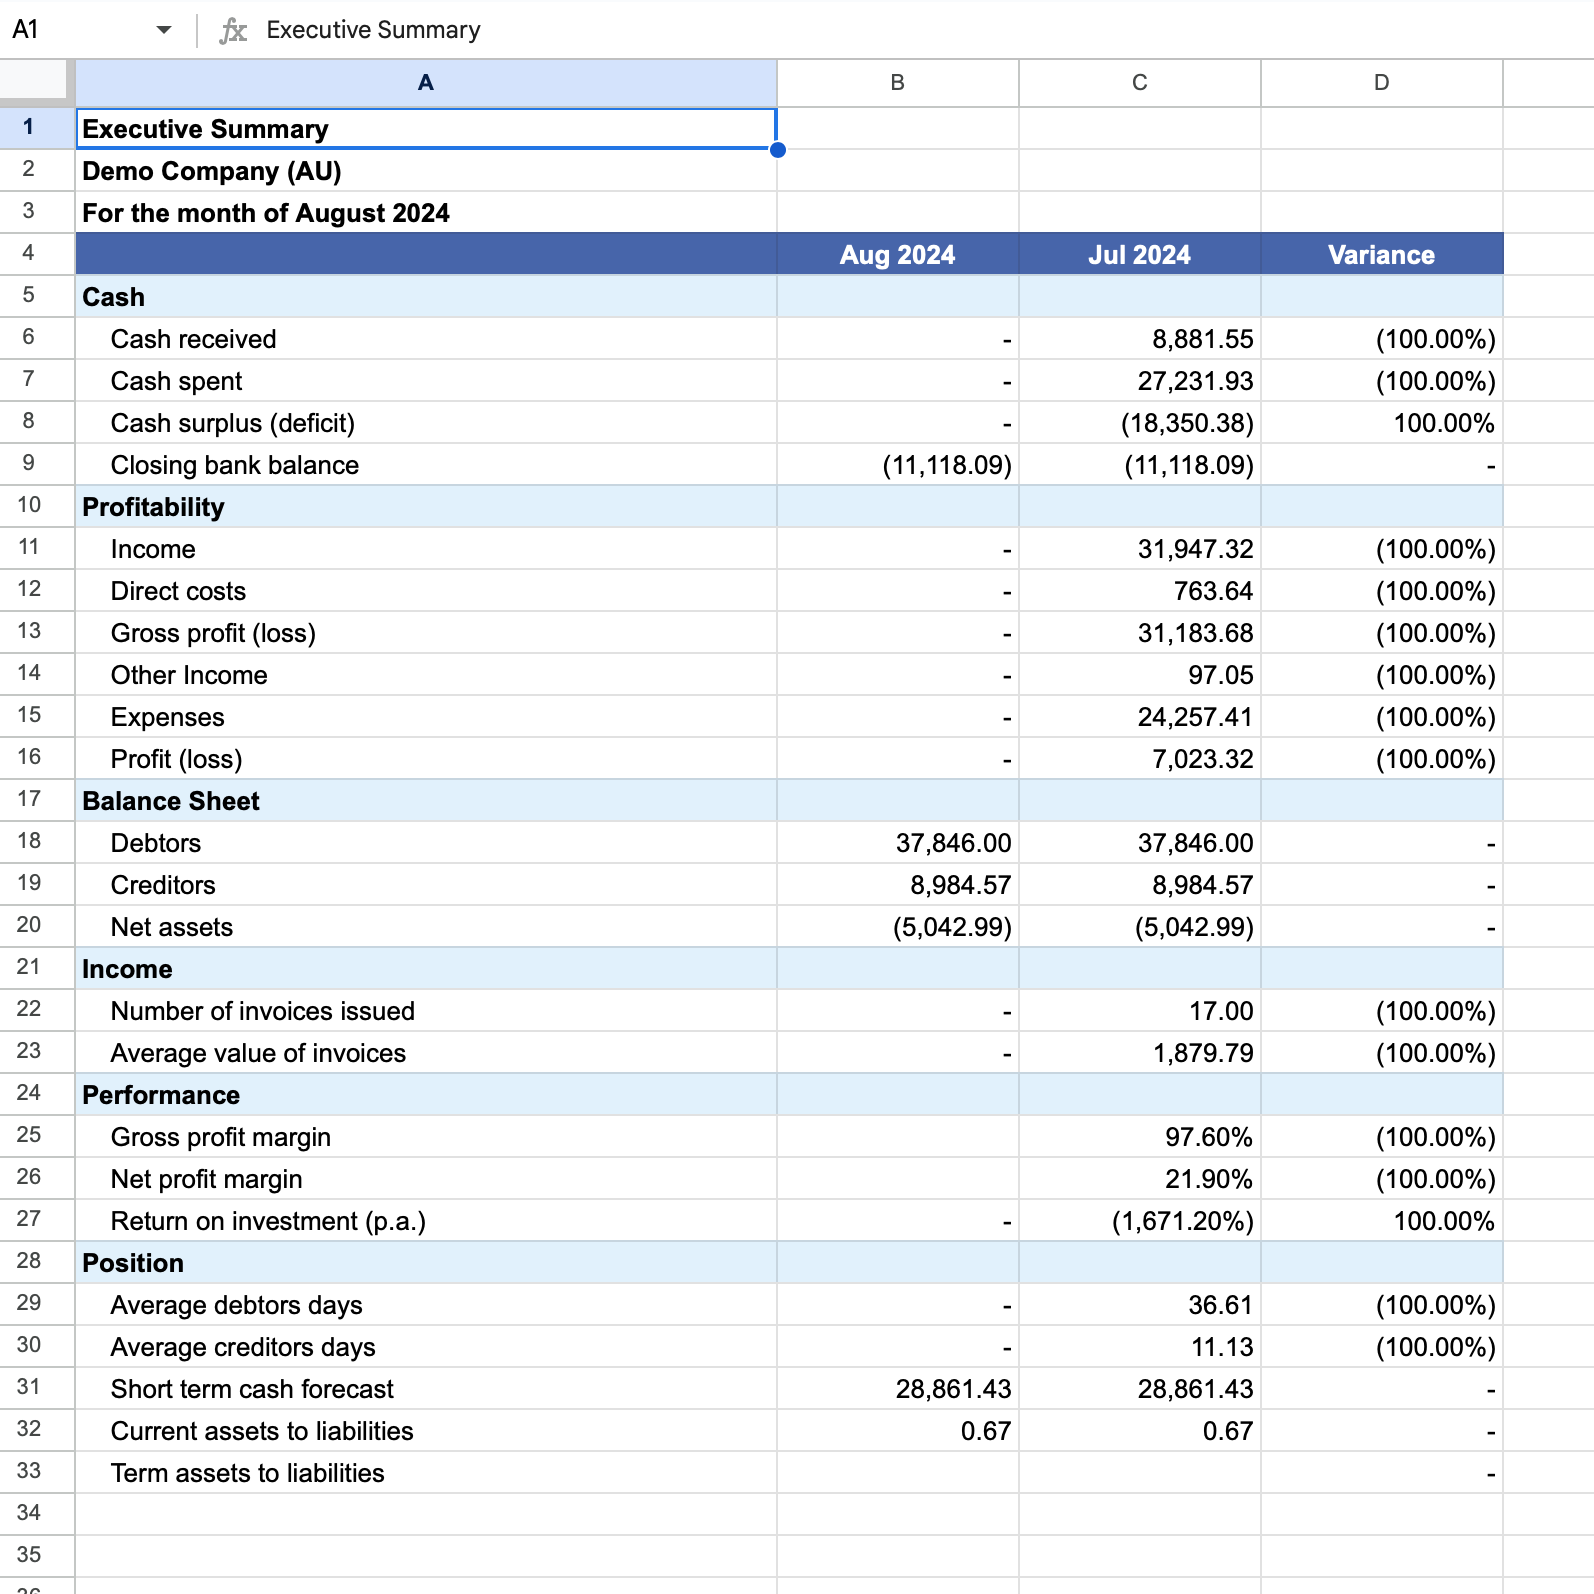
New Formatted Report: Executive Summary