Your Complete Guide to G-Accon

G-Accon Help Center

Explore step-by-step guides, troubleshooting tips, and best practices to make the most of G-Accon. Whether you're setting up integrations, automating reports, or optimizing workflows, our help center has everything you need to succeed.
Wiki Menu

Xero Accounts

Export your Xero chart of accounts into Google Sheets: codes, names, types, bank details, status and descriptions. Choose the fields, filter and sort them, and refresh the list whenever you need.
AppG-Accon for Xero
TableAccounts
RefreshManual or scheduled
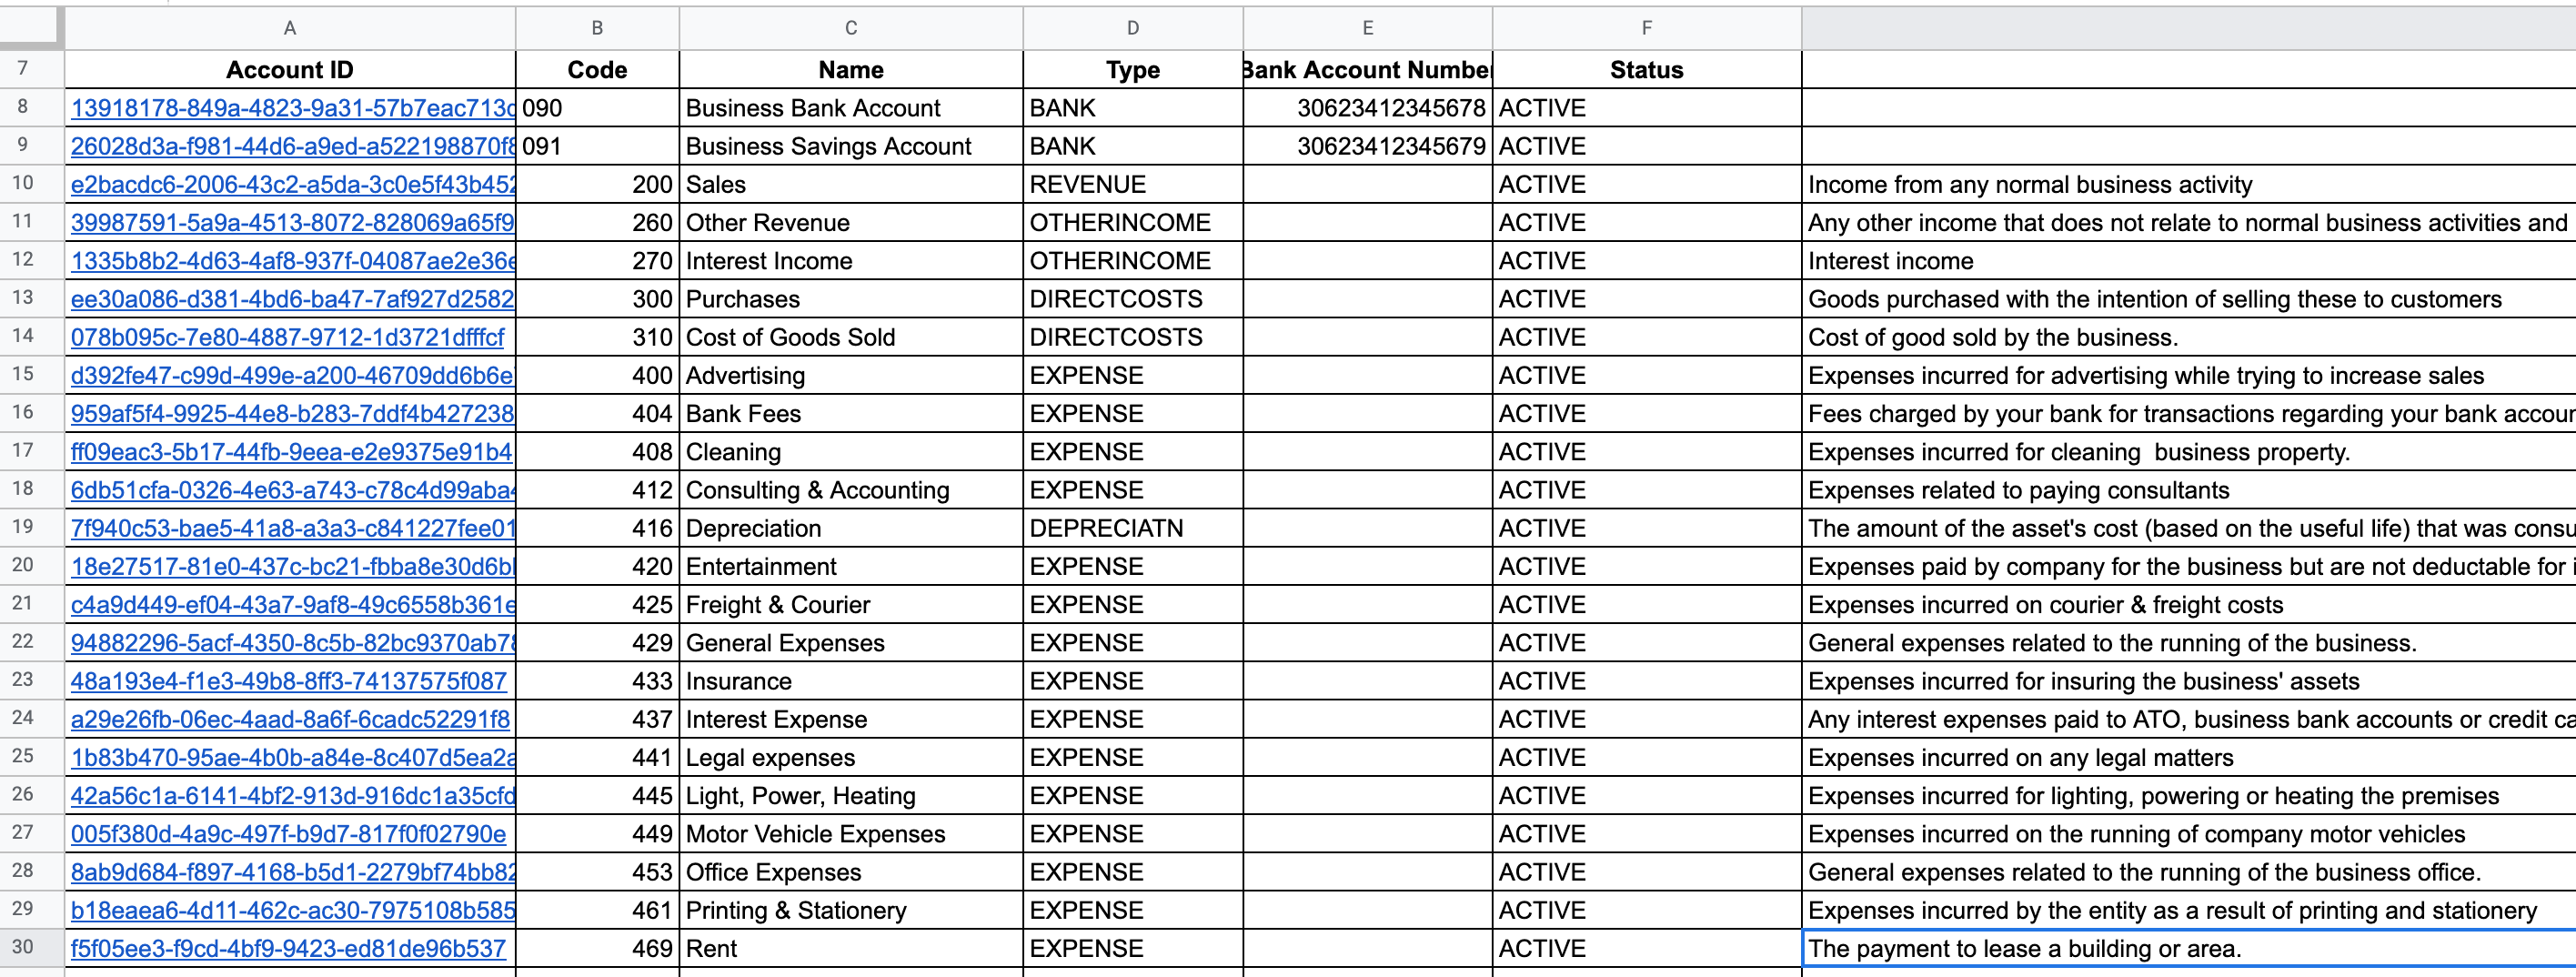
Xero chart of accounts exported into Google Sheets with account ID, code, name, type and status
Your chart of accounts in Google Sheets.
1
Open

Select the Accounts table

  • In Google Sheets, go to Extensions›G-Accon for Xero›Get Accounting Data/Reports›Get Data›Get Accounting Data
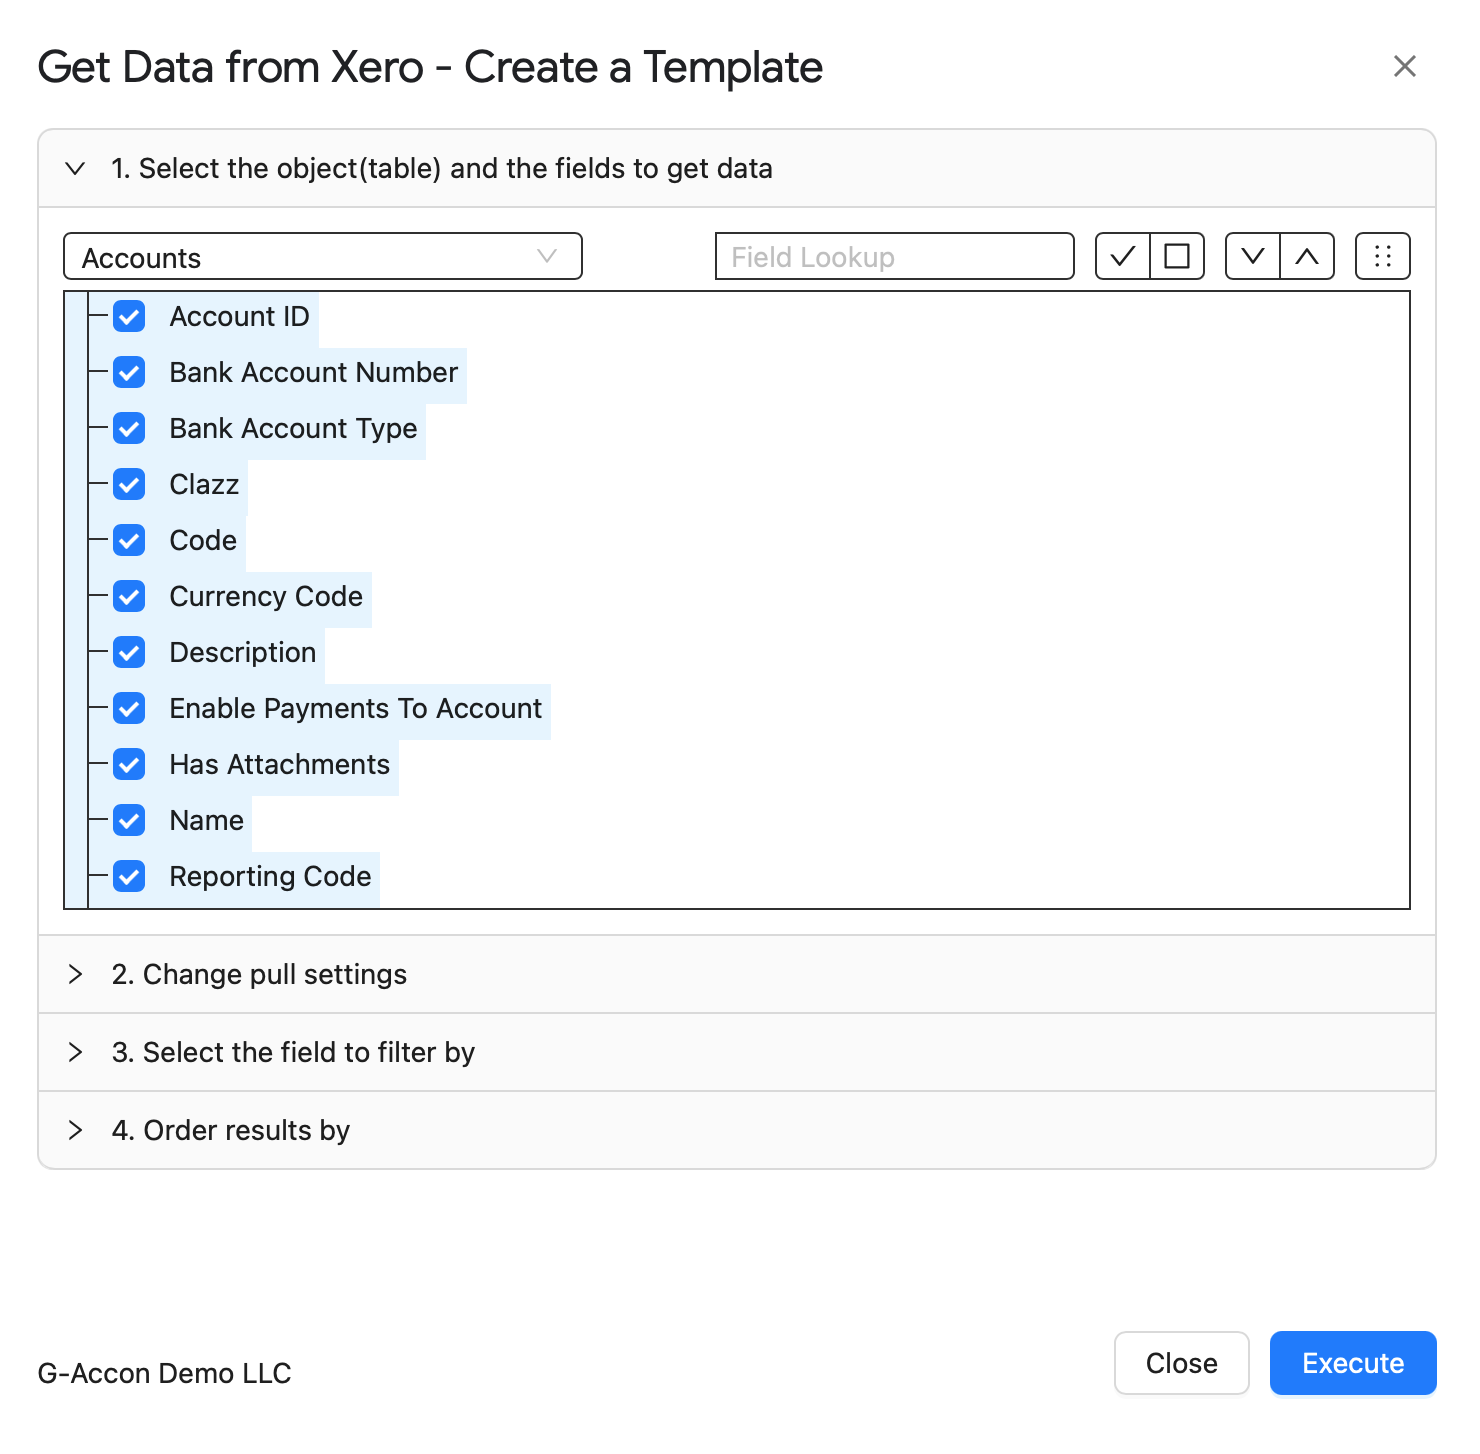
  • In 1. Select the object(table) and the fields to get data, choose Accounts.
  • The fields include Account ID, Code, Name, Bank Account Number, Bank Account Type, Currency Code, Description and Reporting Code.
Get Data from Xero window with the Accounts table and its fields selected
The Accounts table and its fields.
2
Fields

Choose and arrange the fields

Tick the fields you want as columns, or use Field Lookup to find one by name. The buttons beside it help with long field lists:
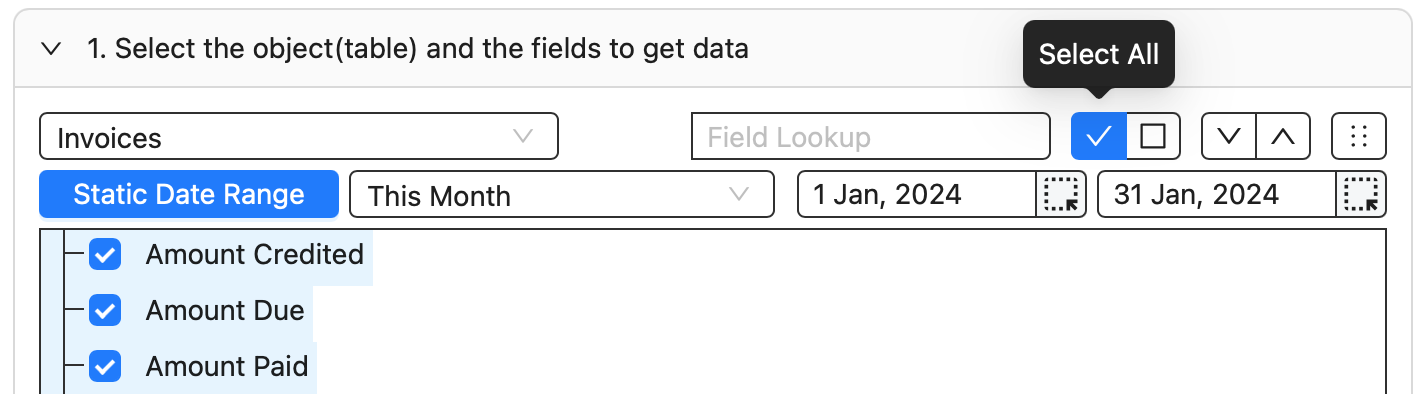
Select AllTick every field.
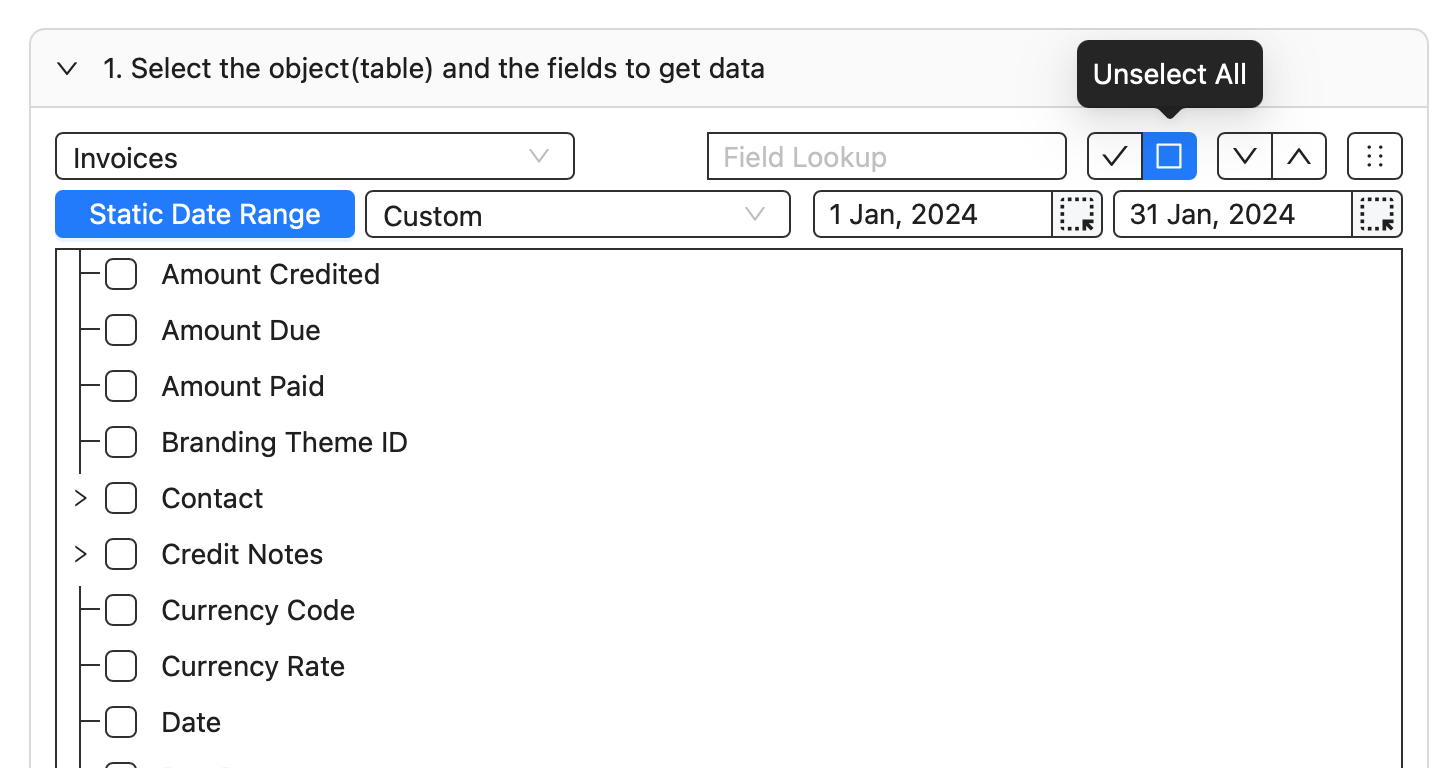
Unselect AllClear every field.
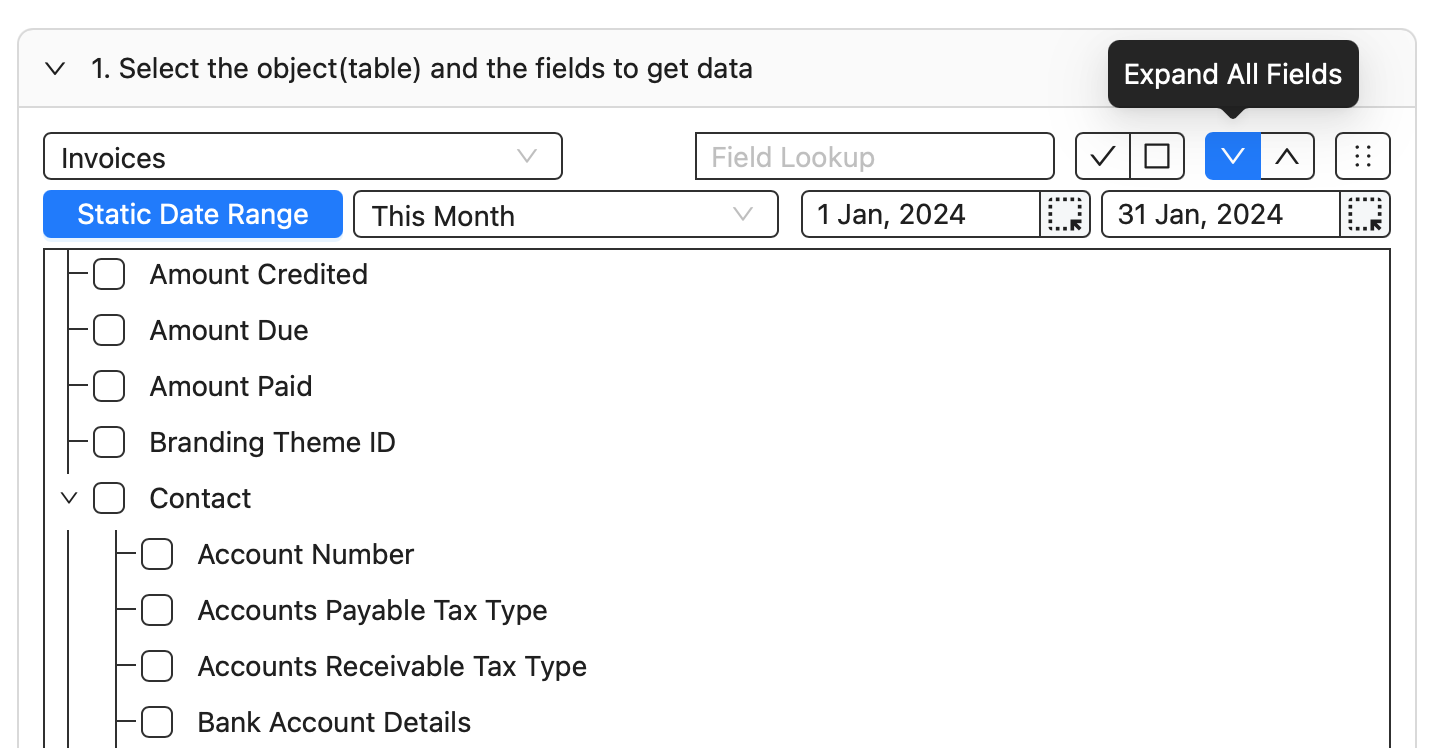
Expand All FieldsShow nested sub-fields.
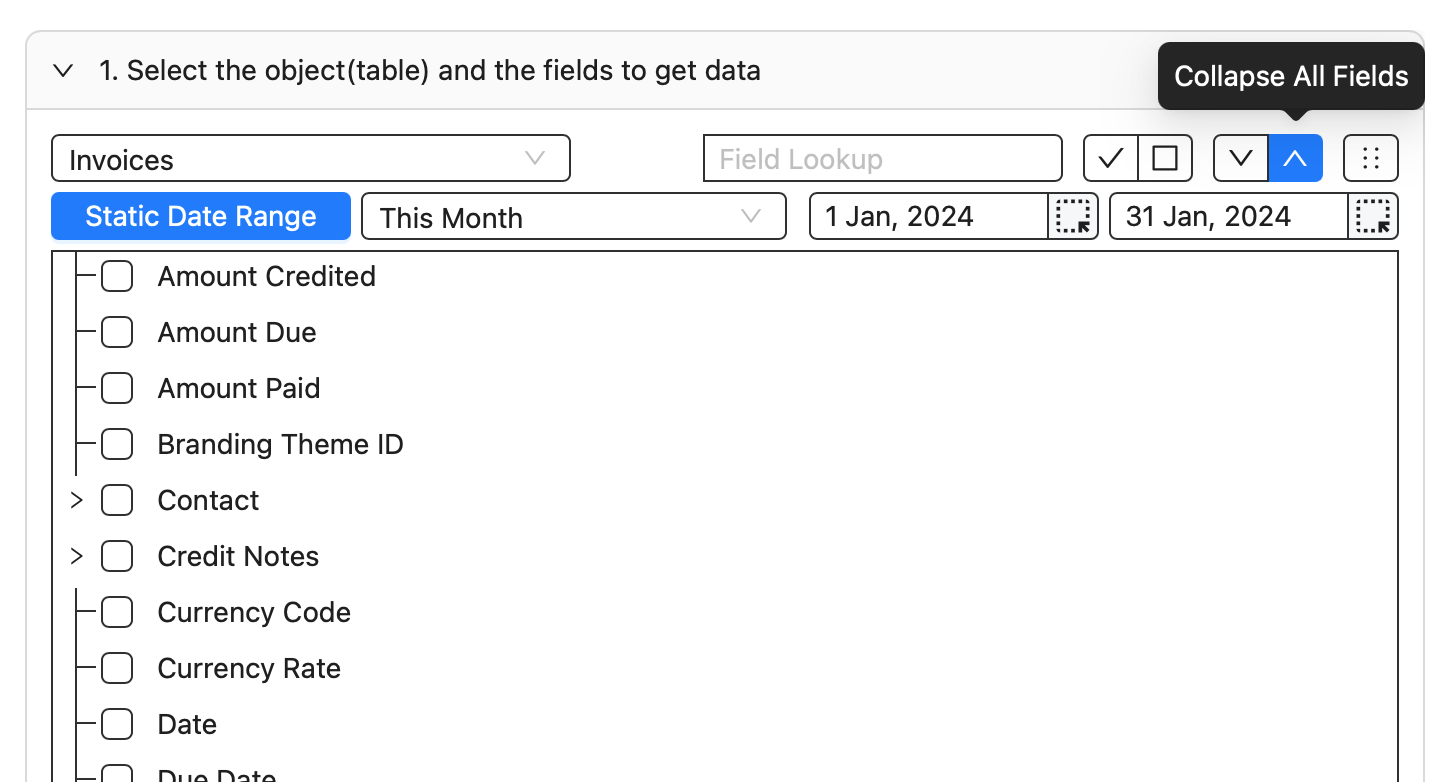
Collapse All FieldsHide sub-fields again.
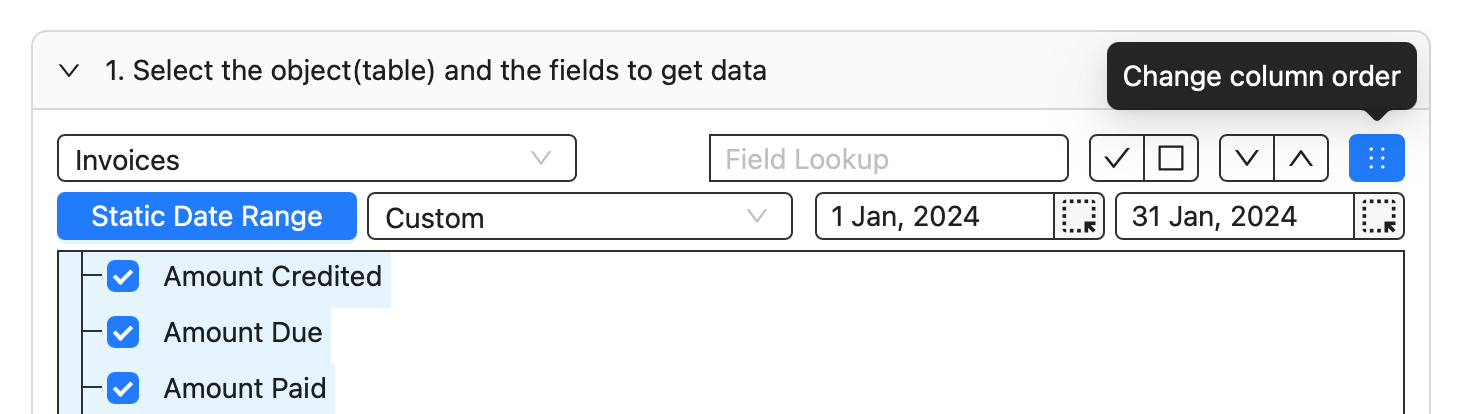
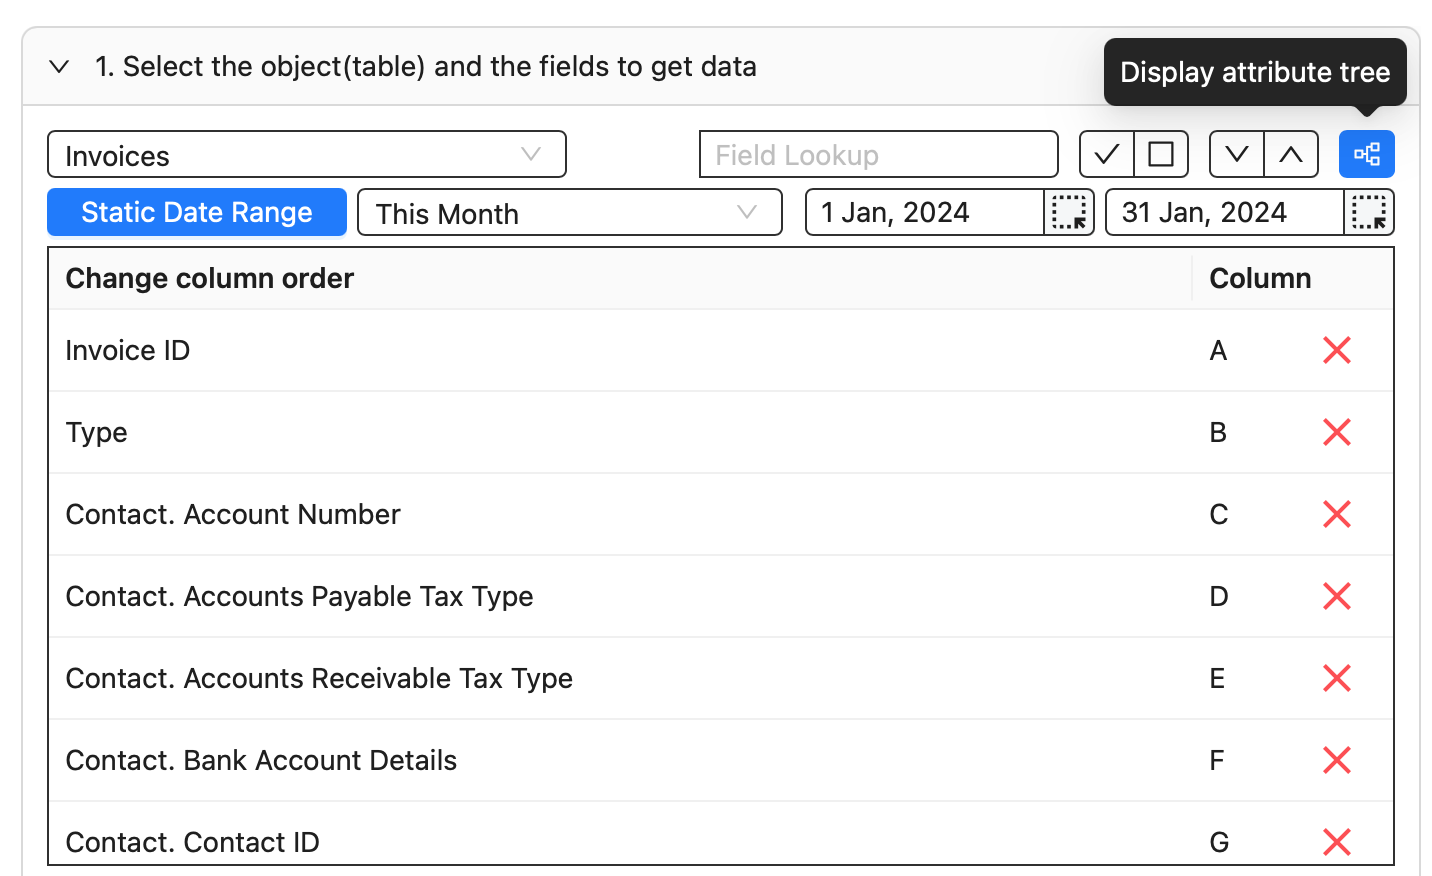
Change column orderSet the order of columns. It stays the same on every refresh.
Show examples
Select All button highlighted above the field list
Select All.
Fields after using Unselect All
Unselect All.
Expand All Fields showing nested sub-fields
Expand All Fields.
Collapse All Fields hiding the sub-fields
Collapse All Fields.
Change column order button highlighted
The Change column order button.
Column order list with each field and its column letter
Each field and its column. Click Display attribute tree to go back.

For tables with dates

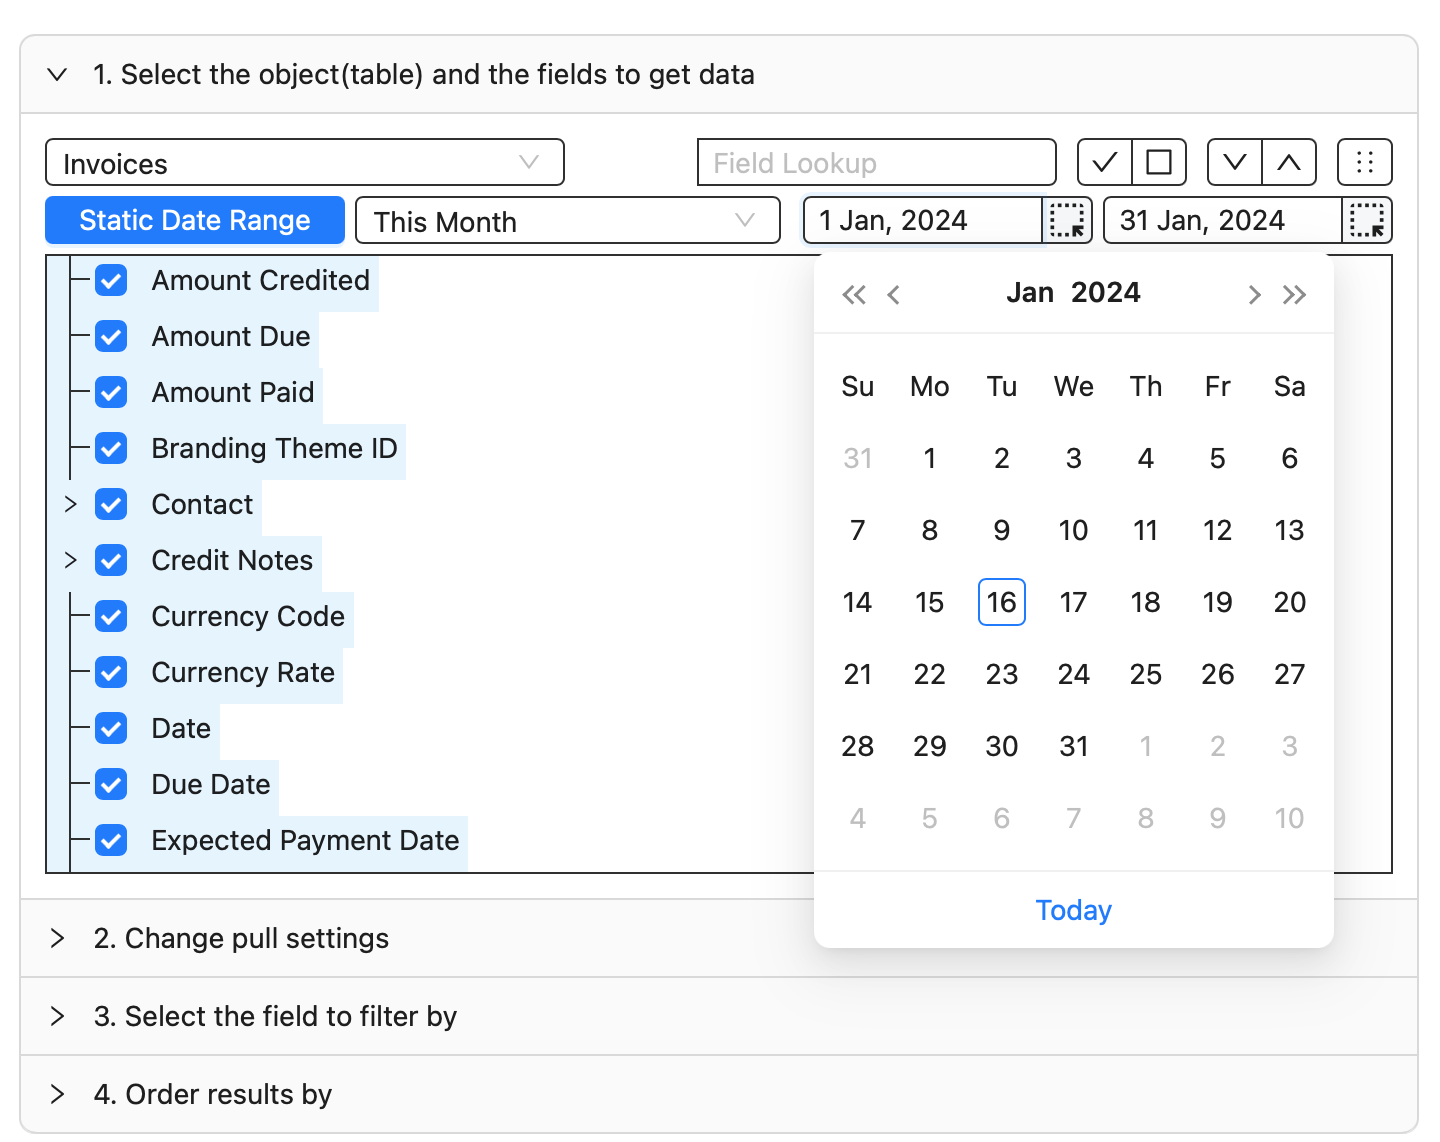
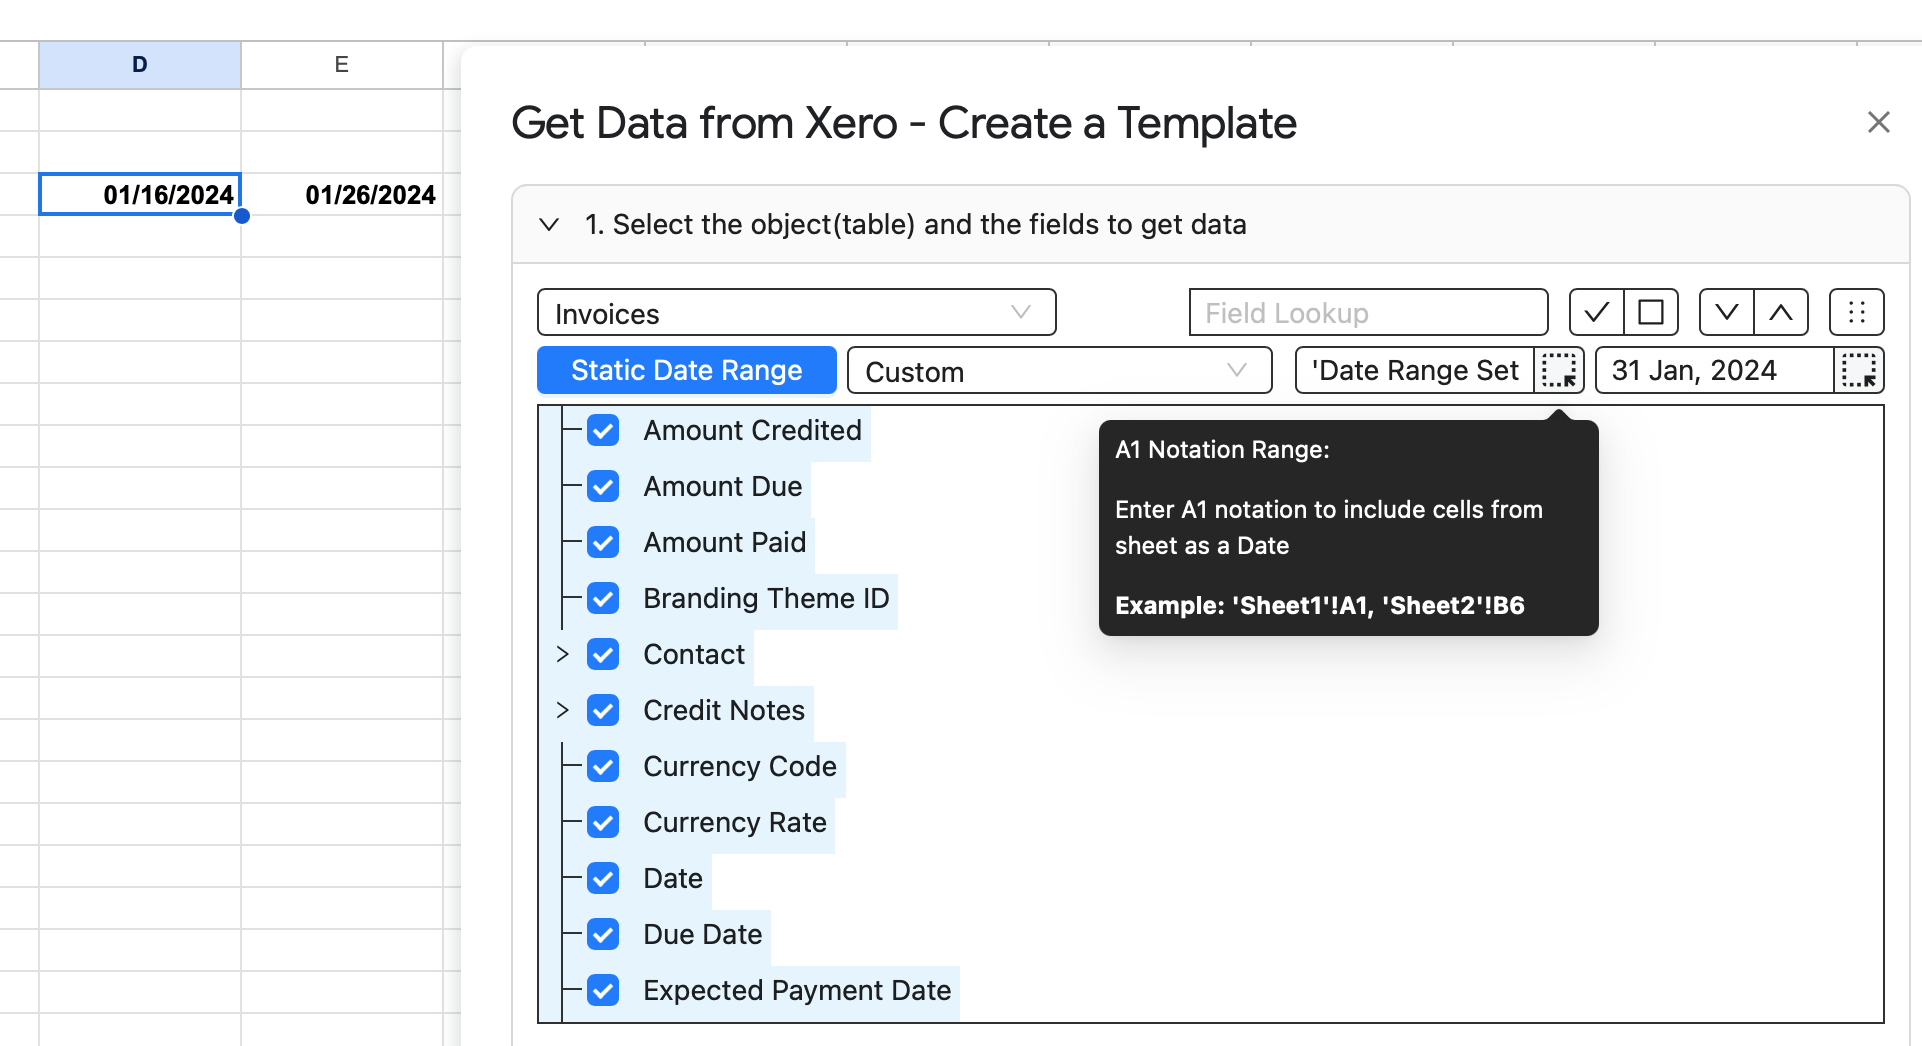
Tables such as Invoices also have a date range. Pick the type that fits your report:
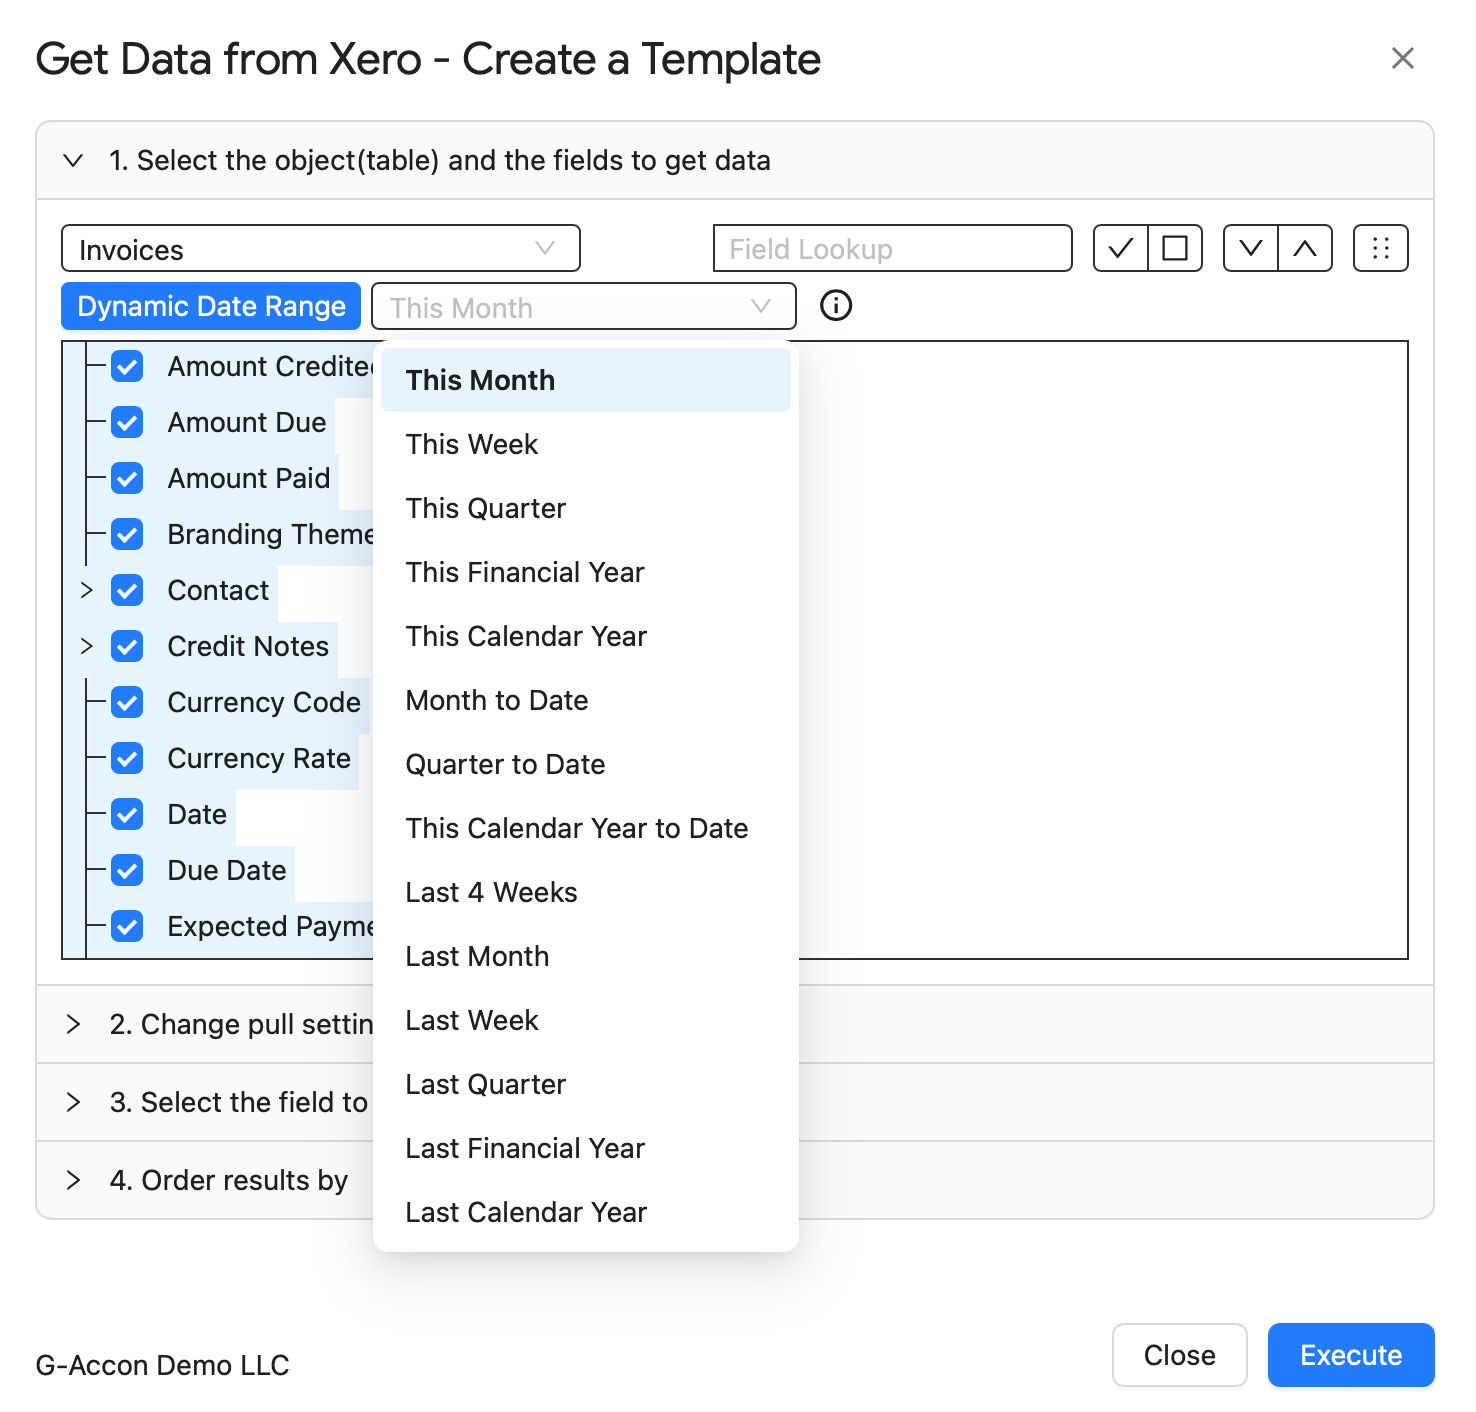
DynamicRelative periods such as This Month, This Quarter, This Year or Last Month.
StaticA fixed start and end date.
CustomDates taken from cells in your sheet, using A1 notation such as 'Sheet1'!A1.
Show examples
Dynamic Date Range options for the Invoices table
Dynamic Date Range.
Static Date Range with a start and end date
Static Date Range.
Custom date taken from a sheet cell using A1 notation
Custom: a date from a sheet cell.
3
2. Change pull settings · optional

Choose how the data looks

Switch on what you need. See every setting with examples
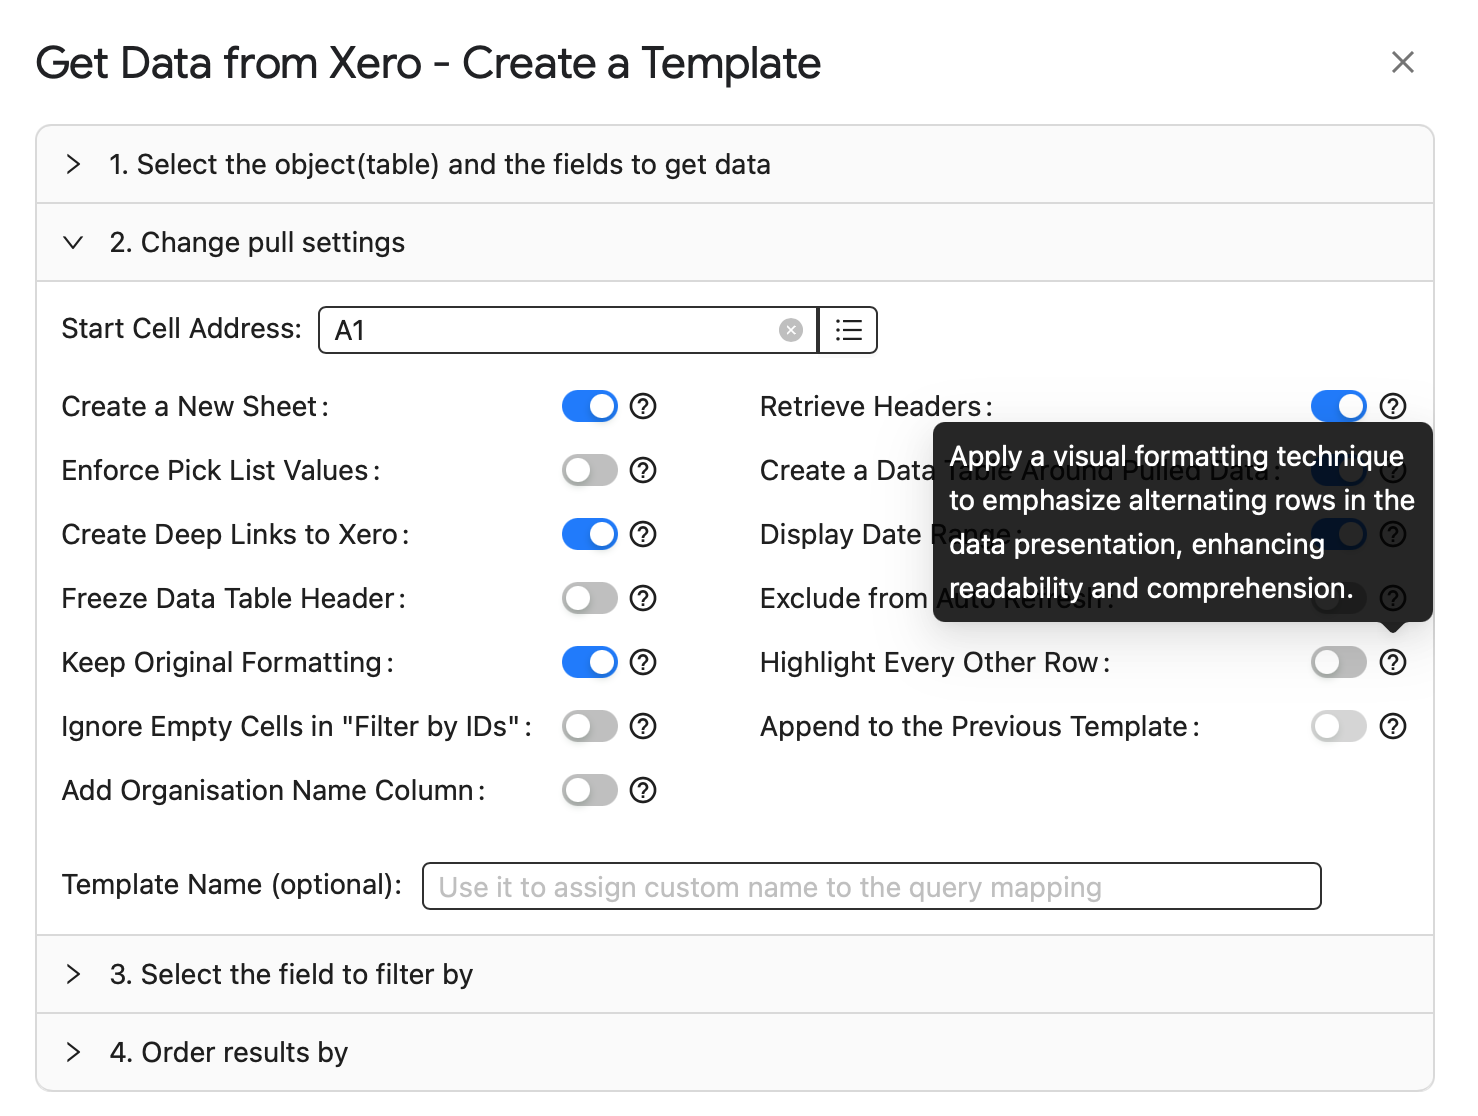
  • Create a New SheetPut the data in a new sheet.
  • Retrieve HeadersShow column names above the data.
  • Enforce Pick List ValuesAllow only the defined pick list values.
  • Create a Data Table Around Pulled DataWrap the data in a structured table.
  • Create Deep Links to XeroOpen a record in Xero from the sheet.
  • Display Date RangeShow the date range of the pulled data.
  • Freeze Data Table HeaderKeep the header row visible.
  • Exclude from Auto RefreshLeave this template out of automatic refresh.
  • Keep Original FormattingKeep your own formatting on refresh.
  • Highlight Every Other RowShade alternate rows.
  • Ignore Empty Cells in "Filter by IDs"Skip empty cells in an ID range.
  • Append to the Previous TemplateAdd new data below existing data.
  • Add Organisation Name ColumnAdd a column with the organisation name.
Start Cell AddressWhere the data starts, for example A1 or A11.
Template Name (optional)A custom name for this template, such as Template Name #1.
Show the Change pull settings panel
Change pull settings panel with switches for each setting
4
3. Select the field to filter by · optional

Pull only the rows you need

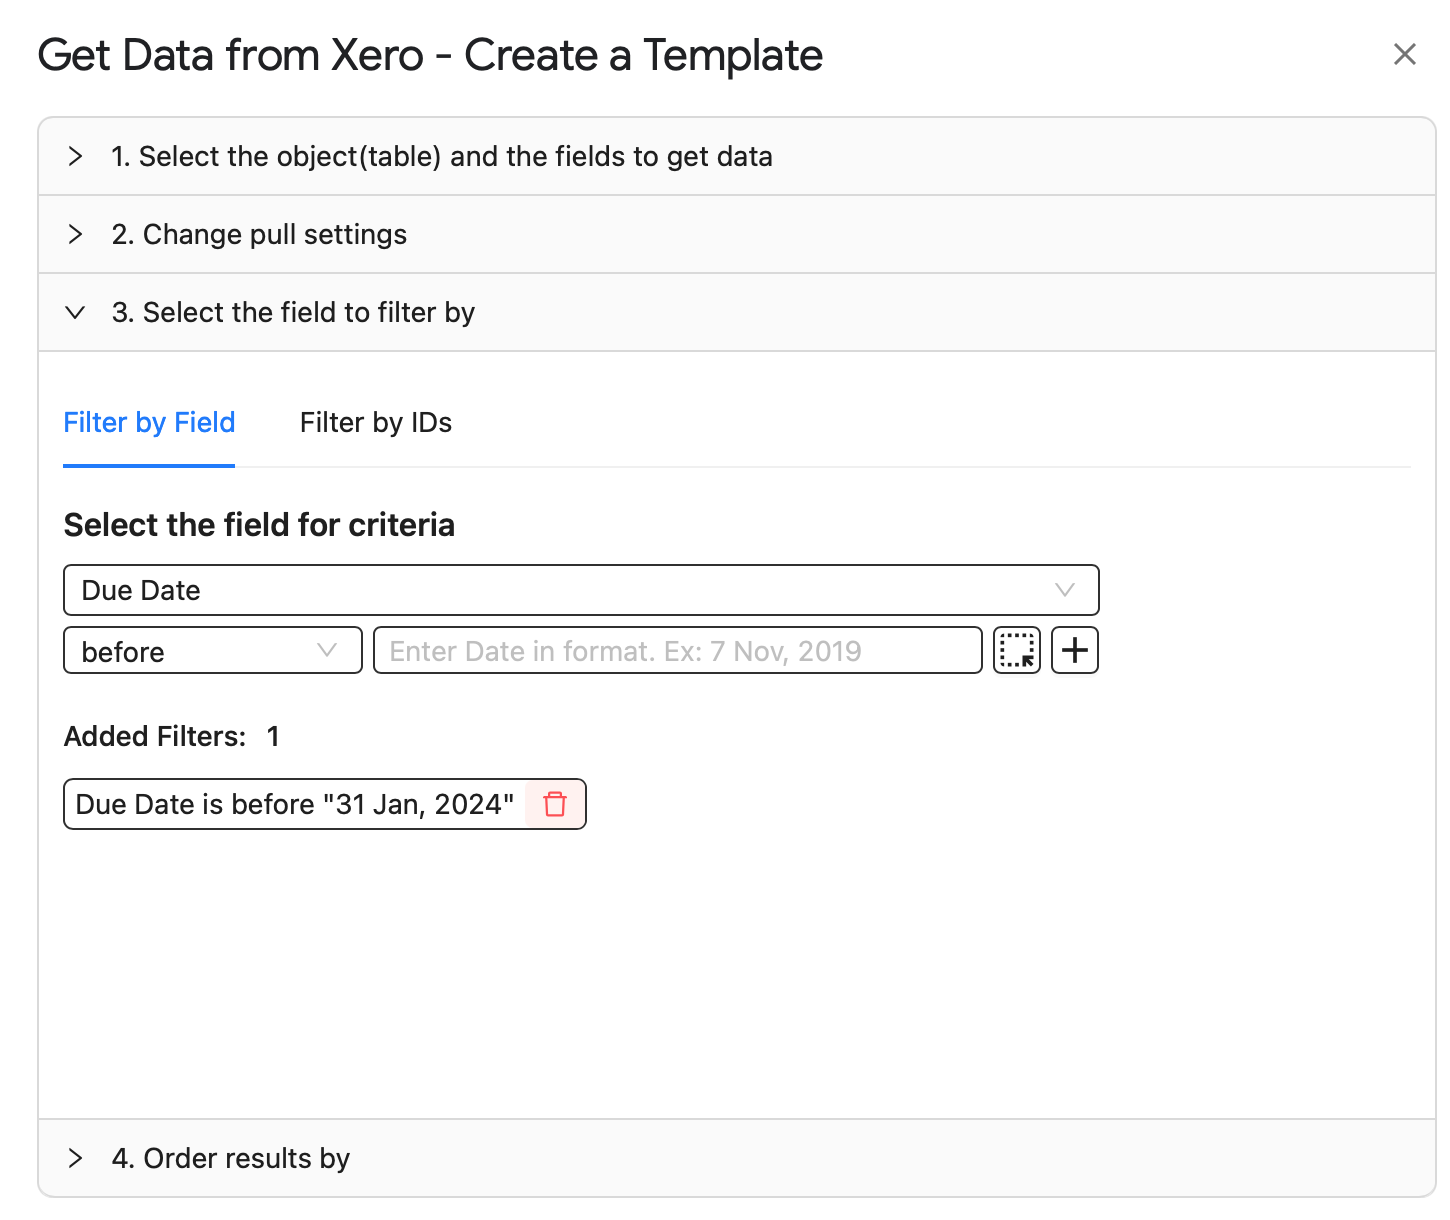
Filter by FieldMatch a conditionPick a field and a condition. Only matching rows are pulled. You can add several filters.Due Date is before "31 Jan, 2024"
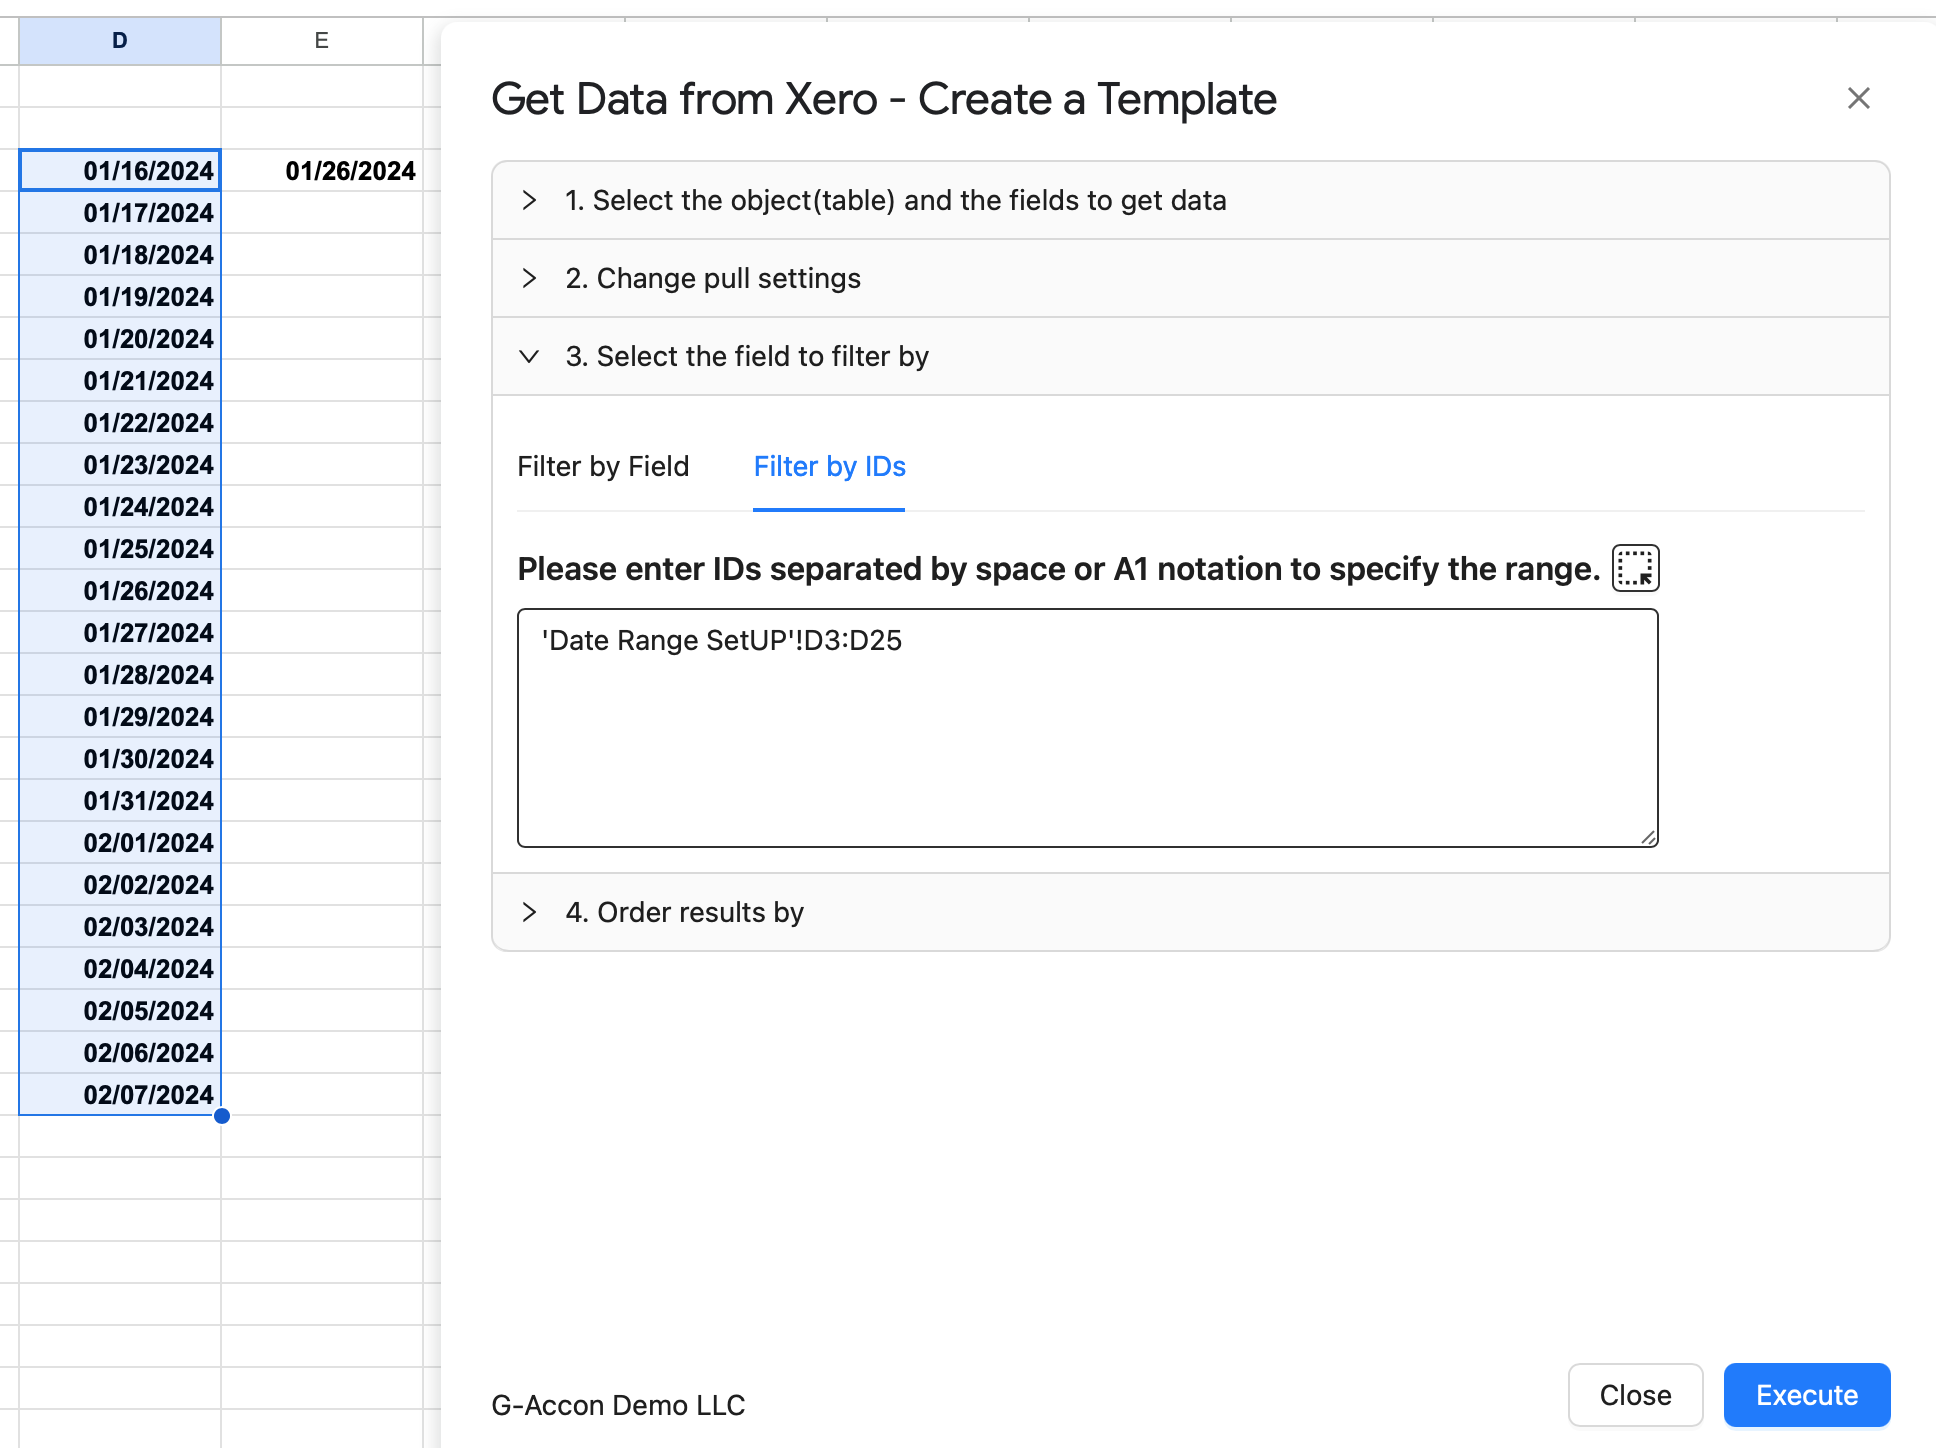
Filter by IDsMatch a list of IDsEnter IDs separated by spaces, or a sheet range in A1 notation. See an example
Show examples
Filter by Field with Due Date before 31 Jan 2024 added
Filter by Field.
Filter by IDs with a range from the sheet
Filter by IDs with a sheet range.
5
4. Order results by · optional

Sort the rows, then Execute

Pick a field in Order By and an Order Type:

ASCENDINGDESCENDING

Then click Execute. The data lands in your sheet, starting at your Start Cell Address.
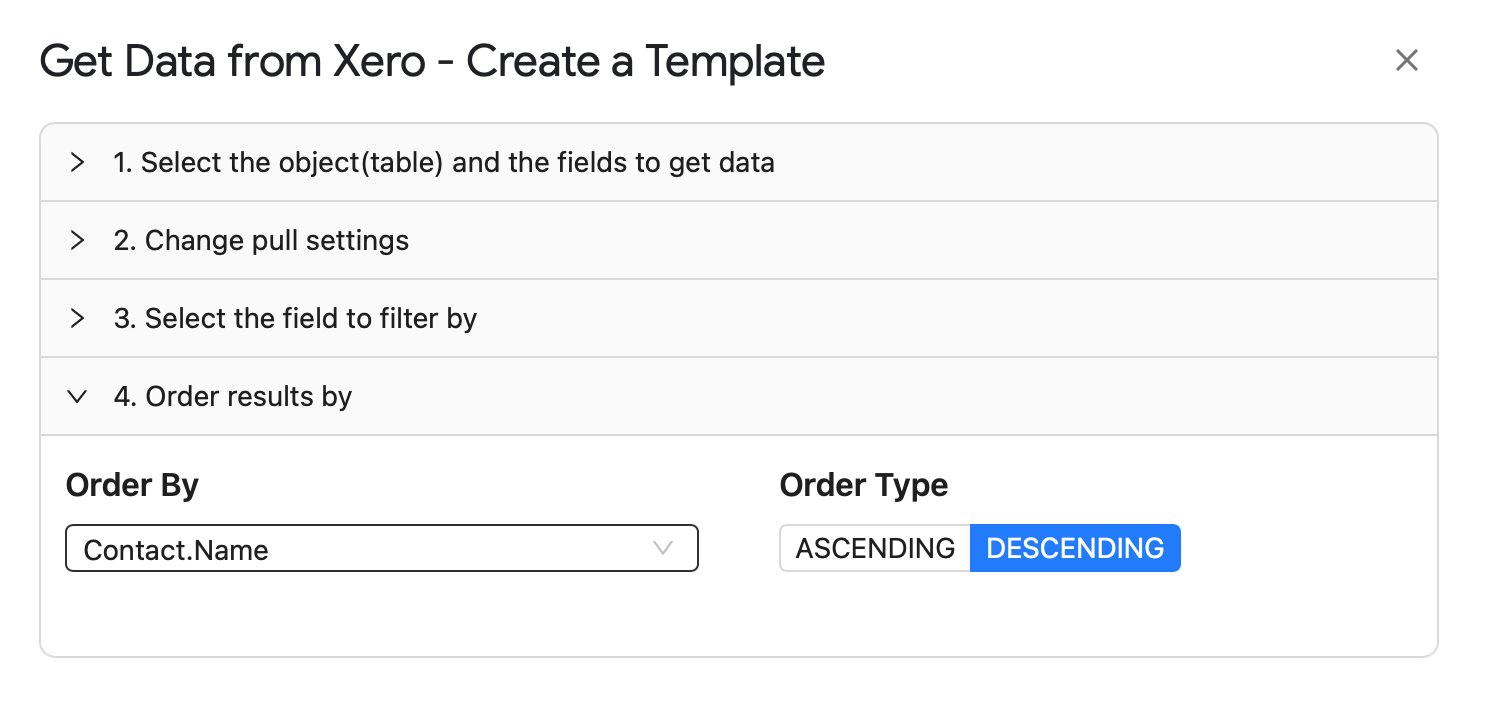
Show example
Order results by Contact Name, descending
Ordered by Contact.Name, descending.
Automate

Refresh it automatically

  • Go to Automation›Create Workflow
  • Add your templates and set a schedule. Each workflow can have its own templates and schedule.
  • Optionally, notify clients and team members when it runs.

Read the Automatic Refresh guide

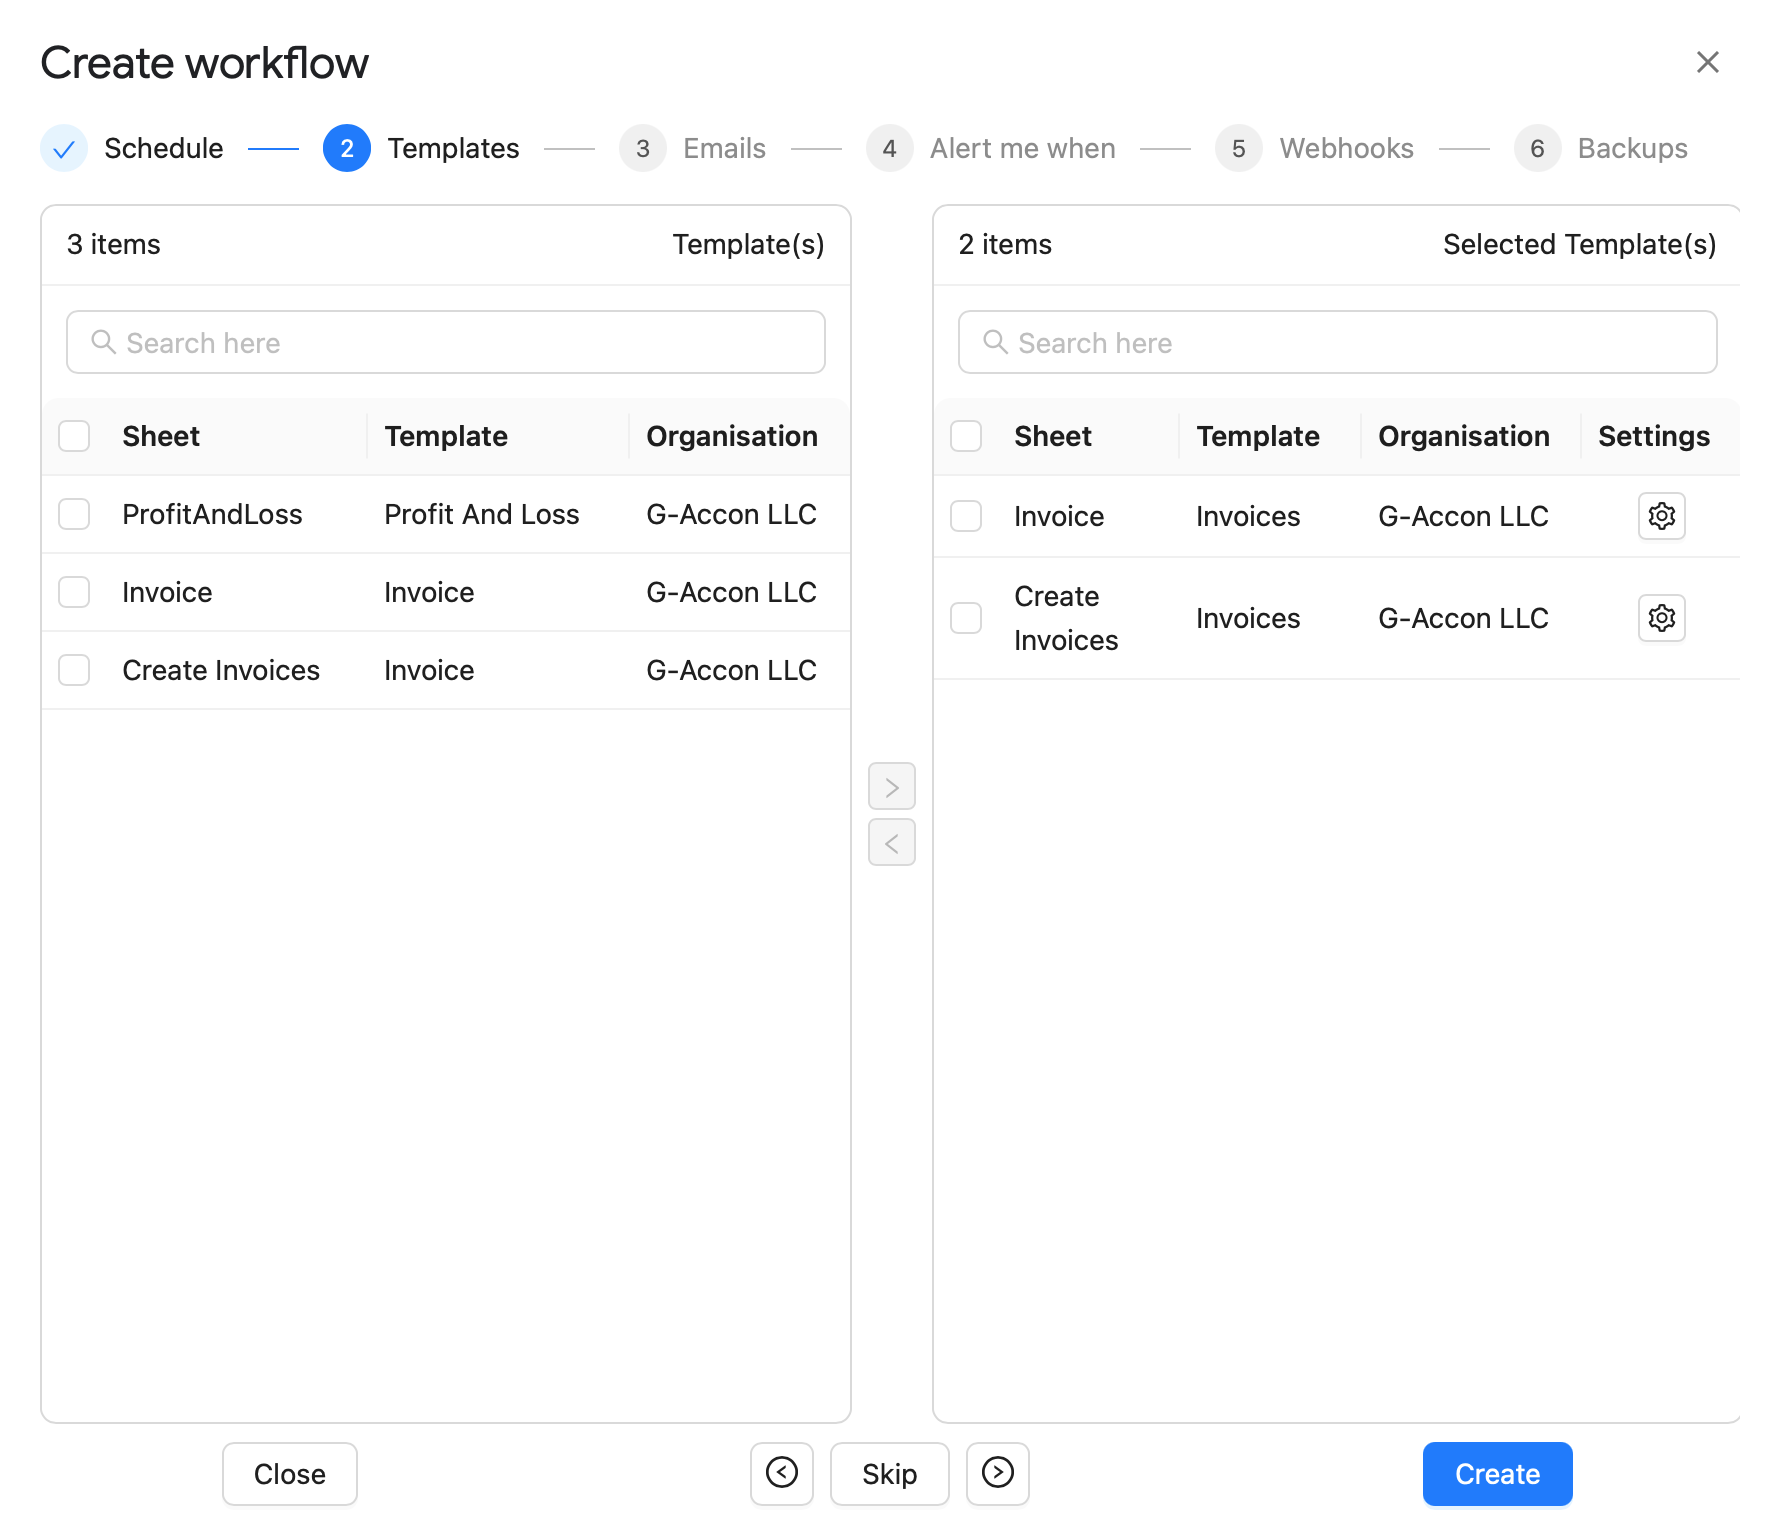
Create workflow window, Templates tab, with two templates selected
The Templates tab of Create workflow.
Edit

Change the template later

You don't need to be signed in to Xero to edit or refresh a template.
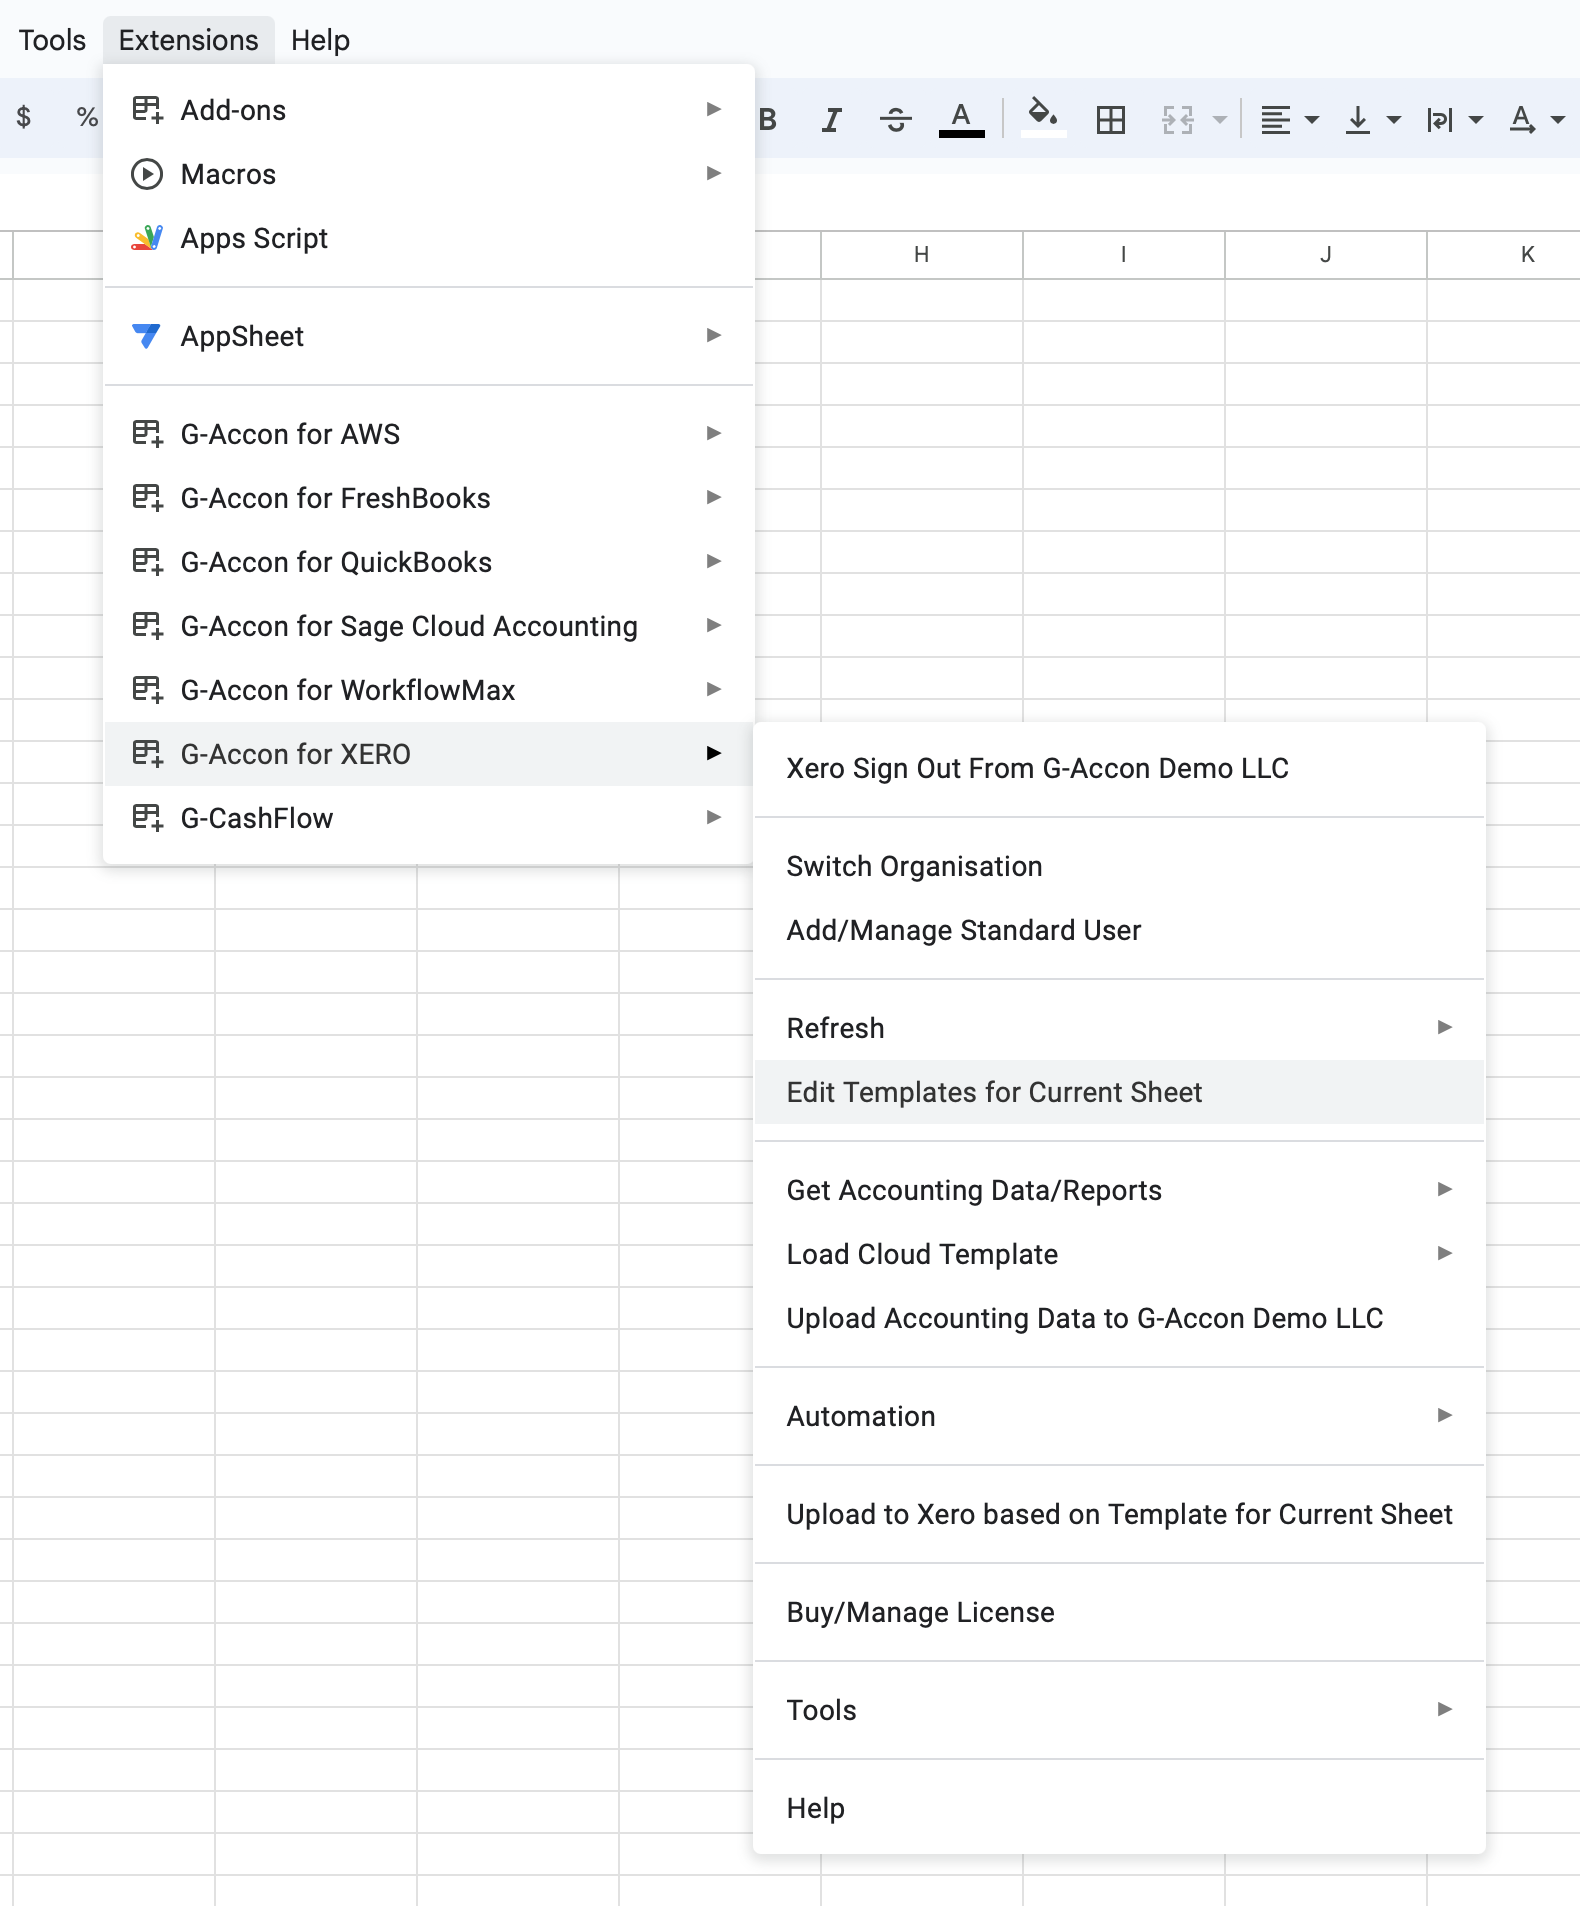
  • Go to Extensions›G-Accon for Xero›Edit Templates for Current Sheet
  • Pick the template and make your changes.
  • Save with one of these buttons:UpdateSave onlyUpdate and ExecuteSave and run now
Edit Templates for Current Sheet in the G-Accon for Xero menu
Edit Templates for Current Sheet.
Need a different table?

See all 31 Xero tables you can export, or ask our support team.

© Copyright 2026 G-Accon
crossmenuchevron-down