Import Manual Journals from Google Sheets — upload your Manual Journals data directly from Google Sheets into Xero with flexible configuration options and automated uploads.
✅ Design a Template
✅ Select Object, Operation, Start Cell and Rows Mode
✅ Mapping Fields
✅ Schedule Automatic Upload
✅ Upload in One Click
✅ Modify Template
✅ Watch G-Accon YouTube Videos
In order to upload data into Xero, you need to be logged into your current Xero organization. The upload functionality is built on top of Xero API functionality and utilizes the structures that the Xero API supports. The first step is to create a template.
This is a one-time process. The easiest way to map your data to Xero object fields is to go to Extensions → G-Accon for Xero → Get Accounting Data → Get Data select the Manual Journals object from the dropdown menu, and choose all the attributes you would like to upload. This gives you a structure that can be easily mapped and posted into your Xero account. You can select all or some attributes based on your preferences.
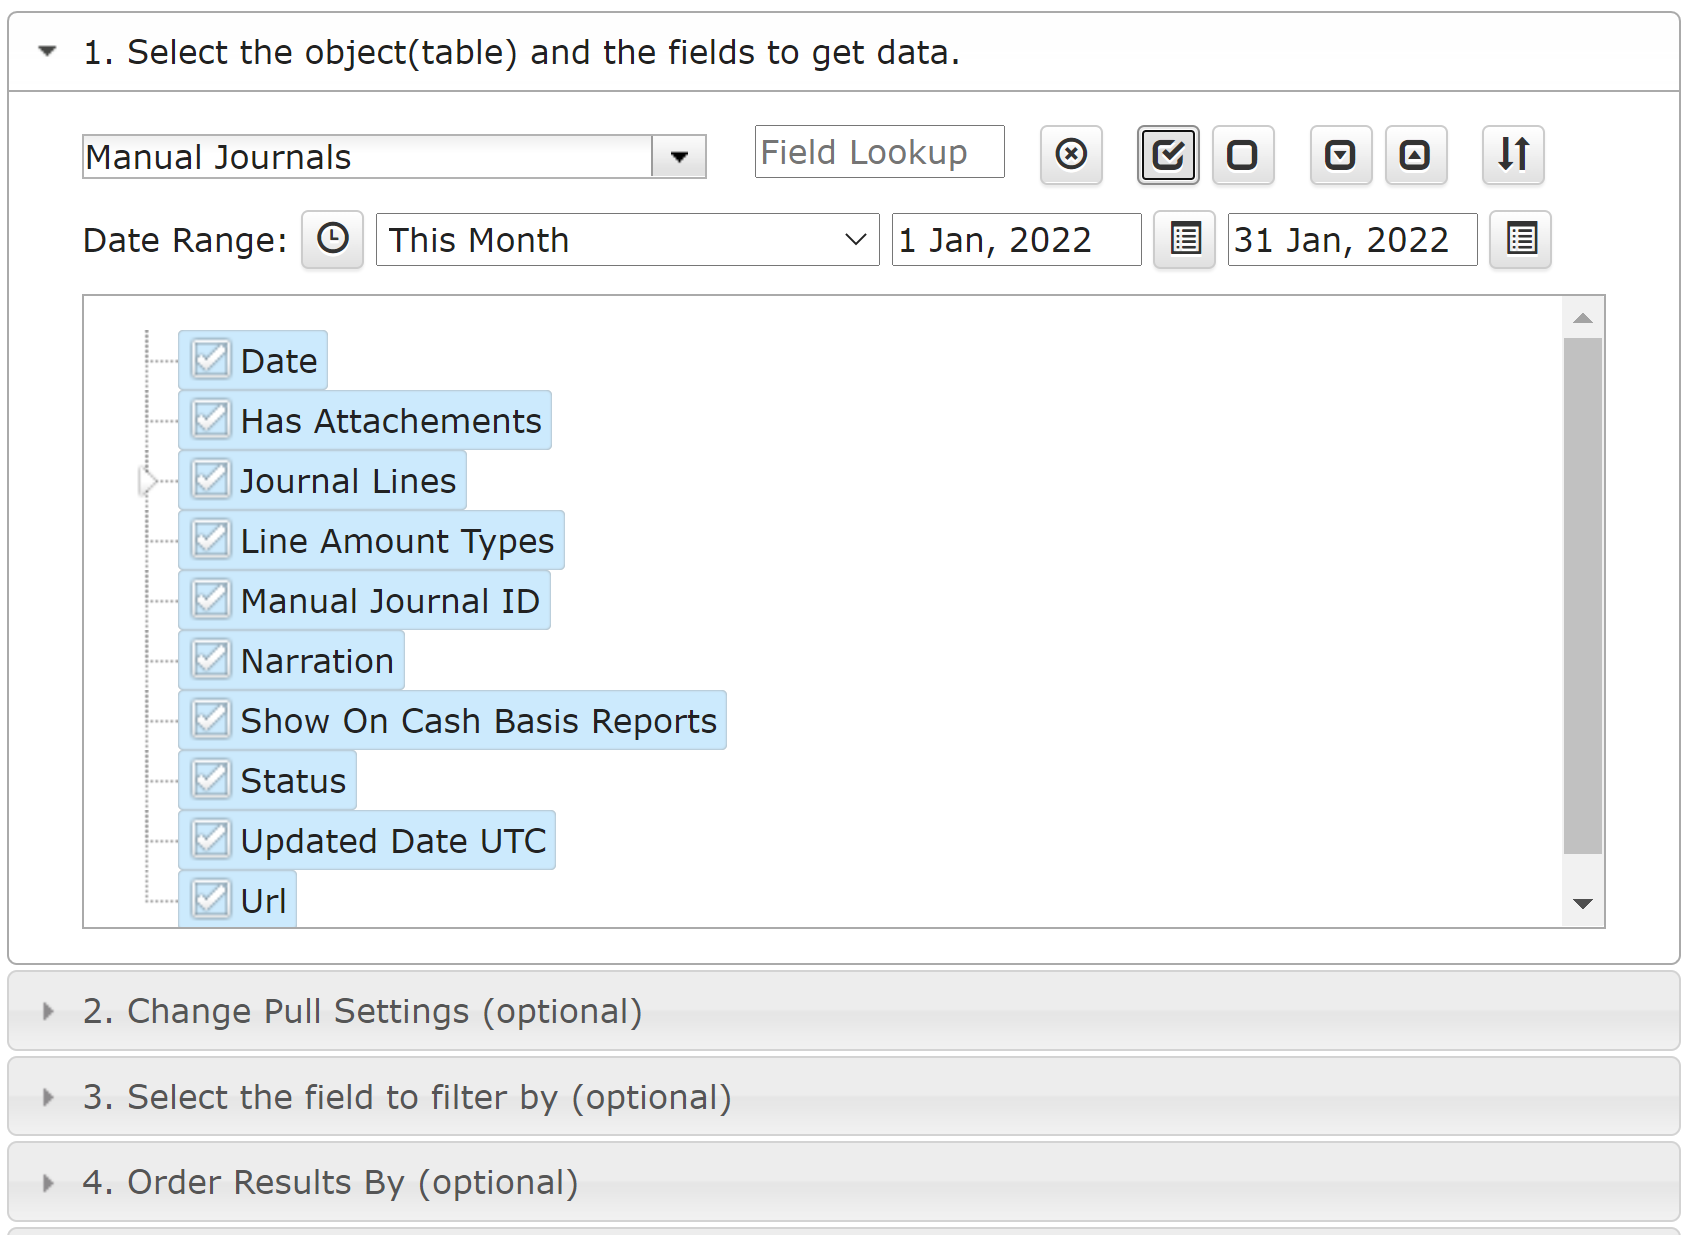
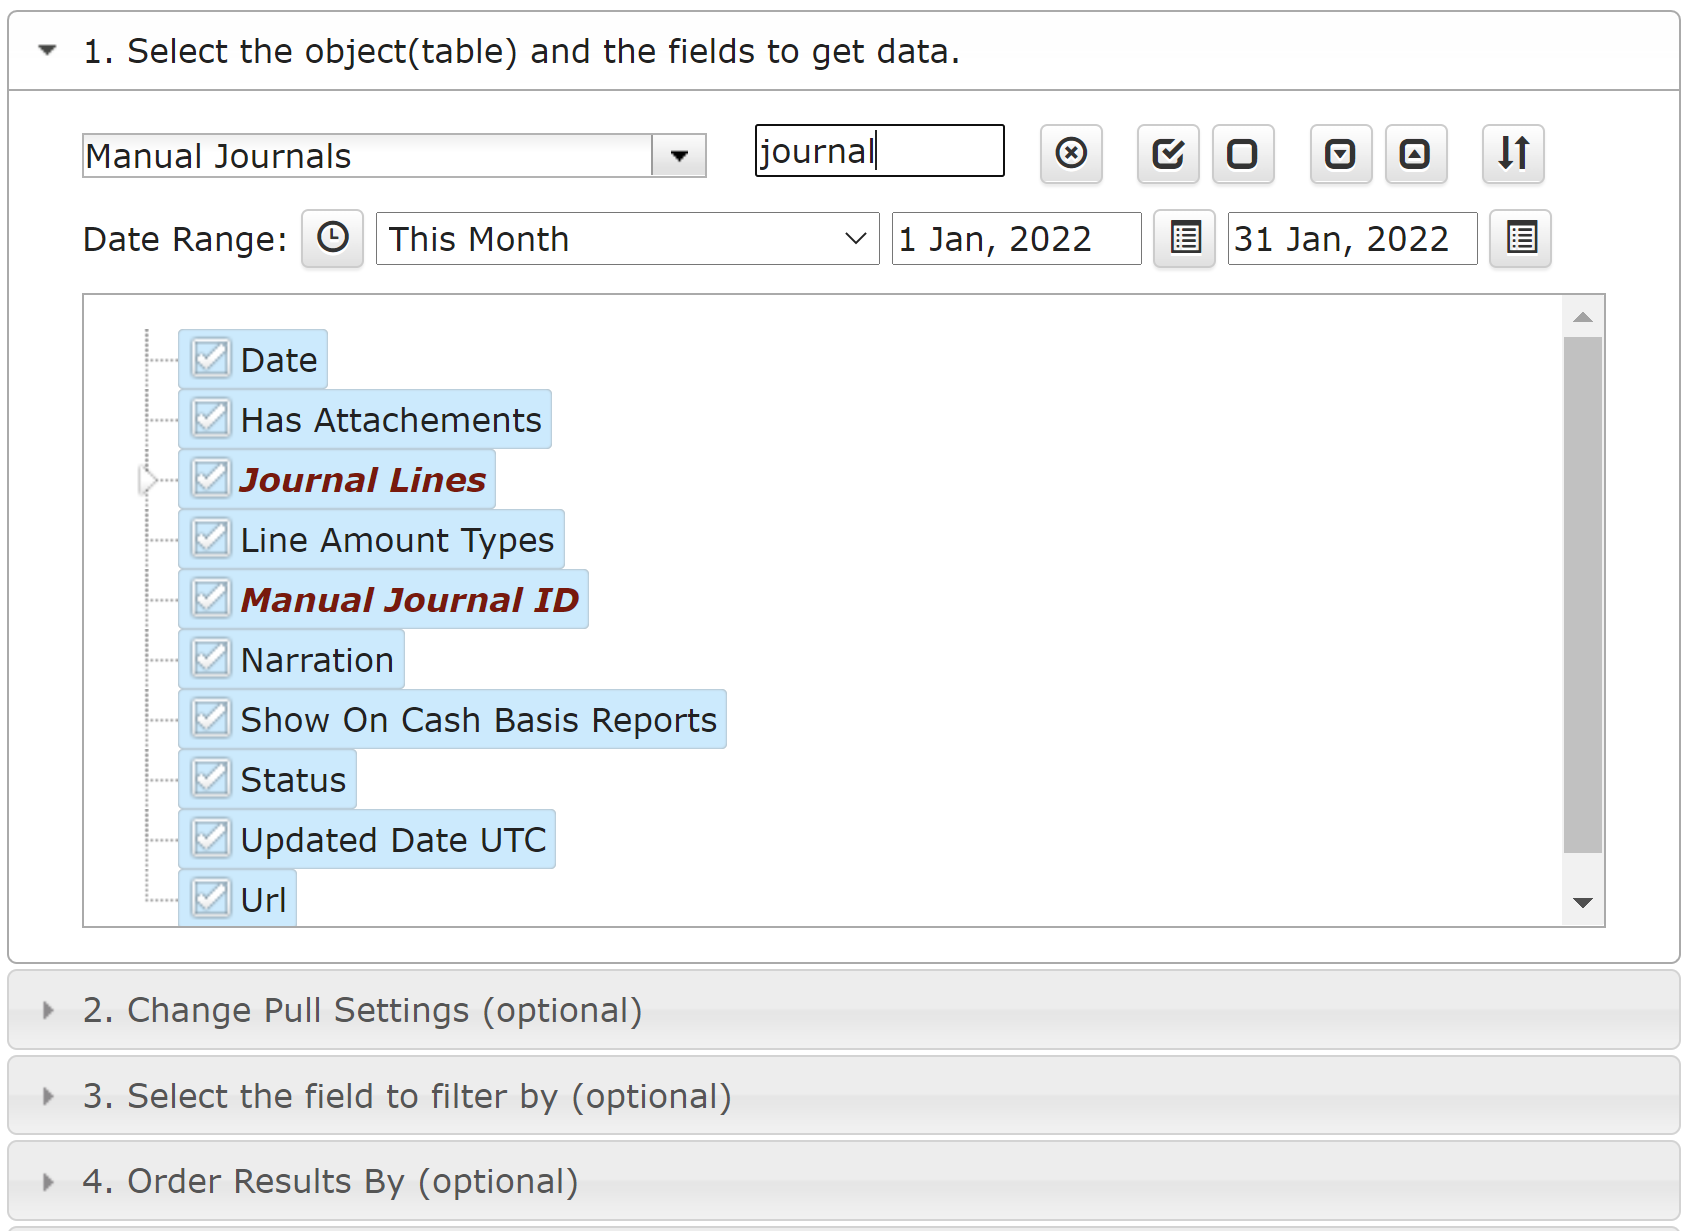
To find a specific field in the attributes list, type the name of the attribute and all matching attributes will be highlighted in the list below.
In this example, we are retrieving Manual Journals from one of the Xero organizations. Here is the result of the execution.

Export Manual Journals in Google Sheets
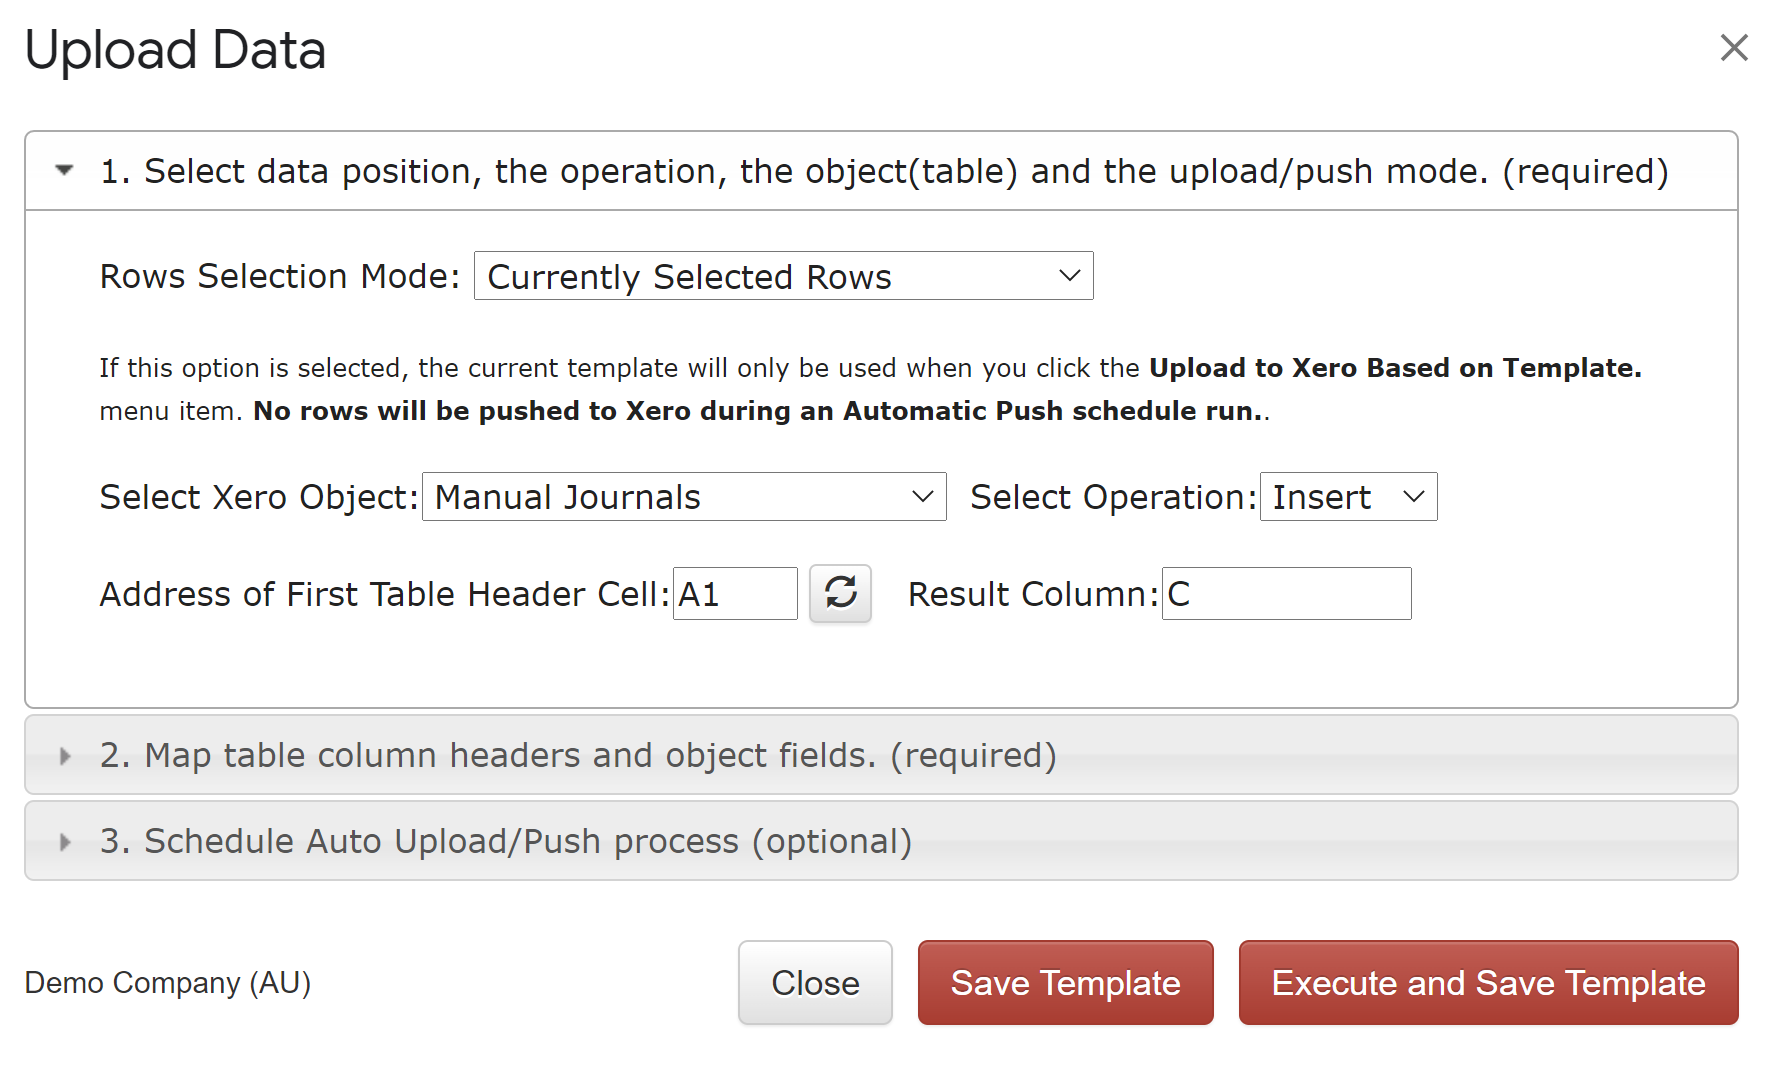
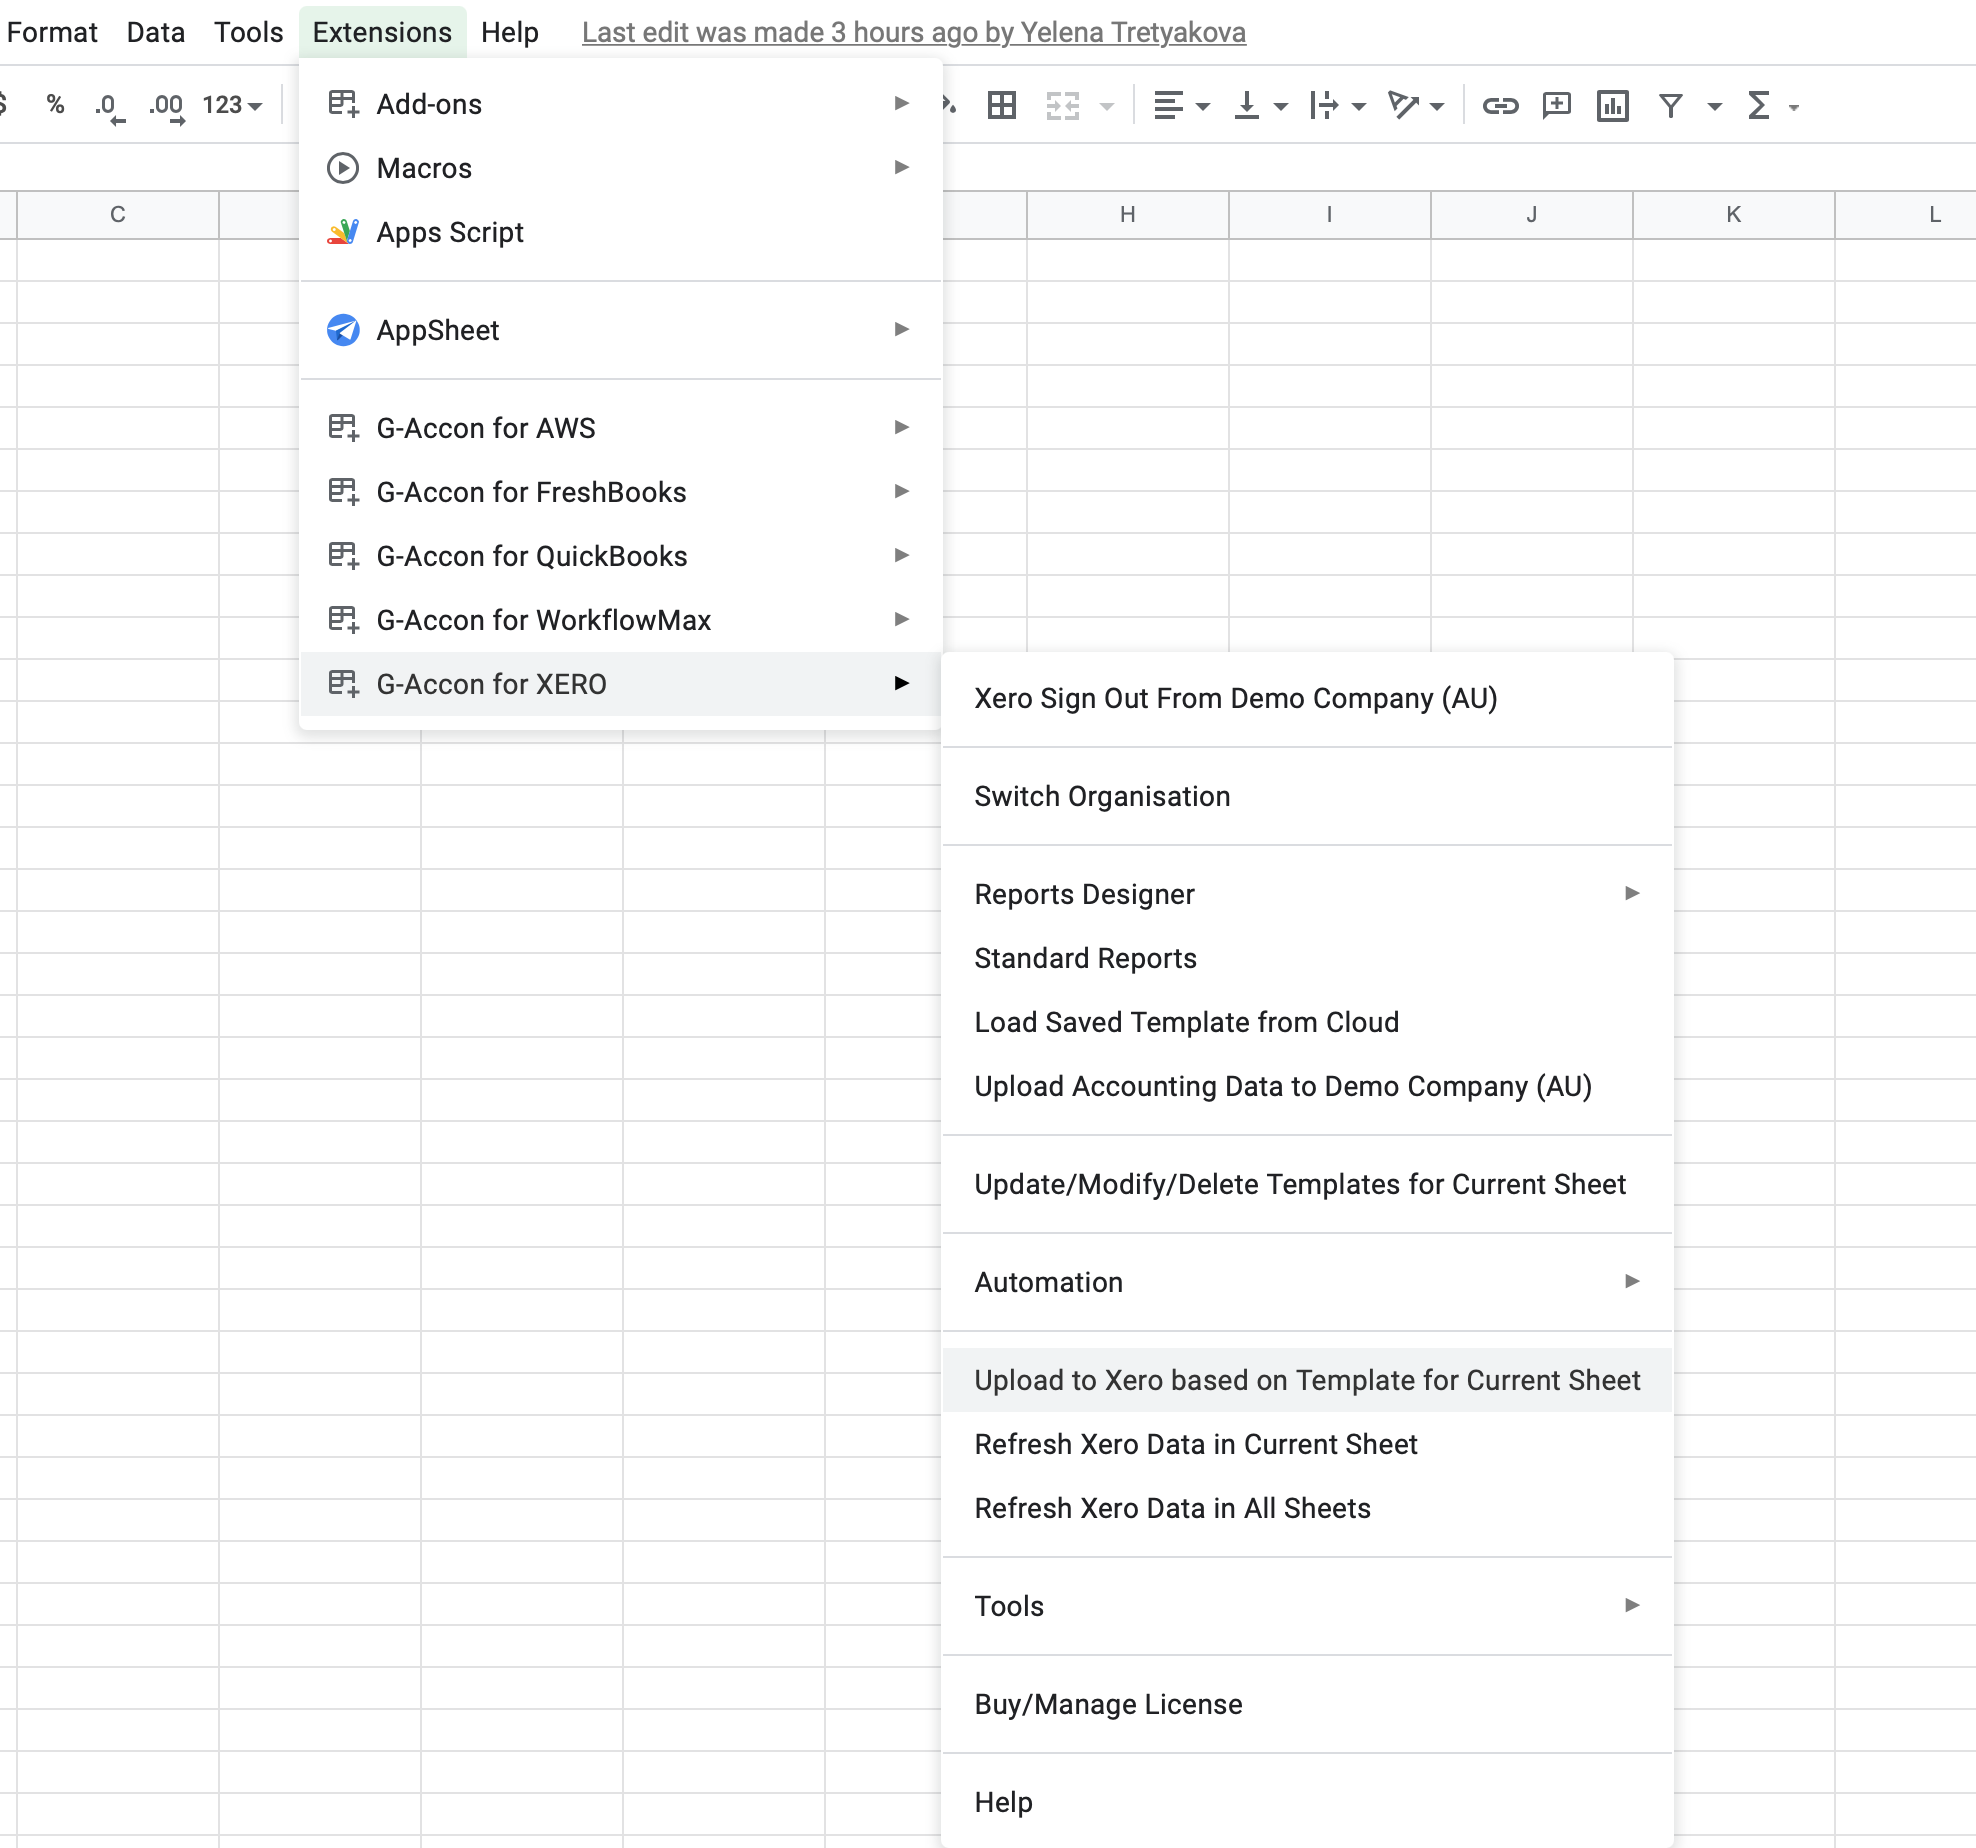
Once you have the structure ready, the next step is to create the Upload Template. Go to Extensions → G-Accon for Xero → Upload Accounting Data to Xero 'Company Name'.
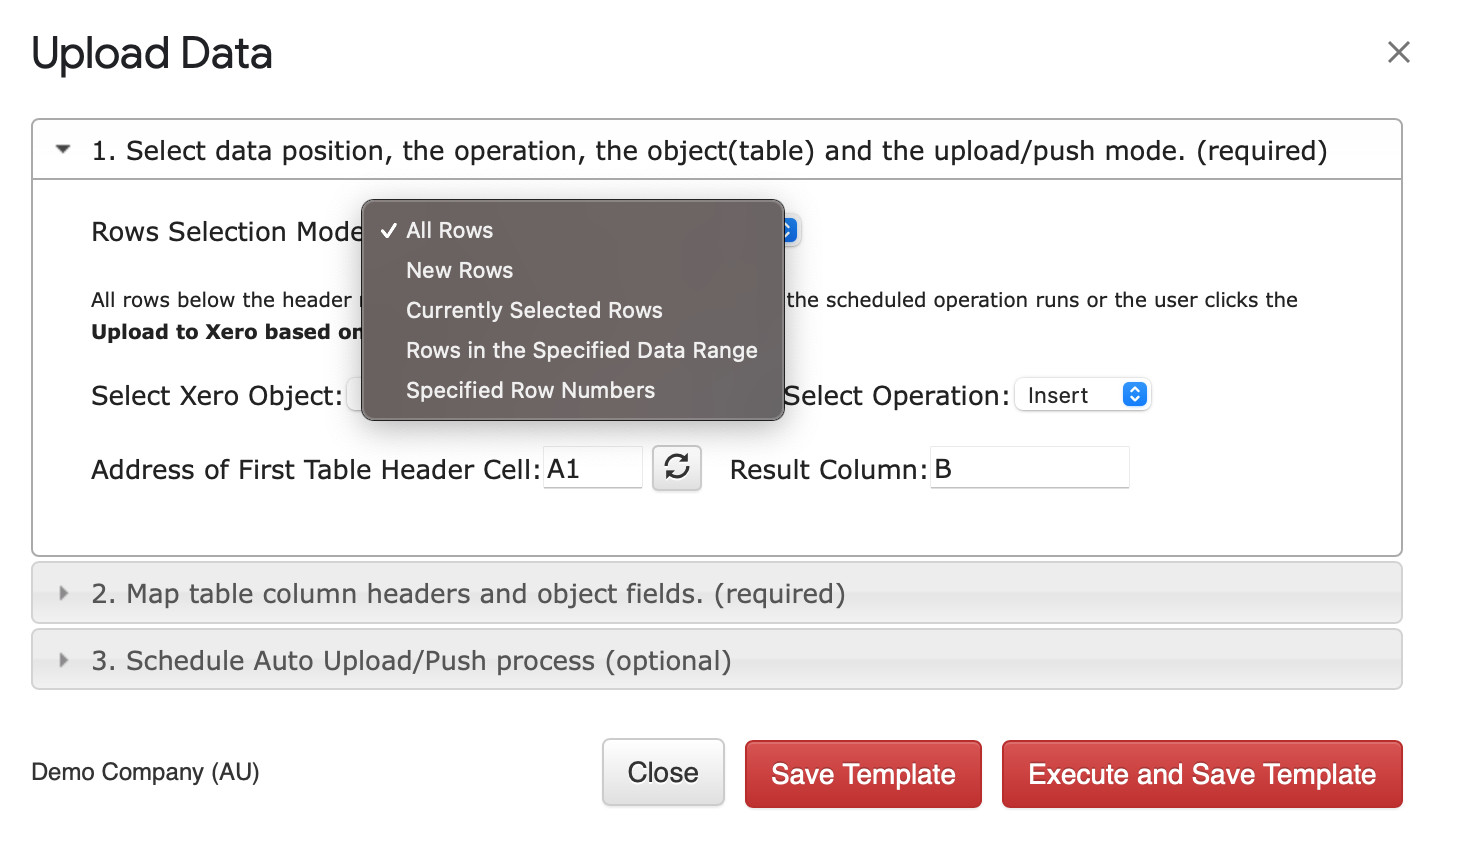
The Upload Accounting Data screen allows you to specify the Row Selection Mode, the object you are working on, the operation you need, the start cell, and where your results will be displayed in your Google Sheet.
Row Selection Mode gives you the ability to make the following selections (Note: you do not need to select the entire data area):
Select the Manual Journals table and choose your operation from the Select Operation dropdown. G-Accon for Xero supports Insert and Update operations for Manual Journals.
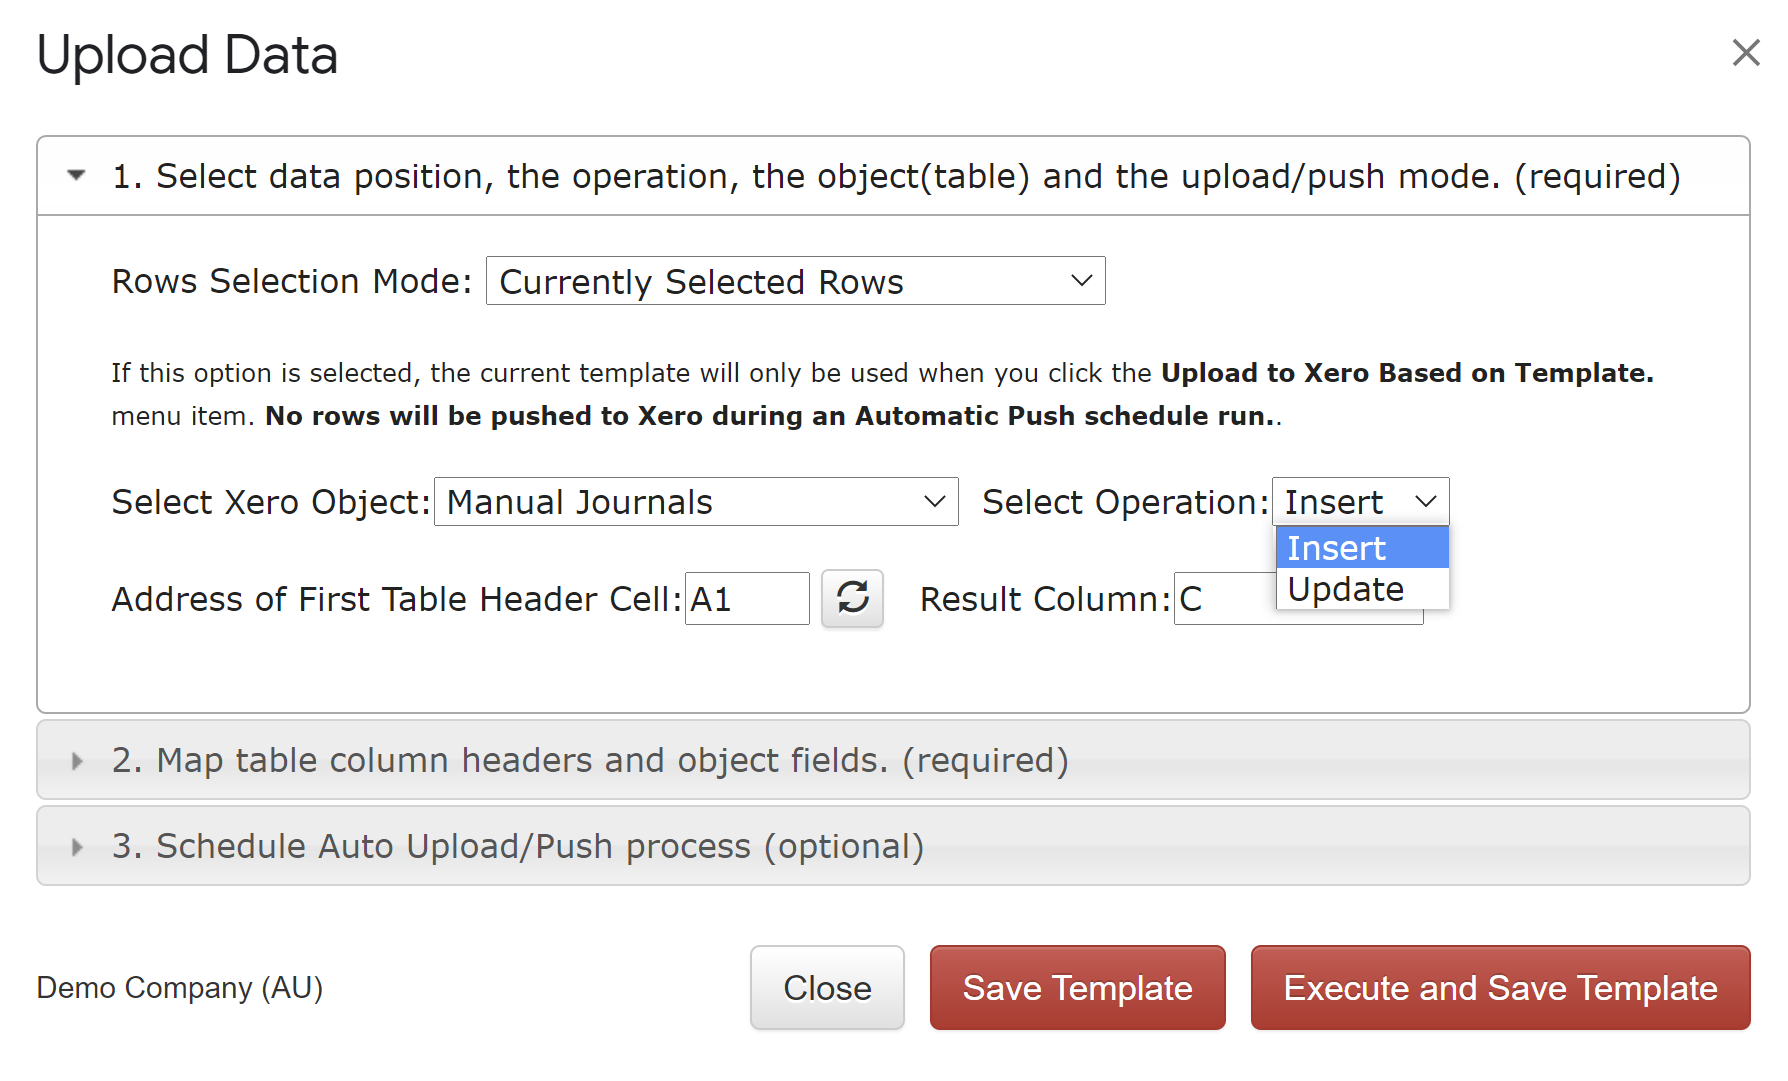
Address of the First Table Header Cell — identifies the top left corner of your dataset. Set this if your data does not start from A1 (for example, A11). The Result Column field sets the position where upload results will be displayed.

The result columns will display the following information:

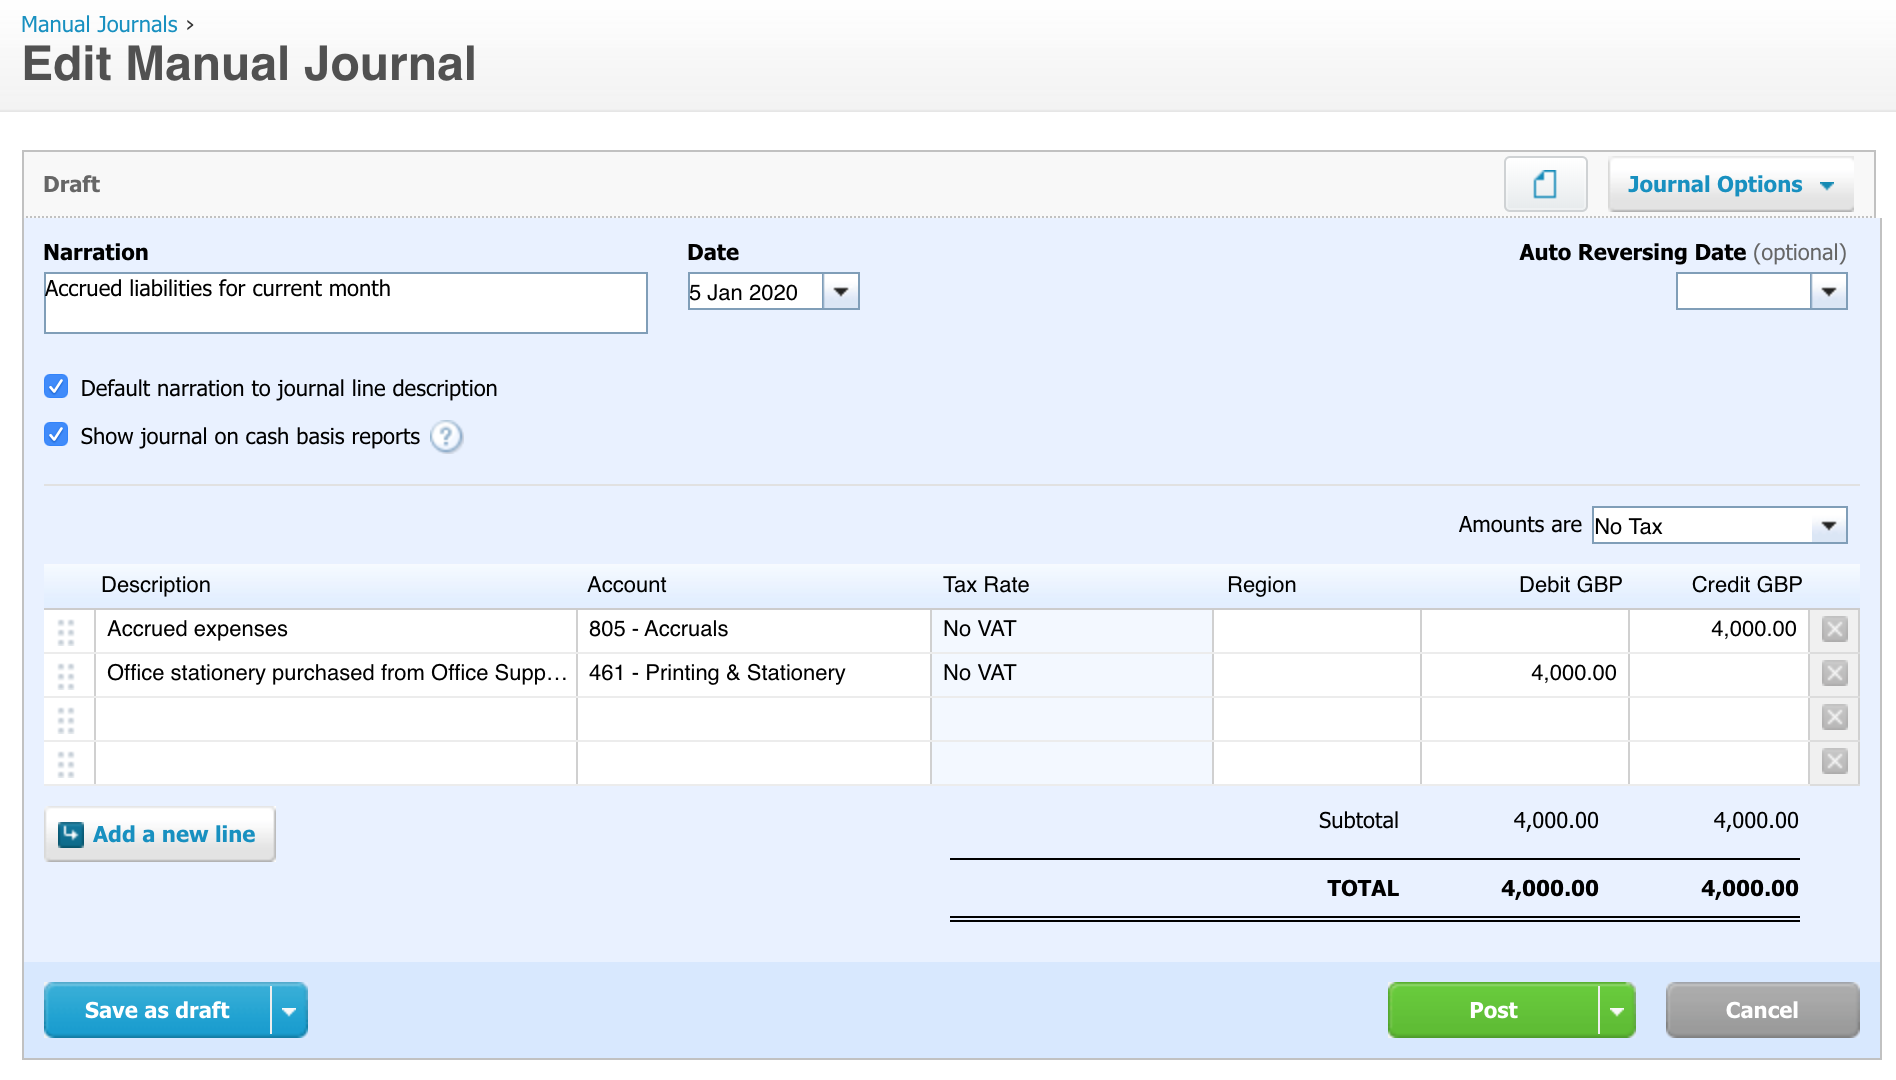
When Manual Journal records are created successfully, deep links to the Xero Manual Journal screen will be provided to you.

Option 2 — Map Table Column Headers and Object Fields allows you to map fields from your template to Xero fields. Fields in the Xero table display the list of available Xero fields that can be entered or updated. Xero object fields cannot be changed. The goal is to map your DataSet headers to the Xero object fields.
G-Accon also supports custom field mappings — there are no restrictions on how your input DataSet headers are named. If any mandatory fields are missed during the upload process, you will be notified with an error message. G-Accon provides data types and values for Xero object fields that have fixed values such as "tax type", "type", "status", etc. Please note that the majority of fixed values use the internal Xero format, which may differ from the Xero user interface values.
You can also drag a field from the Xero fields list and drop it onto the column you want to map it to.

G-Accon's Automation feature lets you schedule your Manual Journals upload to run automatically — no manual intervention needed. You can also configure notifications to alert team members, clients, or stakeholders when an upload completes.
To set up an automated upload:
For full details on workflow configuration, refer to the Create Workflow documentation.
G-Accon offers the ability to upload your financial data in a single click. Go to Extensions → G-Accon for Xero → Upload to Xero Based on Templates for Current Sheet. Your data will be uploaded to your Xero organization immediately without any delay.
If you need to modify your upload template during or after the refresh process, follow these steps:
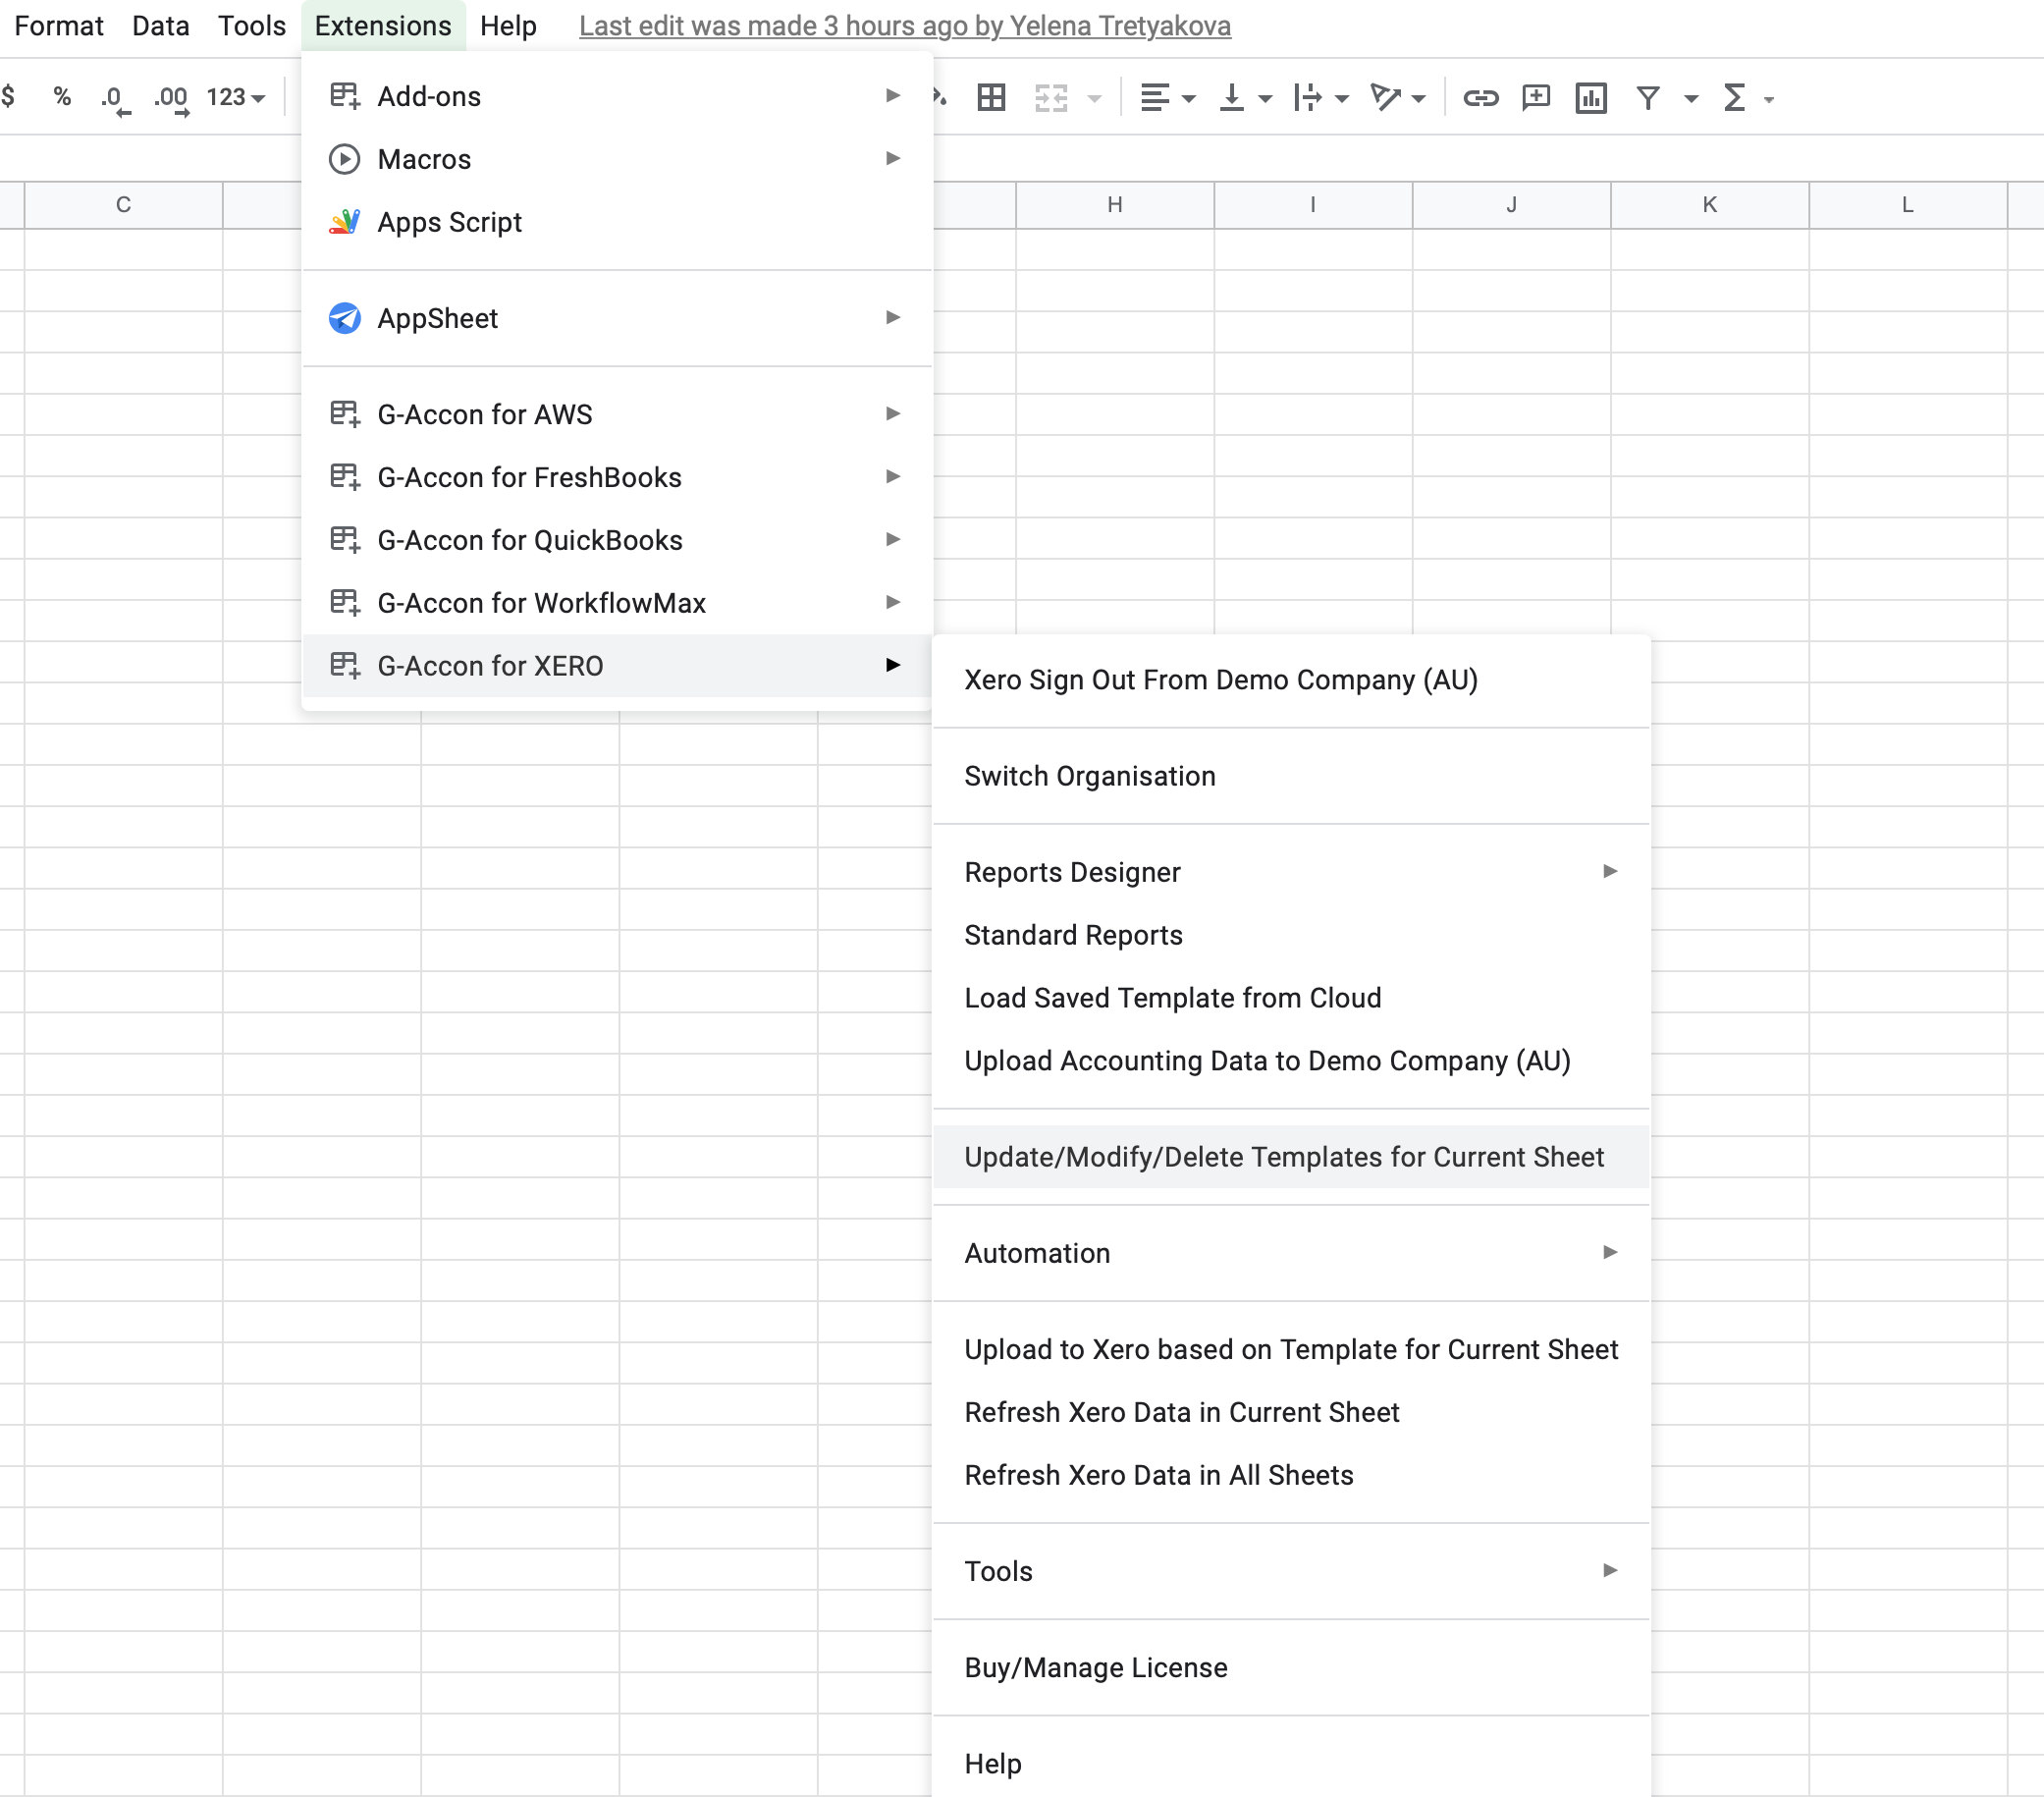
Edit Templates — select, modify, and update an existing upload template


