In order to upload data into Xero, you need to be logged in into current Xero organization. Upload functionality is built on top of Xero API functionality and utilize the structures that Xero API supports.
Create Template ONCE and upload data in ONE CLICK
Create the templates ONCE, and then schedule automatic upload or upload your data to your multiple Xero organizations in just ONE click.
How to create a template
The first step is to create a template. This is one time process. The easiest way to map your data to Xero object fields is to go to Extensions -> G-Accon for Xero -> Design Accounting Reports and pull the headers for Xero object that you would like to update. This gives you the structure that can be easily mapped and post into Xero.
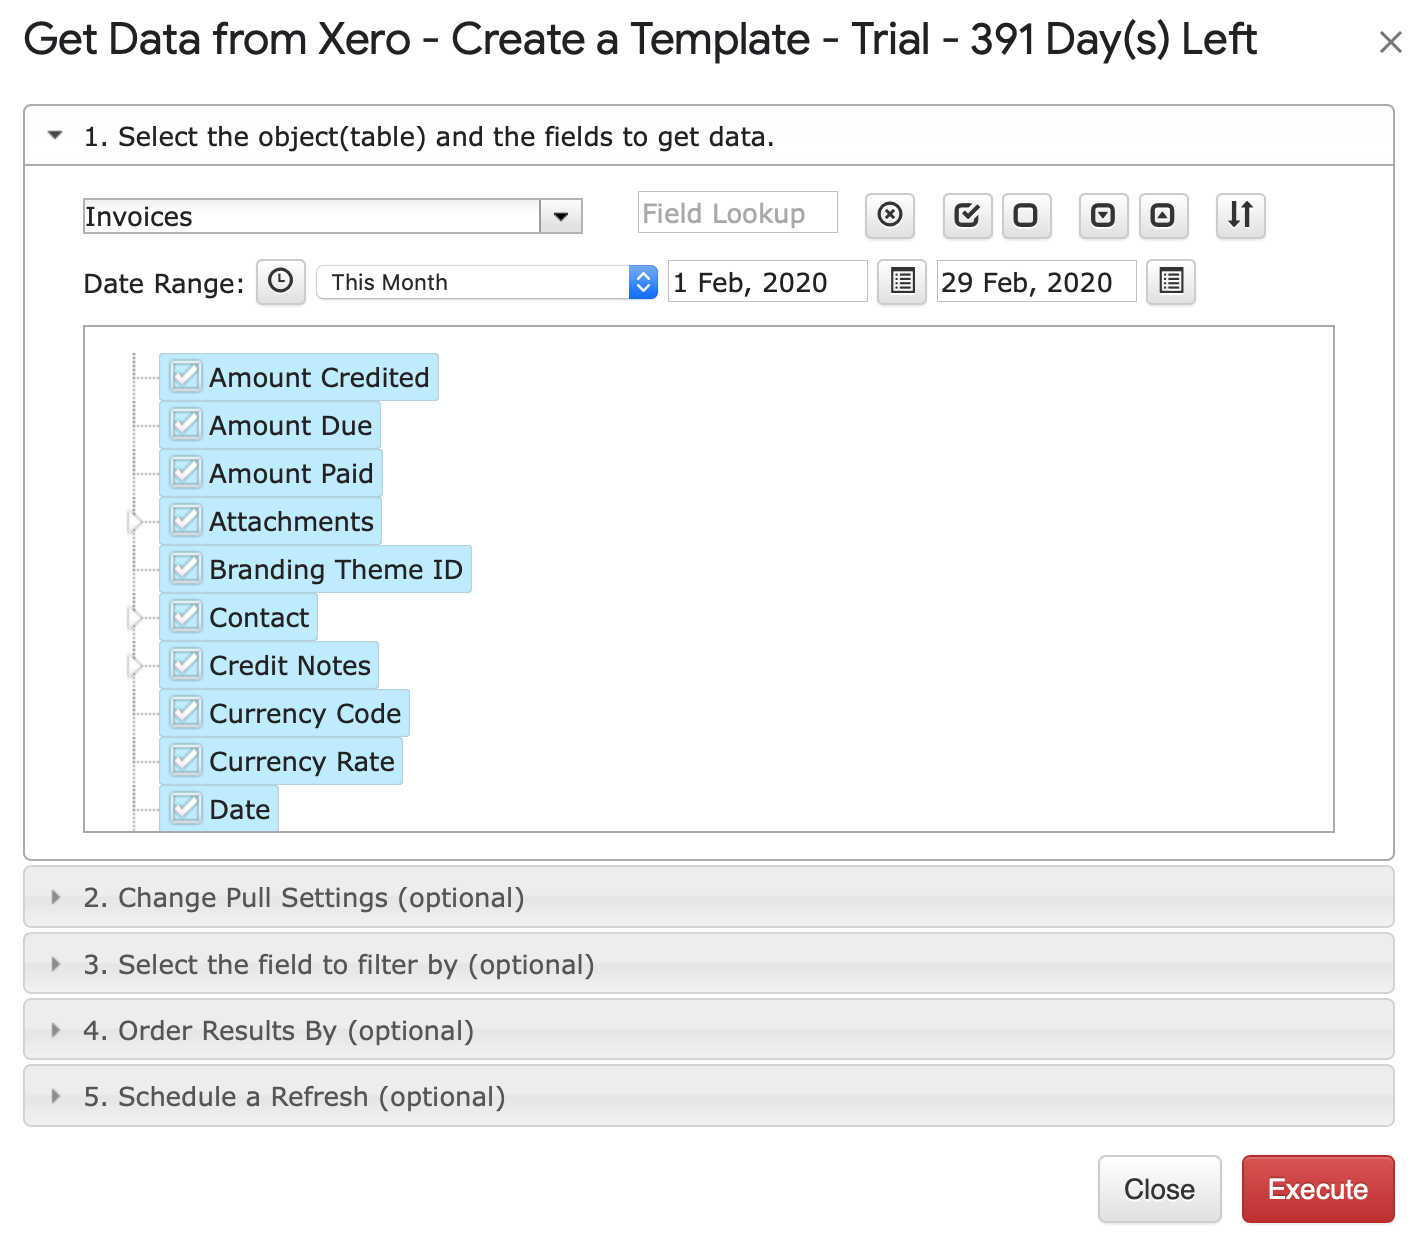
In our example, we are retrieving Invoice data from one of our Xero accounts. Here is the result of the execution.
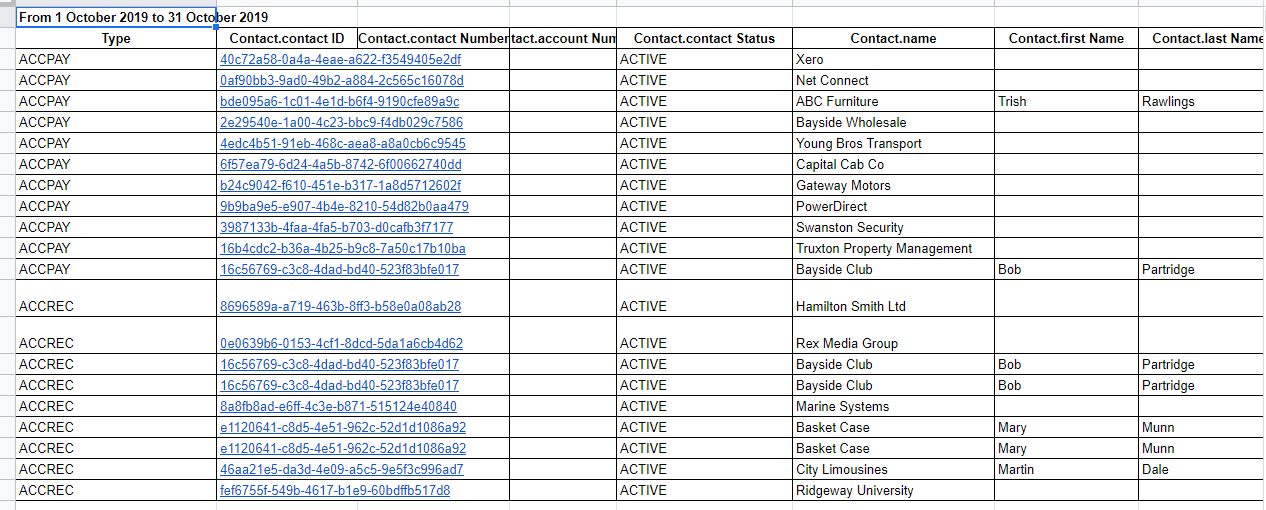
Let’s assume we need to create New Invoices in Google sheet and upload them into Xero accounts. We have updated Date, Due Date, Type of the invoices (ACCREC), and status (DRAFT).
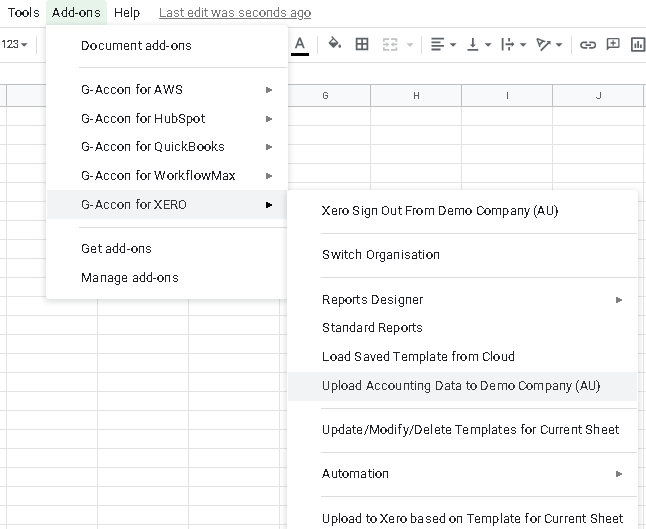
Next step is to create Upload Template. In order to create the Upload Template, you need to go to Extensions -> G-Accon for Xero -> Upload Accounting Data to ‘Organization Name’.
How to select object, operation, start cell and rows mode?
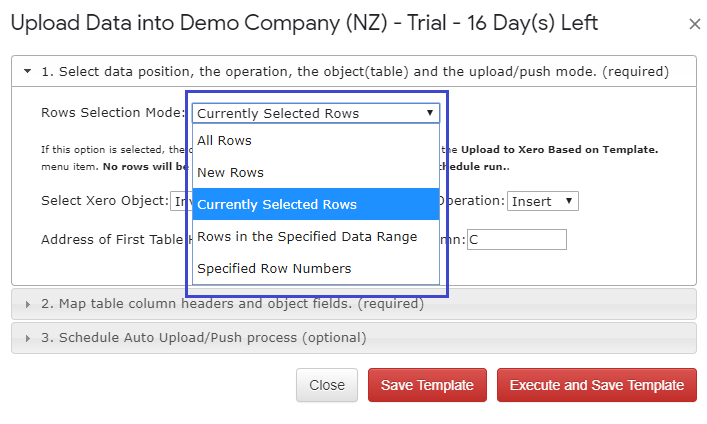
You will see the Upload Data into ‘Organization Name’ screen where you can specify what are you planning to change in Row Selection Mode, what object you are working on, what operation you need, what the start cell is and, where your result will be displayed in your google sheet.

Row Selection Mode give you the ability to make the following selection (Notice: you do not need to select all data area):
– You can work on ALL Rows
– Only New Rows
– Currently Selected Rows
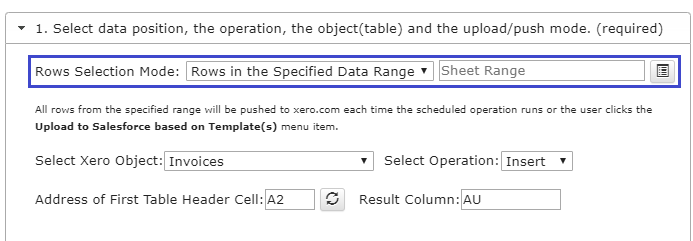
– You can also specify data range and in this case you need to select Rows in the Specified Data Range
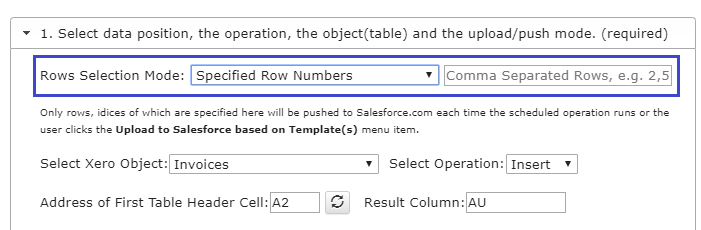
– Or you can specify the row number Specified Row Number
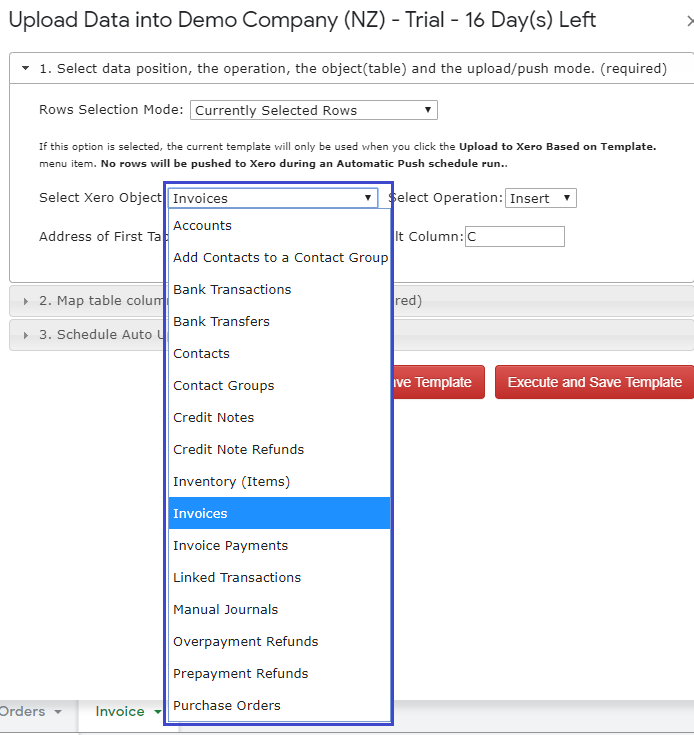
Next step is to select the Xero object where you want to upload your data. G-Accon for Xero offers the list of objects available for your upload. Select the Xero object and choose the operation from the Select Operation drop down box. G-Accon for Xero supports Insert and Update operations.
Accounts, Add Contacts to a Contact Group, Bank Transactions, Bank Transfers, Credit Note Refunds, Invoice Payments, Linked Transactions, Overpayment Refunds, and Prepayment Refunds have only insert operation.
The Address of the First Table Header Cell is the identifier of the top left corner of the DataSet and needs to be set up in case the data is not starting from A1, for example, in our case our template starts in A2. The Result Column field is used to set the position of upload results.
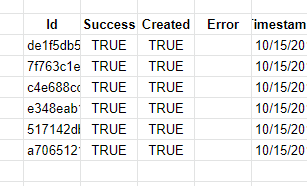
Where Id is object id, Success will be true in case operation was fulfilled successfully, Created will be true in case insert was successfully, Error displays a error in case error happens and Timestamp is the time when operation was performed.
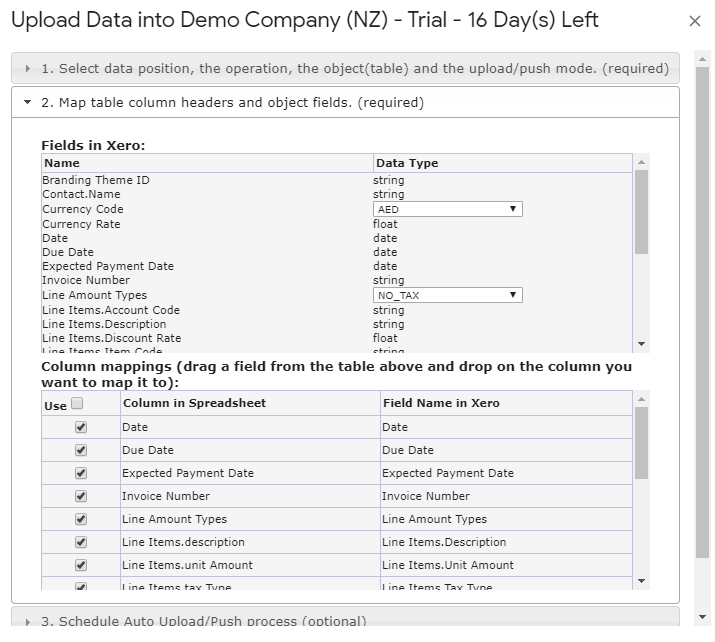
How to MAP fields?
Option 2, Map table column headers and object fields, allow to you to map fields from your template to Xero fields. Fields in Xero table display the list of available Xero fields that can be entered or updated. Xero object fields CANNOT be changed. The goal is to map DataSet headers to the Xero object fields. G-Accon provides field data types and discrete values. Column mapping contains the headers of your DataSet.
As our unique feature we also support custom field mappings. There are no restrictions on how your input DataSet headers are named. If any mandatory fields during the upload process are missed, you would be notified with the error message. For your convenience, we provide data types and values in case Xero object field has fixed values such as “status”, “type”, etc. Please note that majority of fixed values have the internal Xero format and they are different from Xero user interface values.
You have the ability to DRAG a field from Fields in Xero table above and DROP on the column you want to map it to.
How to schedule automatic UPLOAD?
To schedule the auto upload, you can use option Schedule Auto Upload/Push process. The important to remember this settings will take effect only if the master auto refresh process in turned ON. This option allows you to set up spreadsheet level automation if you want to have the different schedule compare to your master schedule. See the Automation process for further explanation.
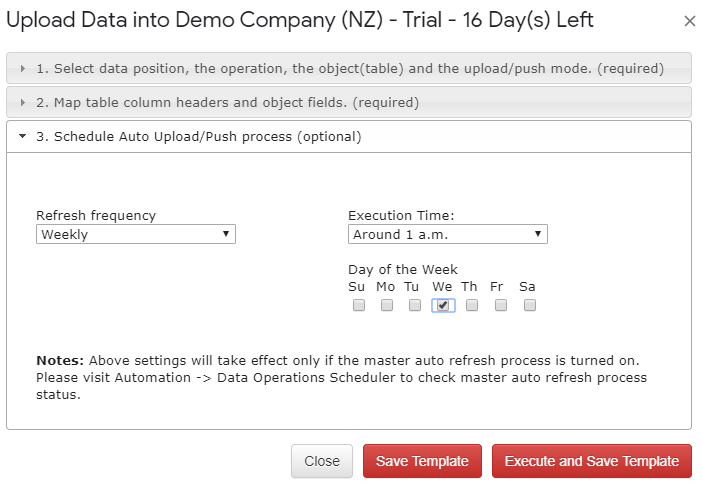
The final step is to save the created template by clicking on the “Save Template” button. If you wish to upload data, click on the “Execute and Save Template” button, the template will be saved automatically. After you process the execution, your data will be uploaded into your Xero account.
You also have the ability to simultaneously upload data from the multiple G-Accon templates to multiple Xero organizations.
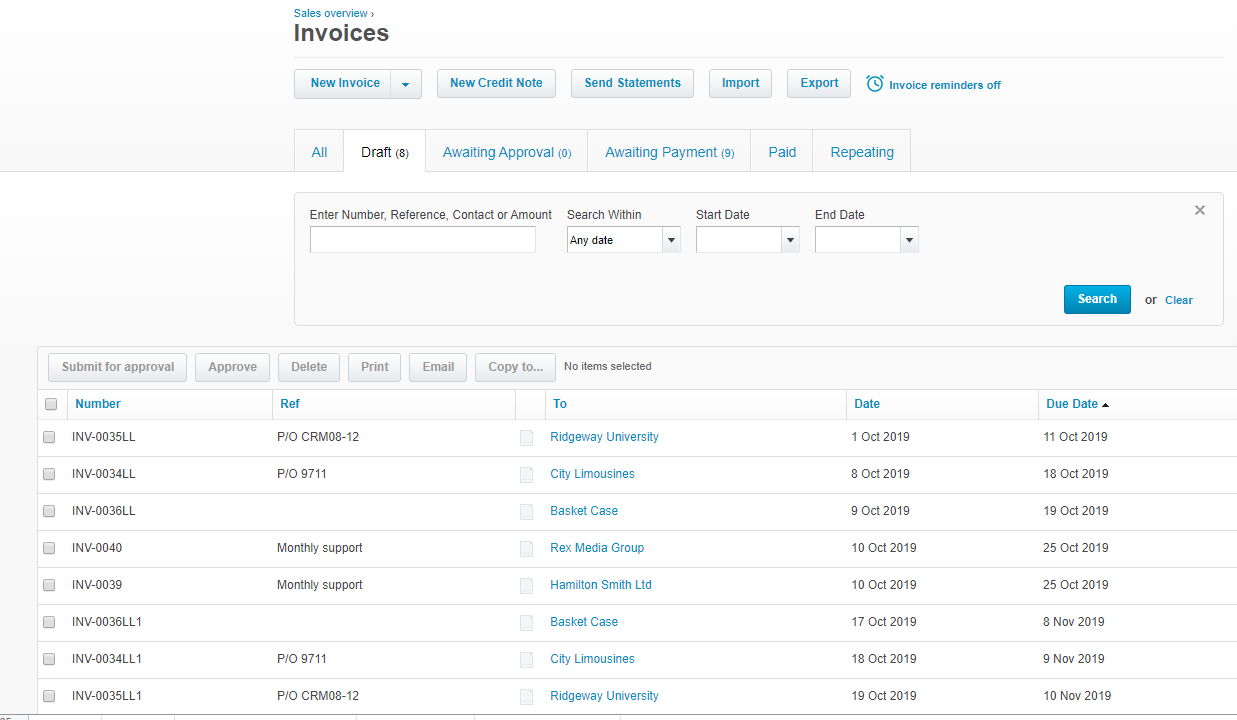
This is the updated google spreadsheet in our Invoice example and the corresponding Xero Invoice screen.

UPLOAD in One Click
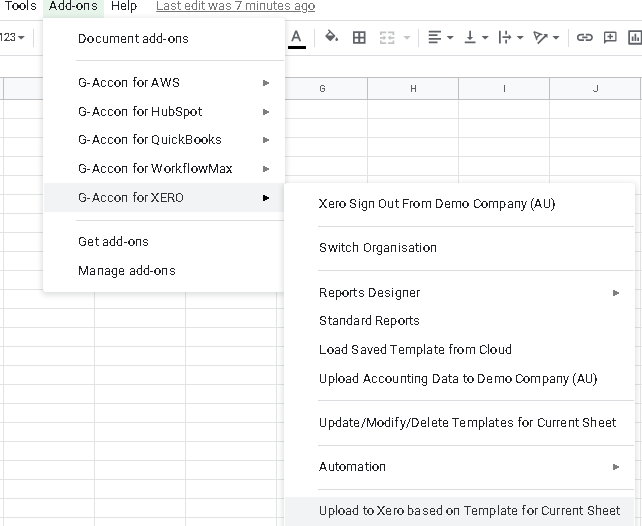
G-Accon offers the amazing ability to upload your financial data in ONE click. You just need to go to Extensions -> G-Accon for Xero -> and select Upload to Xero based on Templates for Current Sheet. As a result your data will be uploaded to Xero accounts right away without any delay.
How to modify your query and your upload template at the same place?
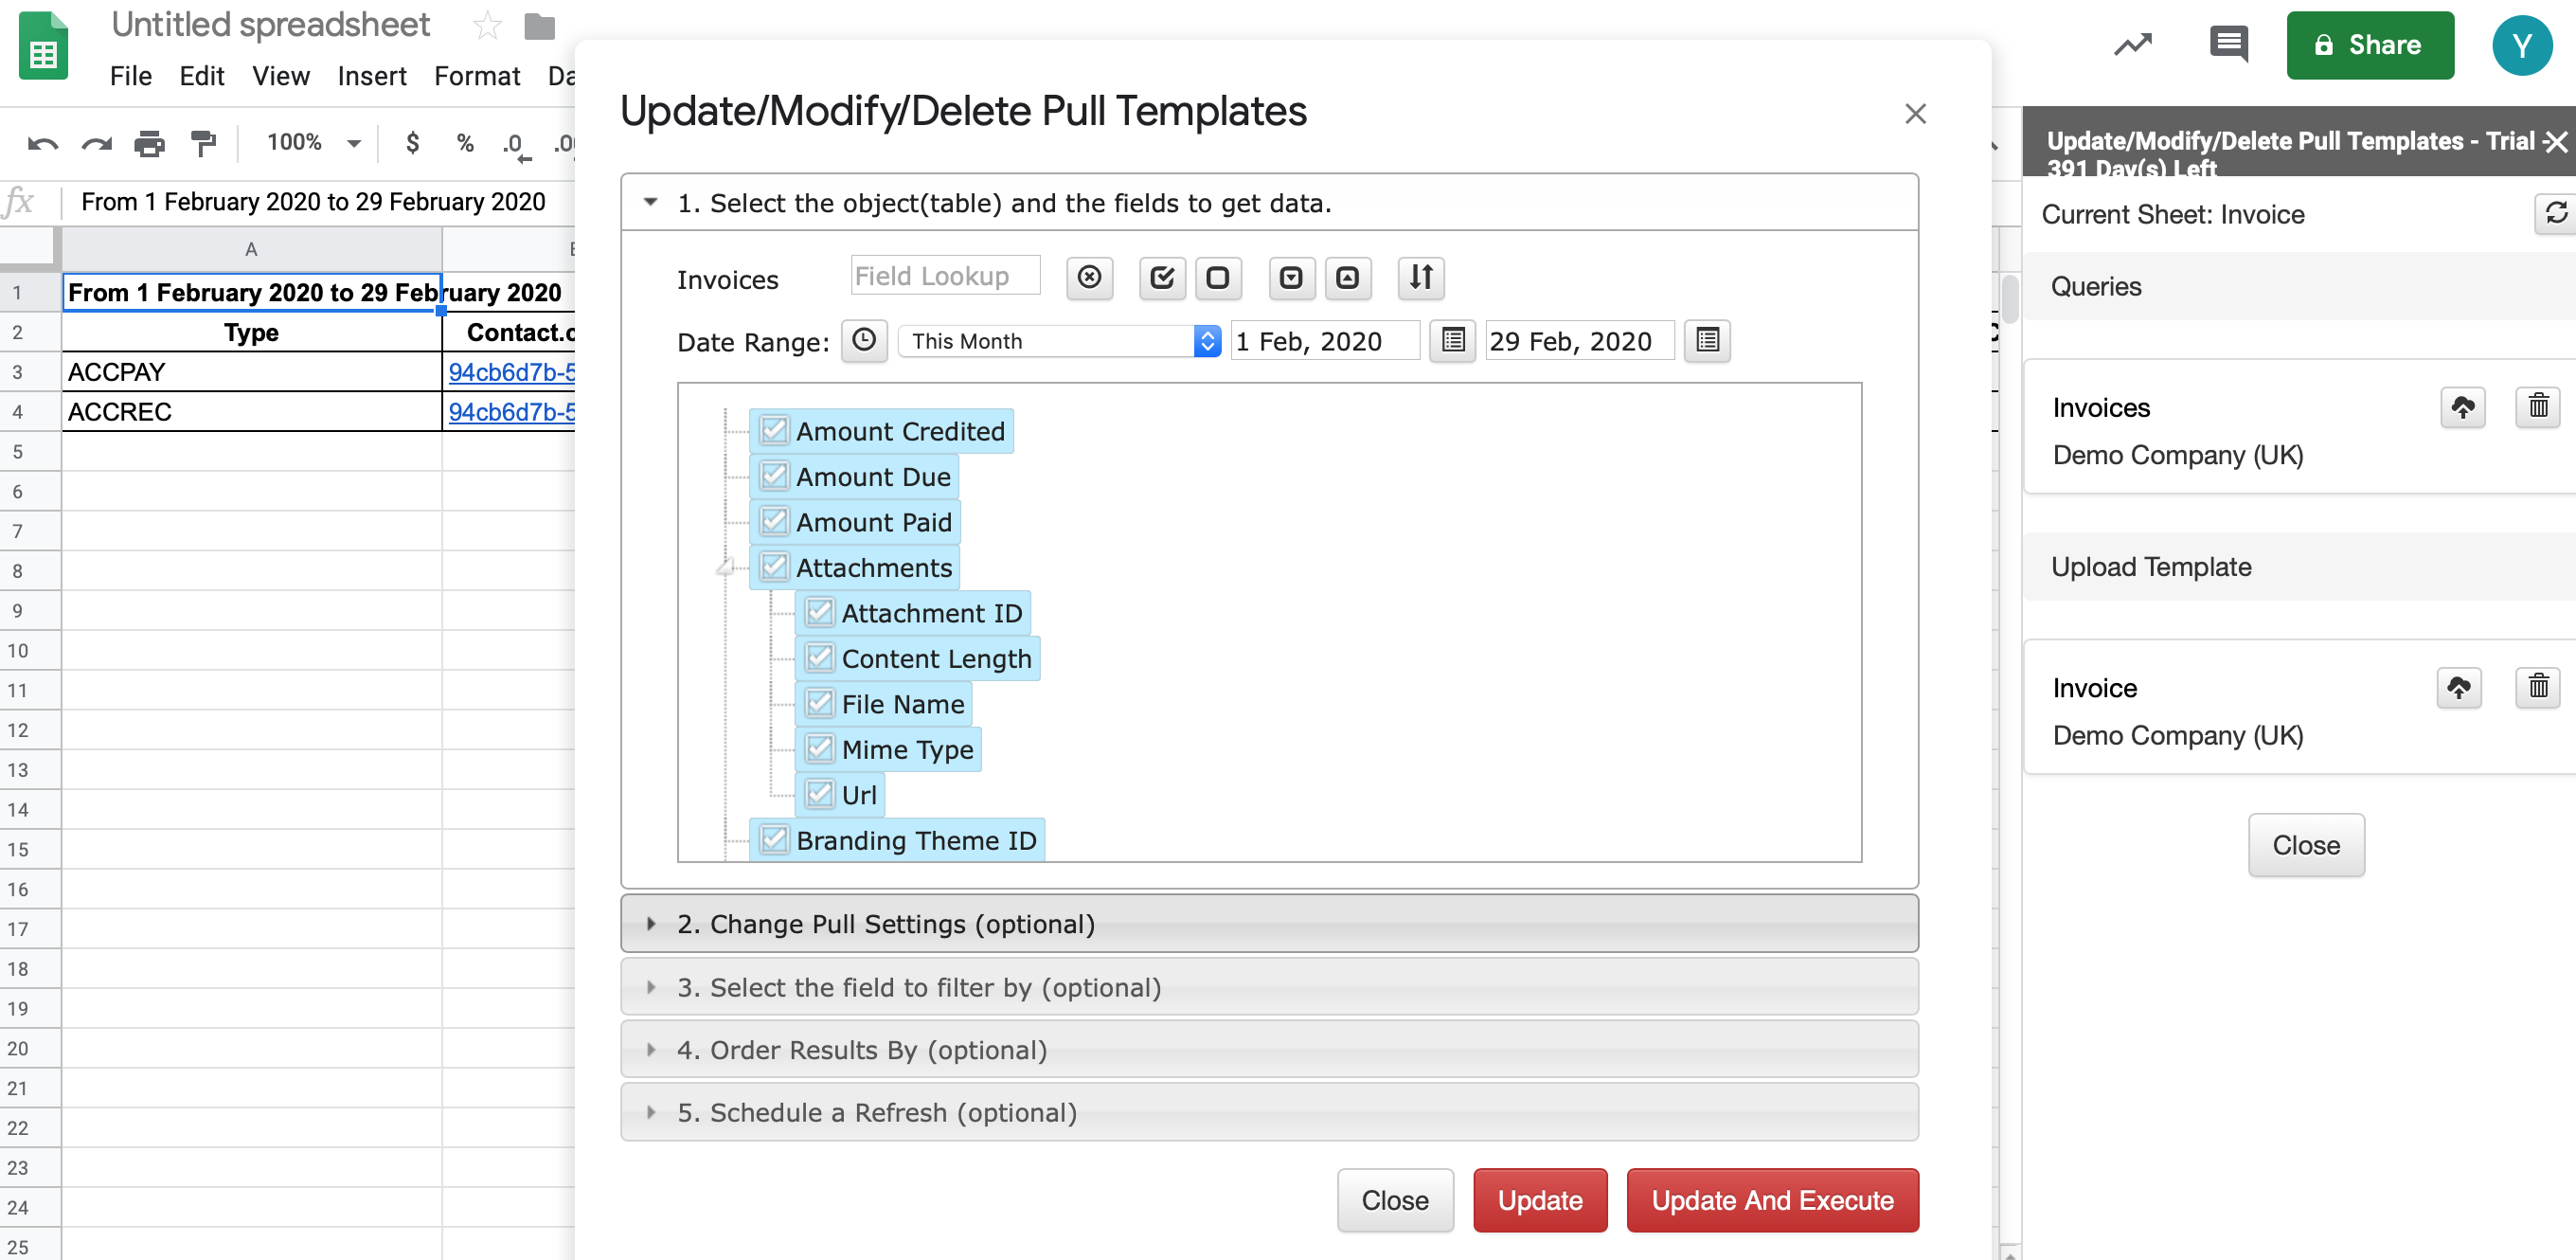
You are in the middle of the upload process and you realize you need more data to be uploaded into your Xero accounts or something needs to be modified or deleted. There is a very easy way to modify your query and your upload template. You need to select Add-ons -> G-Accon for Xero -> Update/Modify/Delete Templates for Current Sheet
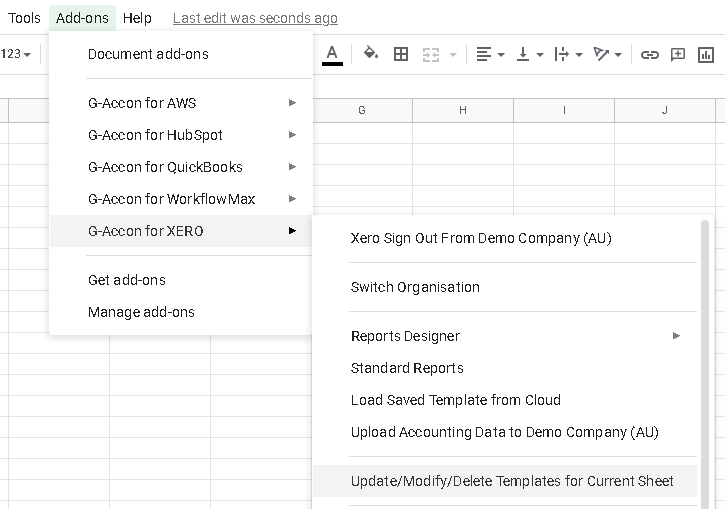
The Queries section will allow you to modify your query and Upload Template section will bring the Upload Template window where you can modify your upload process.
You also have the ability to save your templates in Cloud and reuse them if needed. See more details here.


