Release updates for G-Accon for Xero/QuickBooks
G-Accon for QuickBooks: Enhancements released in December, 2024
G-Accon for QuickBooks/Xero: Enhancements released in December, 2024
Watch latest videos in G-Accon Integration channel
Consolidated Reports changes: Group Rows By Accounts, Accounts Rollups, and enhanced Consolidated Reports design
✅ Group Rows By Accounts
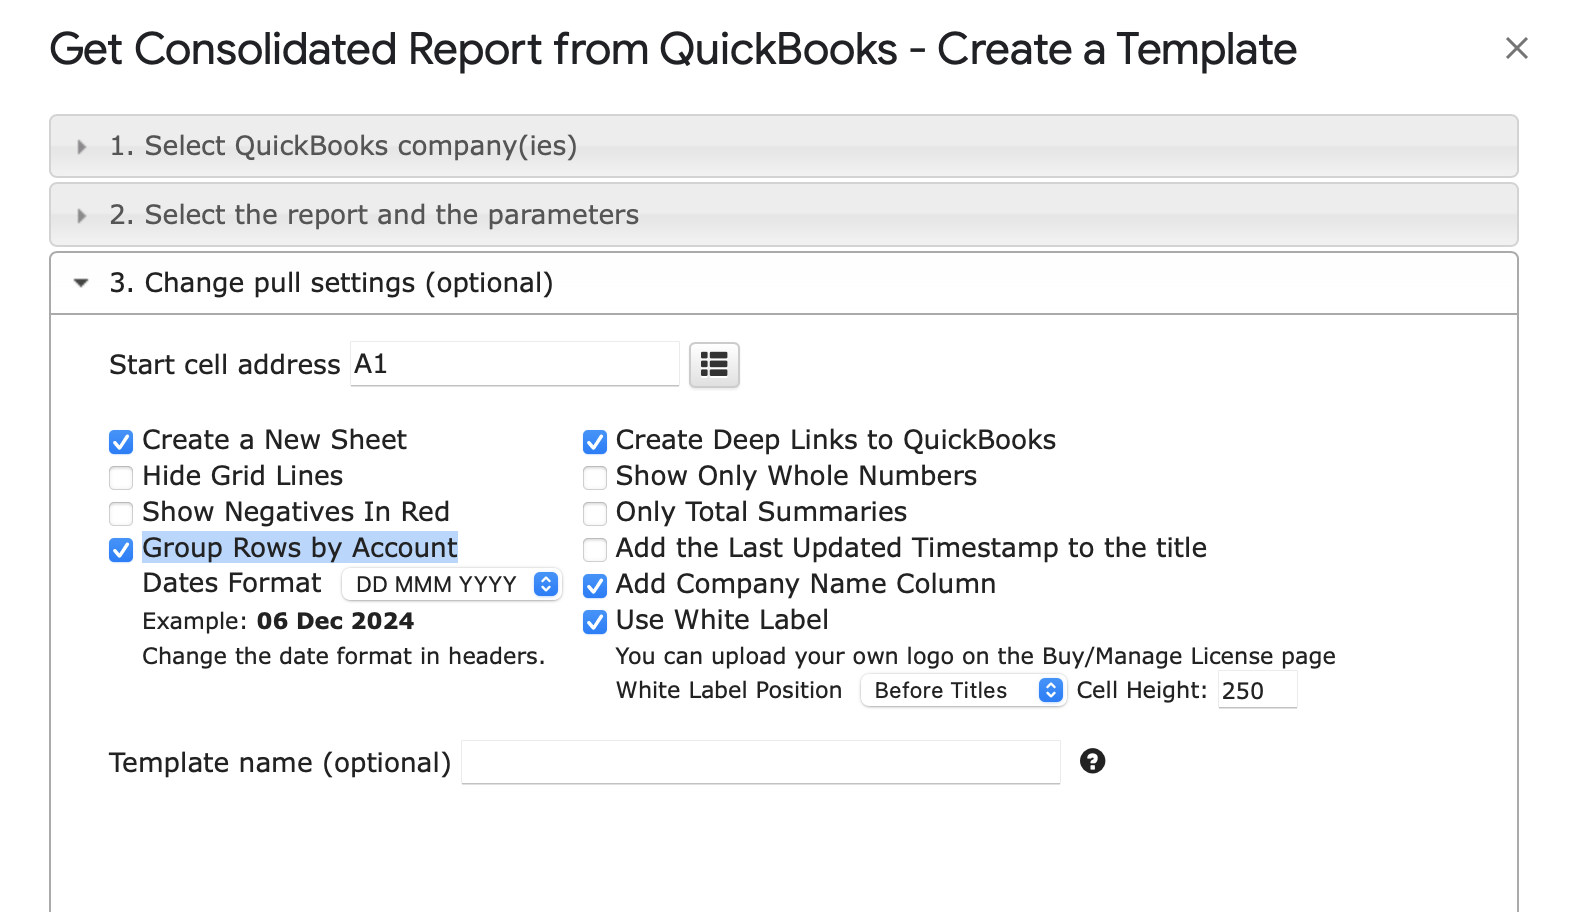
To ensure that G-Accon consolidates accounts with the same number and name into a single transaction when generating the consolidated reports, you need to select the "Group Rows By Accounts" checkbox under the Change Pull Settings option. This will automatically combine accounts with identical numbers and names into one transaction.
✅ Accounts Rollup feature for the Consolidated Reports
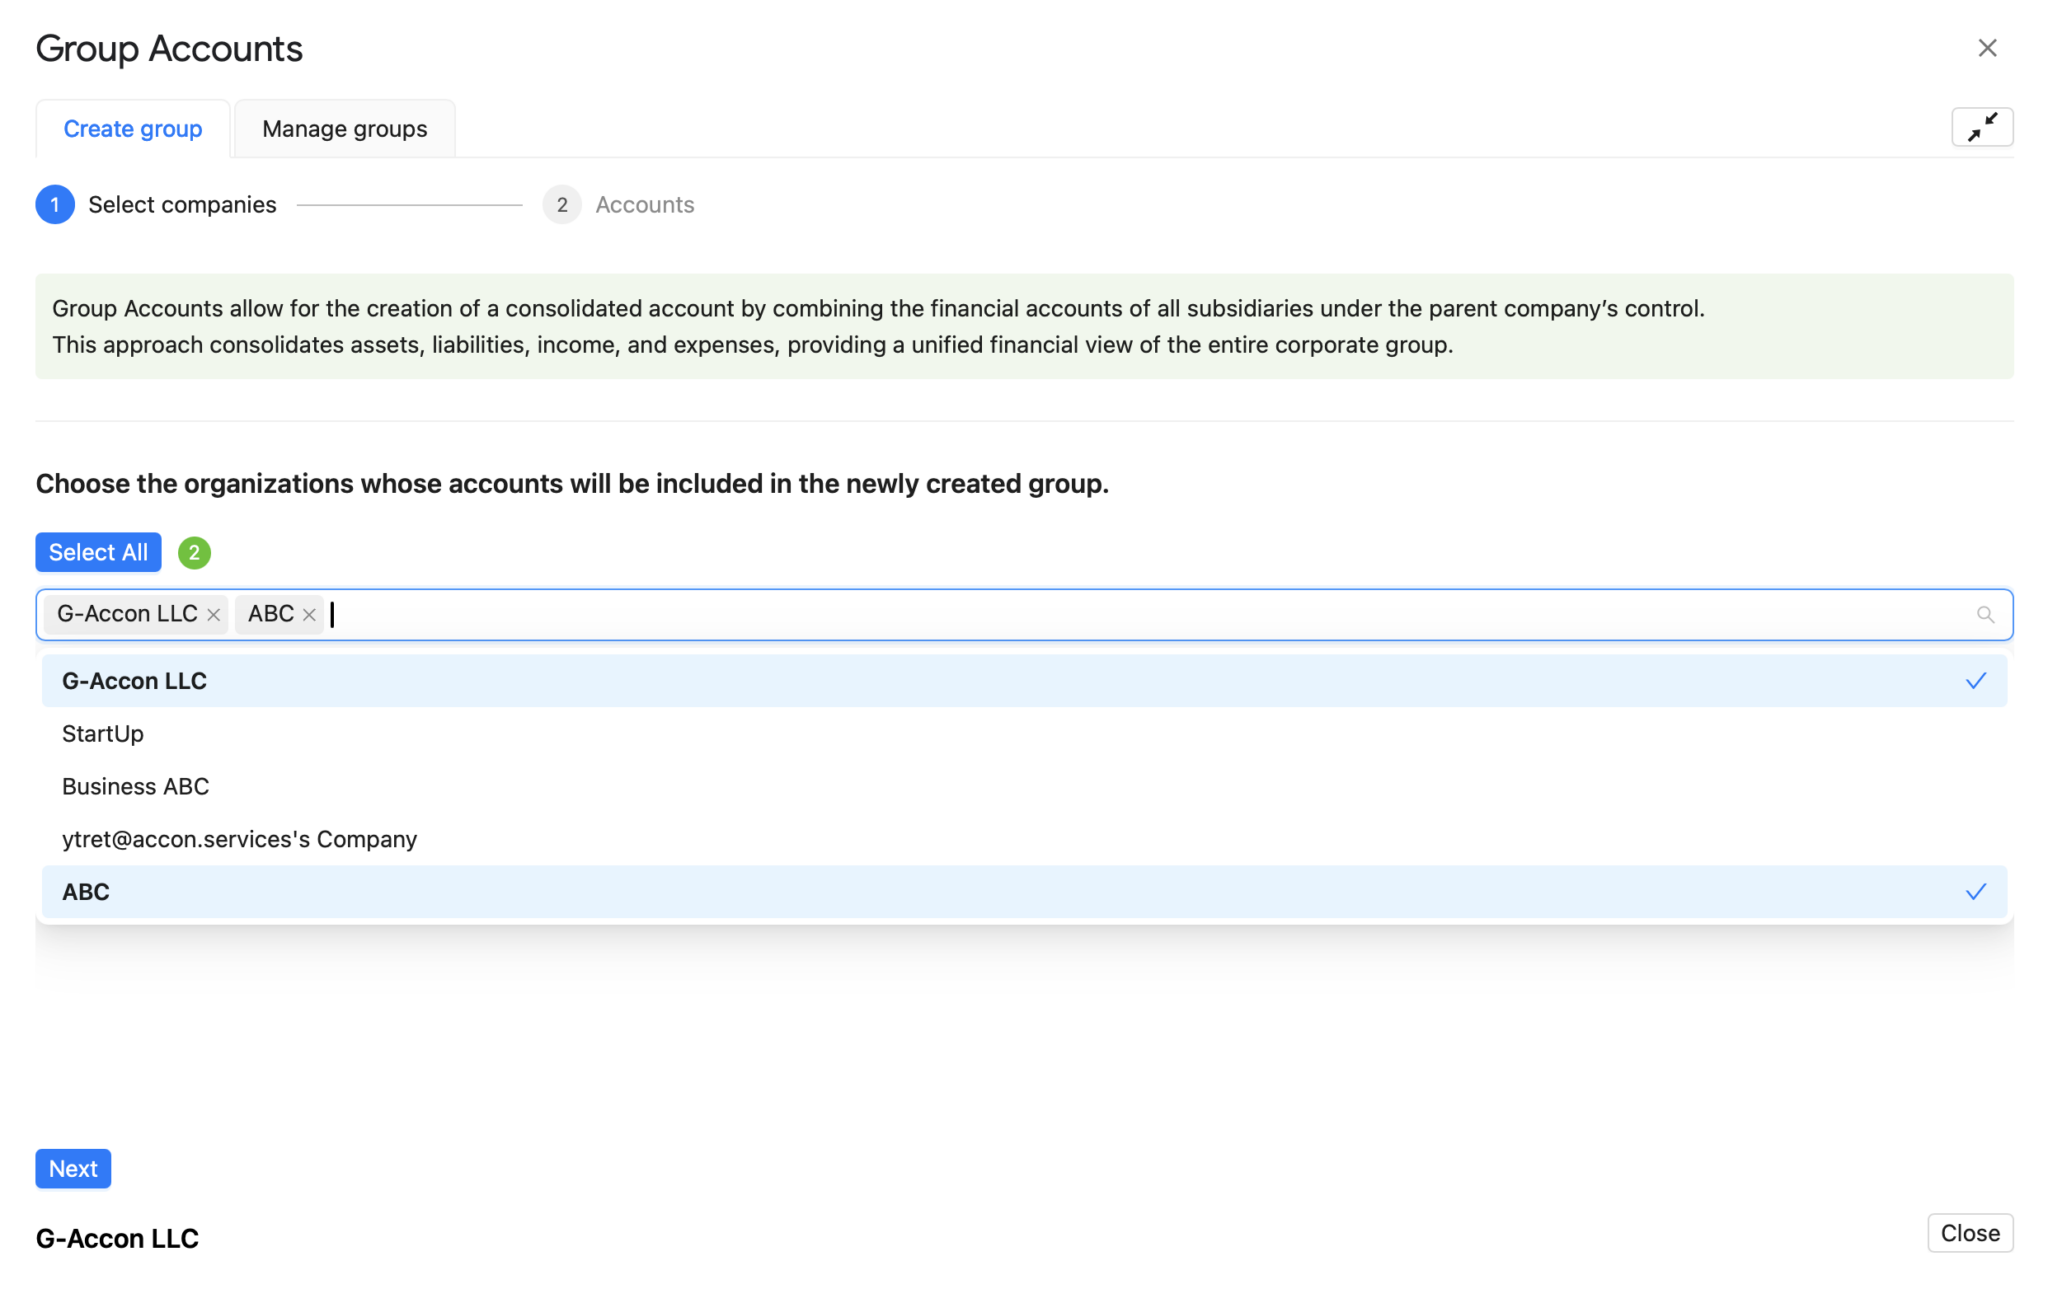
Group Accounts feature allows for the creation of a consolidated account by combining the financial accounts of all subsidiaries under the parent company’s control.
This approach consolidates assets, liabilities, income, and expenses, providing a unified financial view of the entire corporate group. This process is called Accounts Rollup.
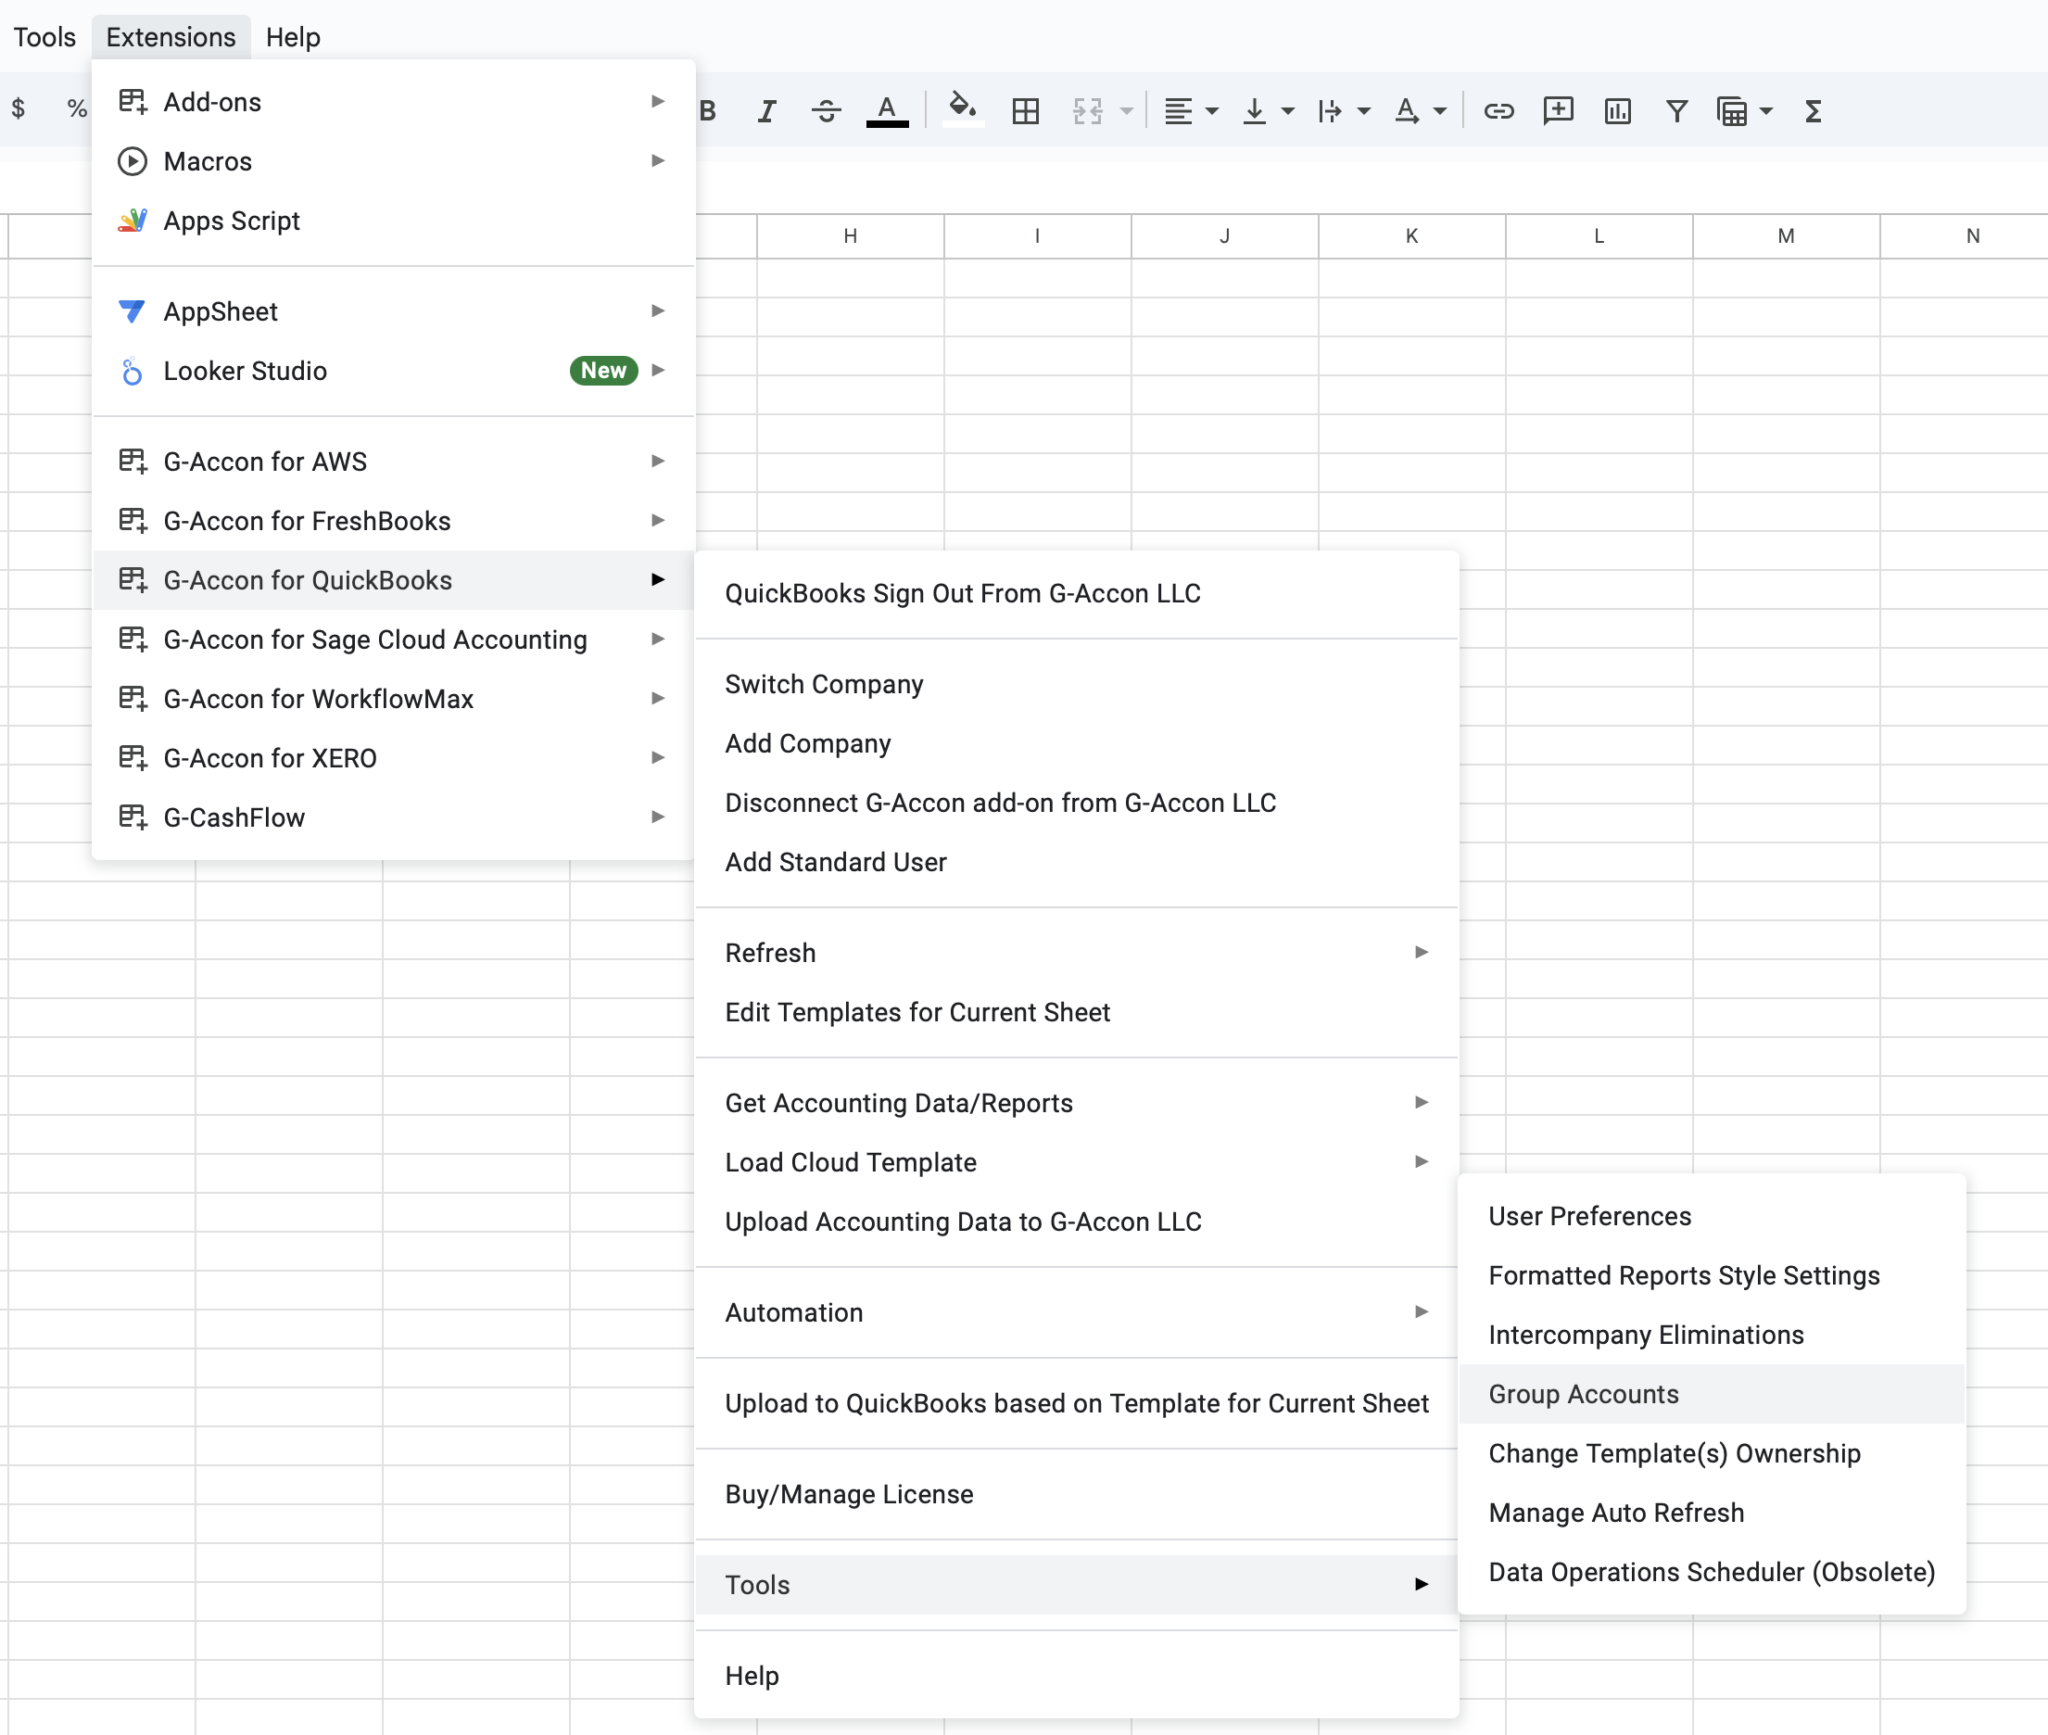
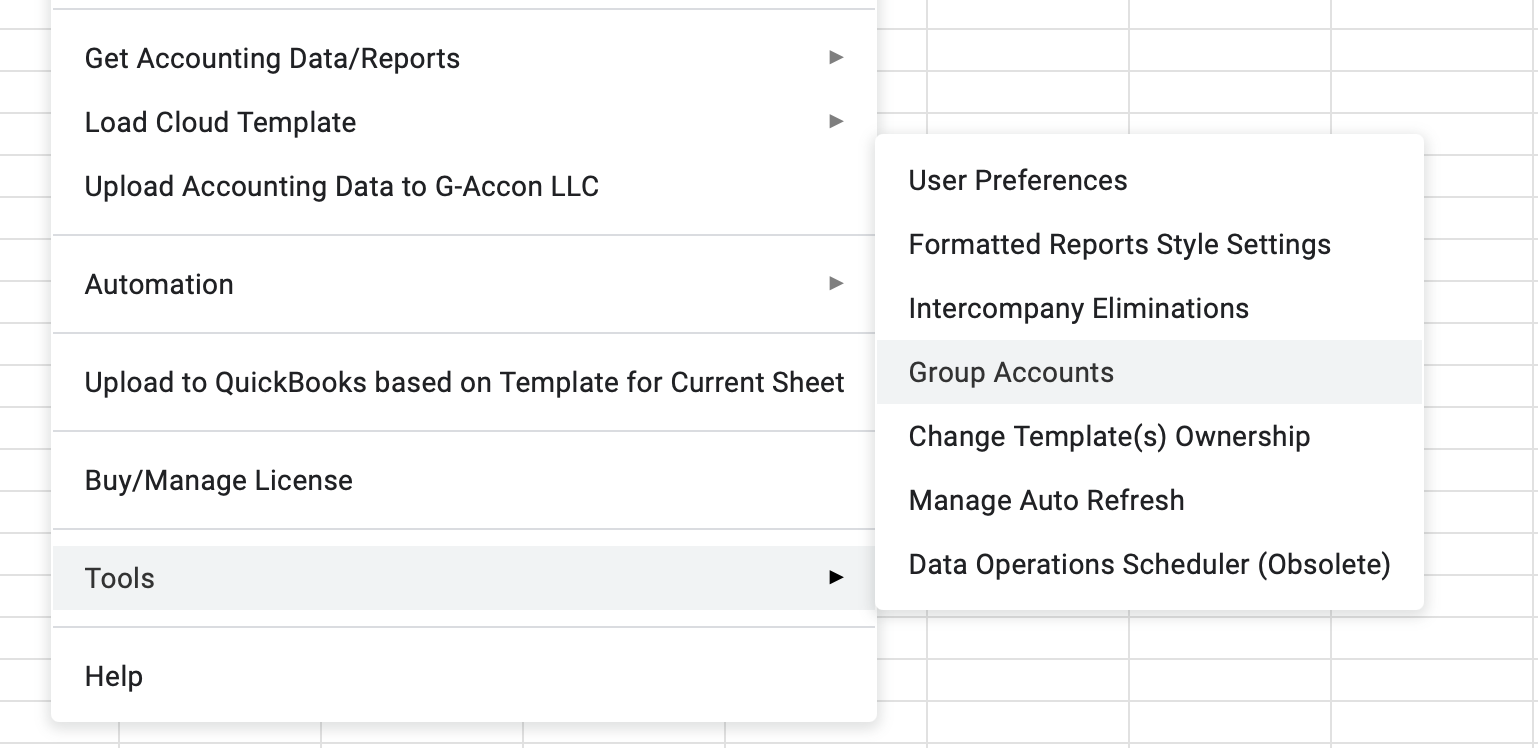
The easiest way to create a group of accounts is by selecting G-Accon for QuickBooks → Tools → Group Accounts. This streamlined process allows you to efficiently group accounts for better organization and reporting.
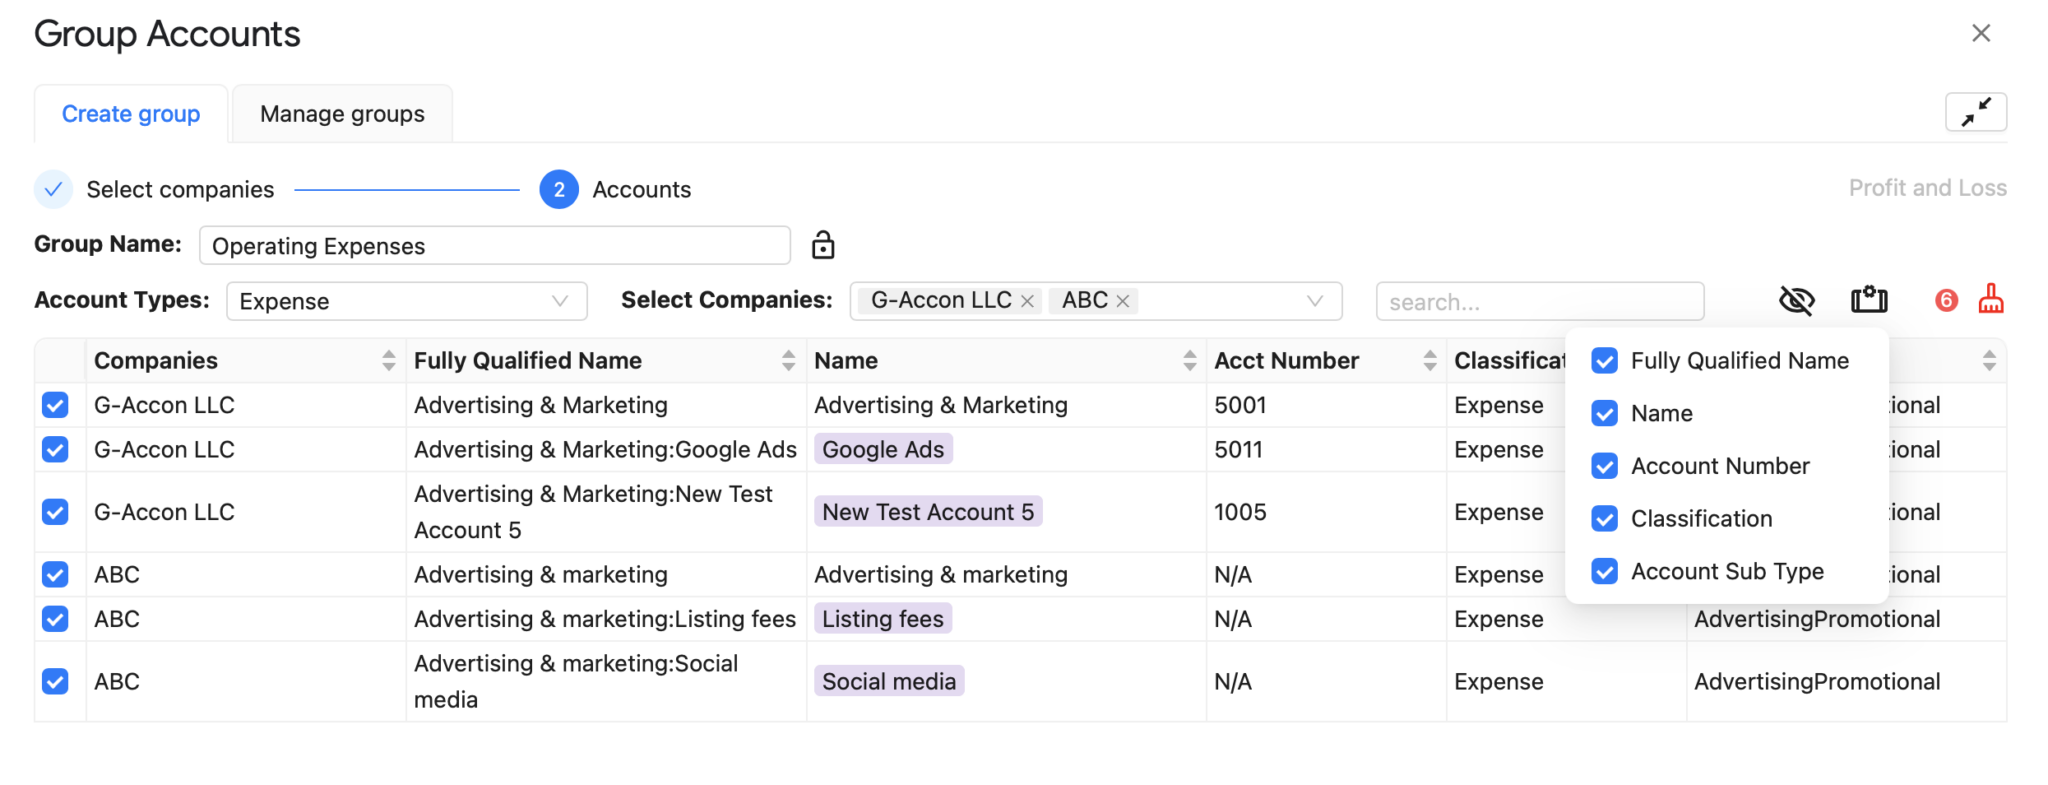
The first step in creating a group of accounts is selecting the organizations:
Next, create a group name and start selecting the accounts that need to be included in this group. Once completed, this grouped structure can be used for streamlined reporting and analysis.
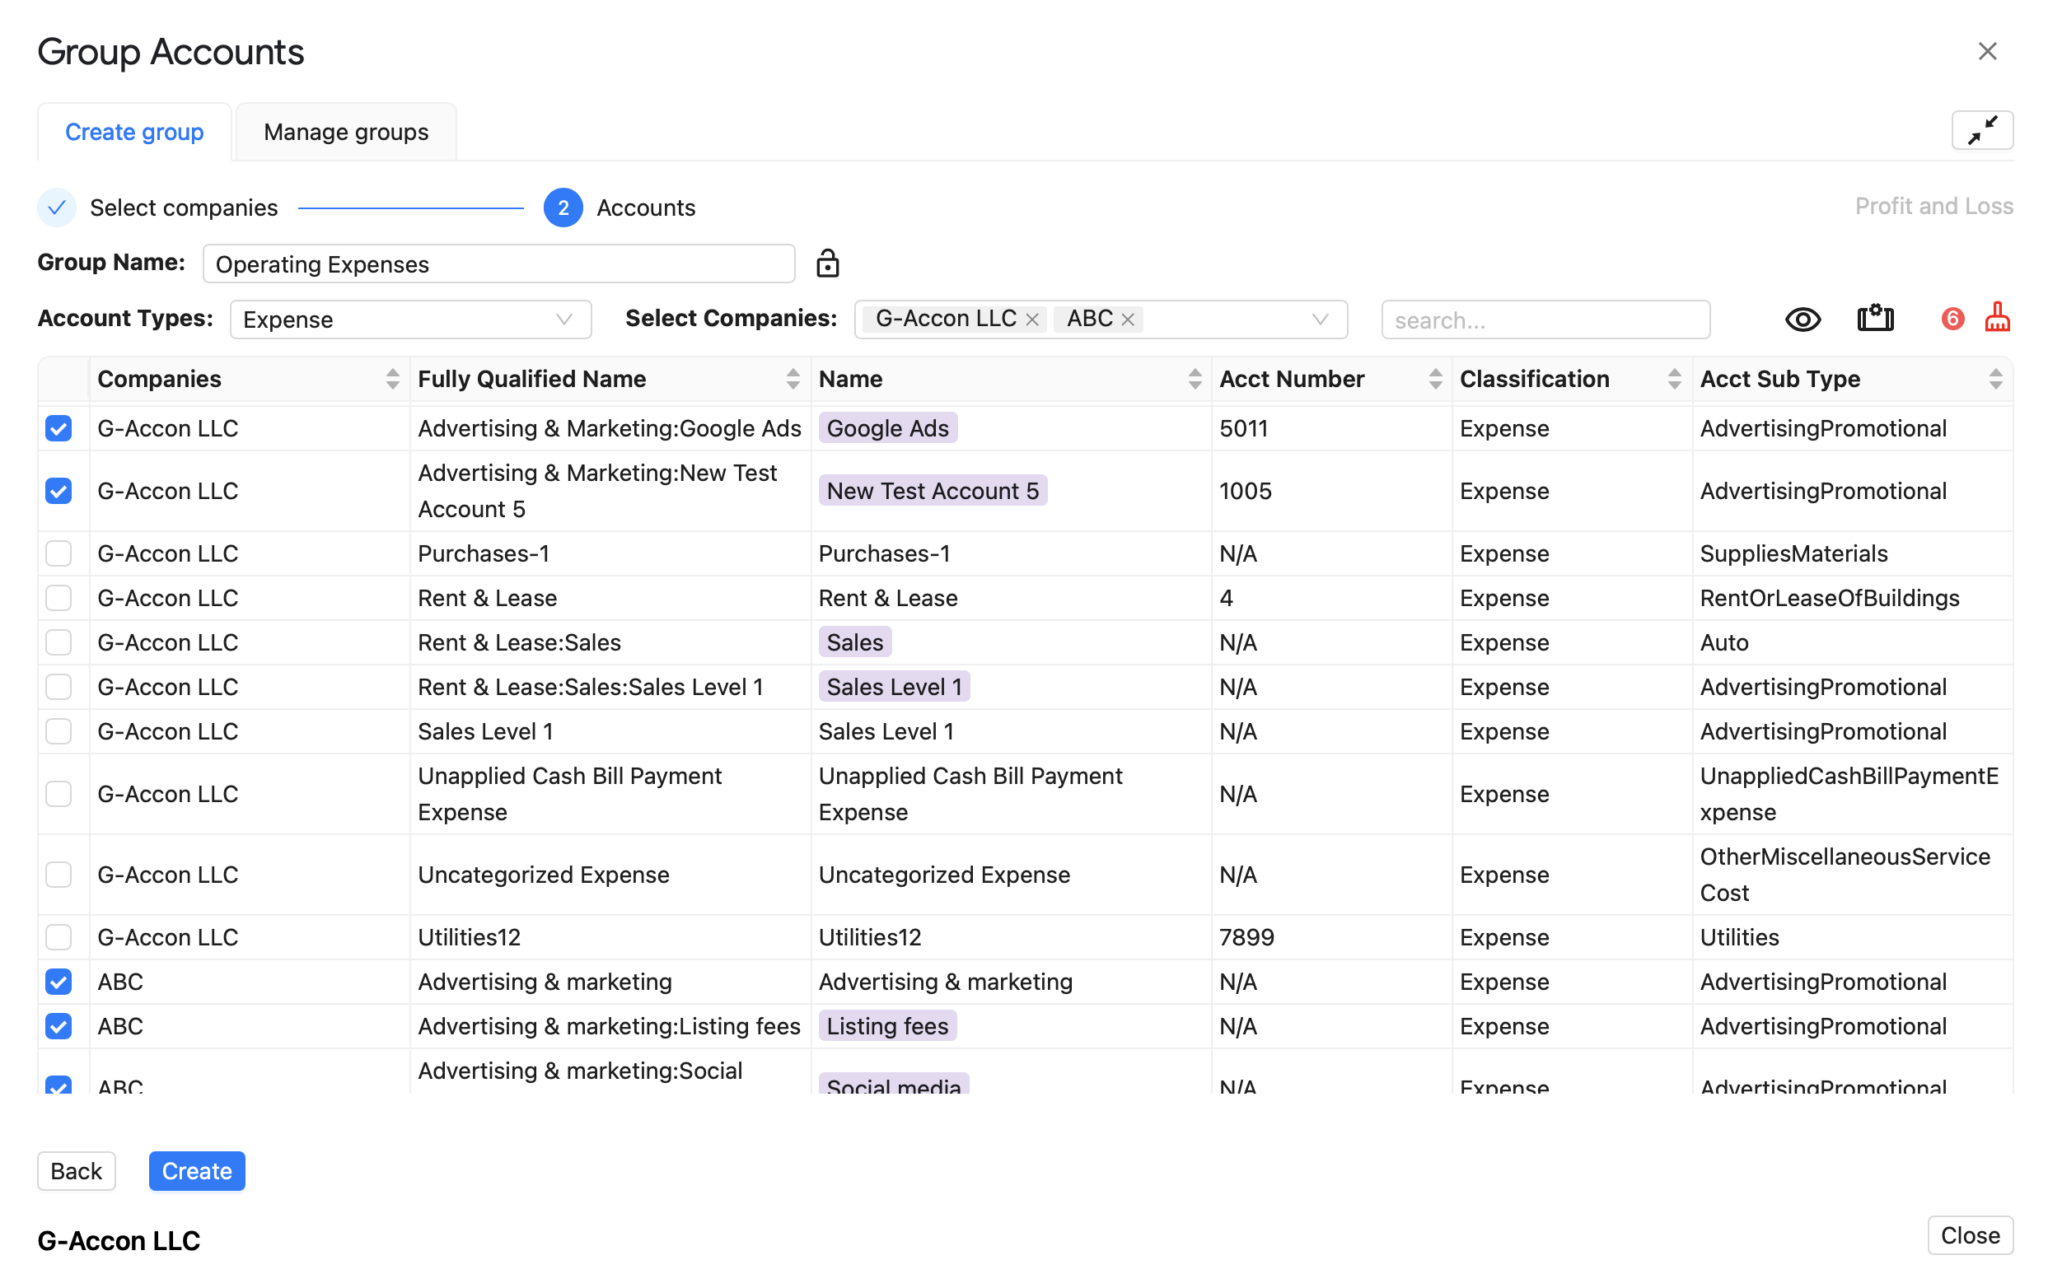
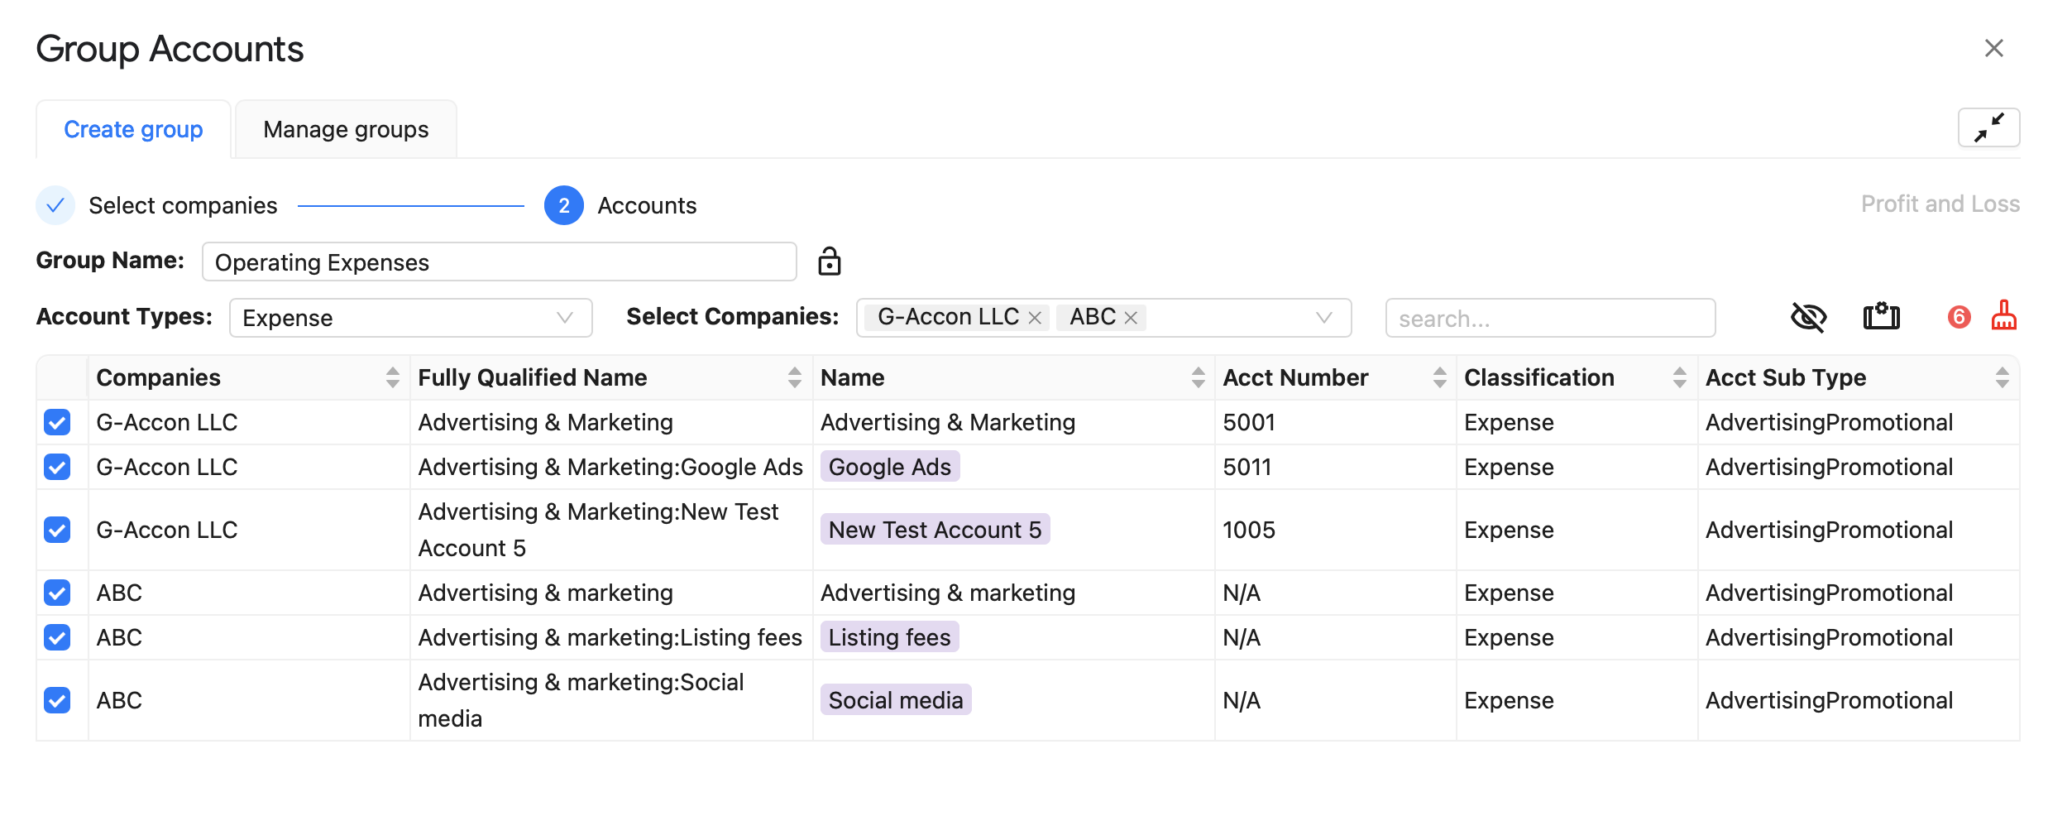
By selecting the icons on the upper-right corner, you can either view the selected accounts, display needed attributes on the screen or clear the selection. This feature provides flexibility to review or reset your account grouping choices as needed.

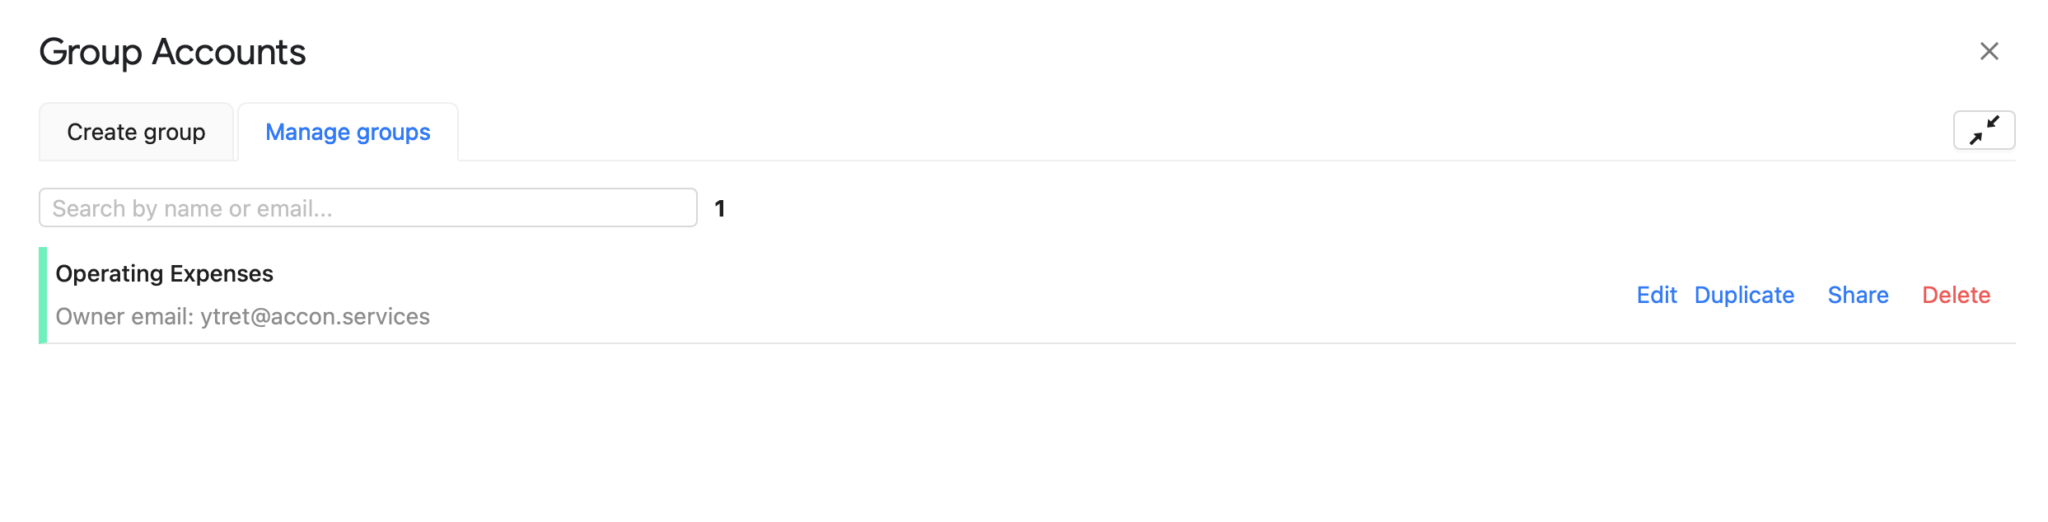
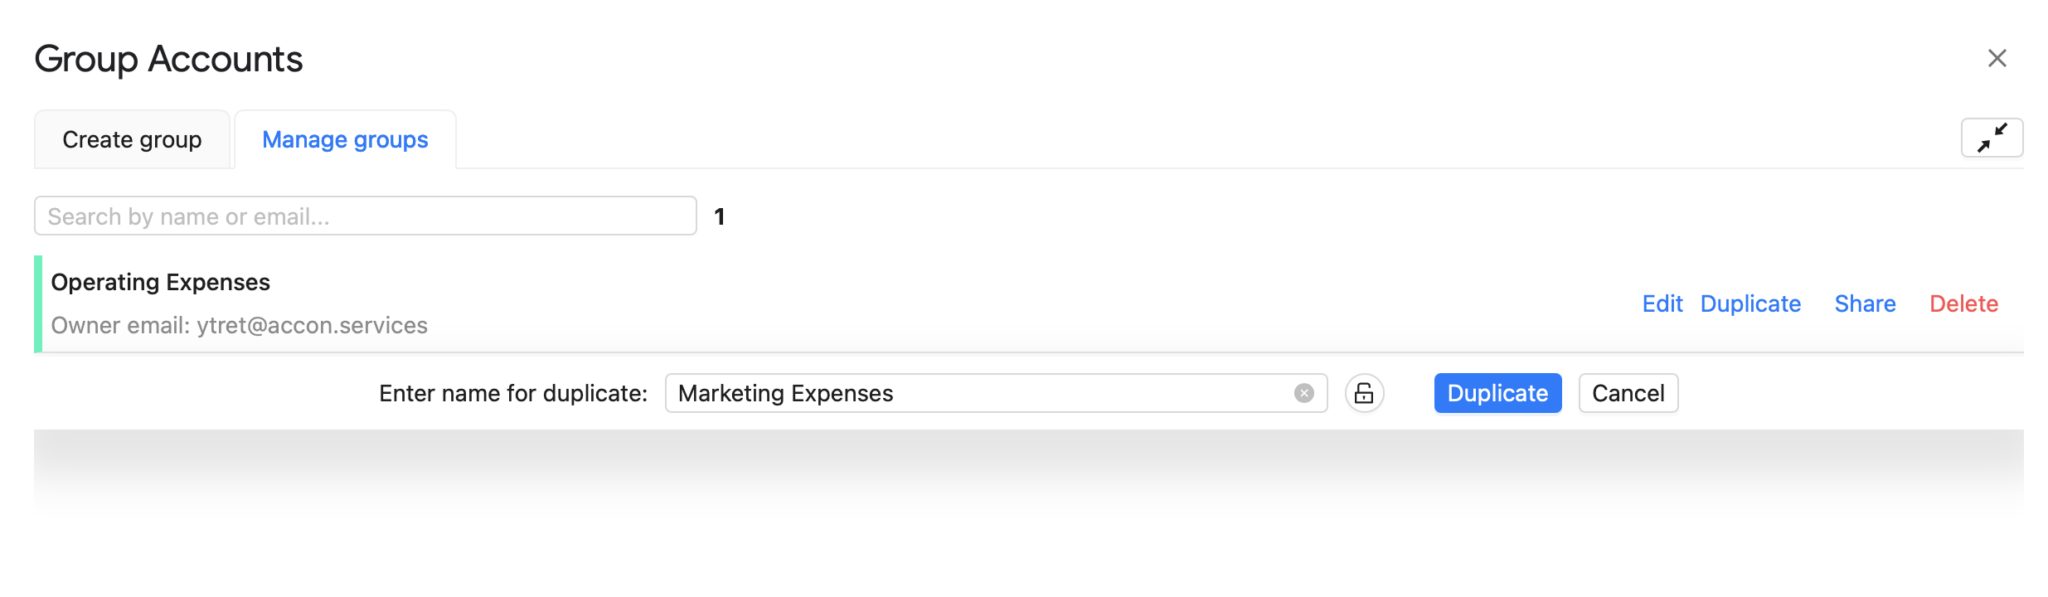
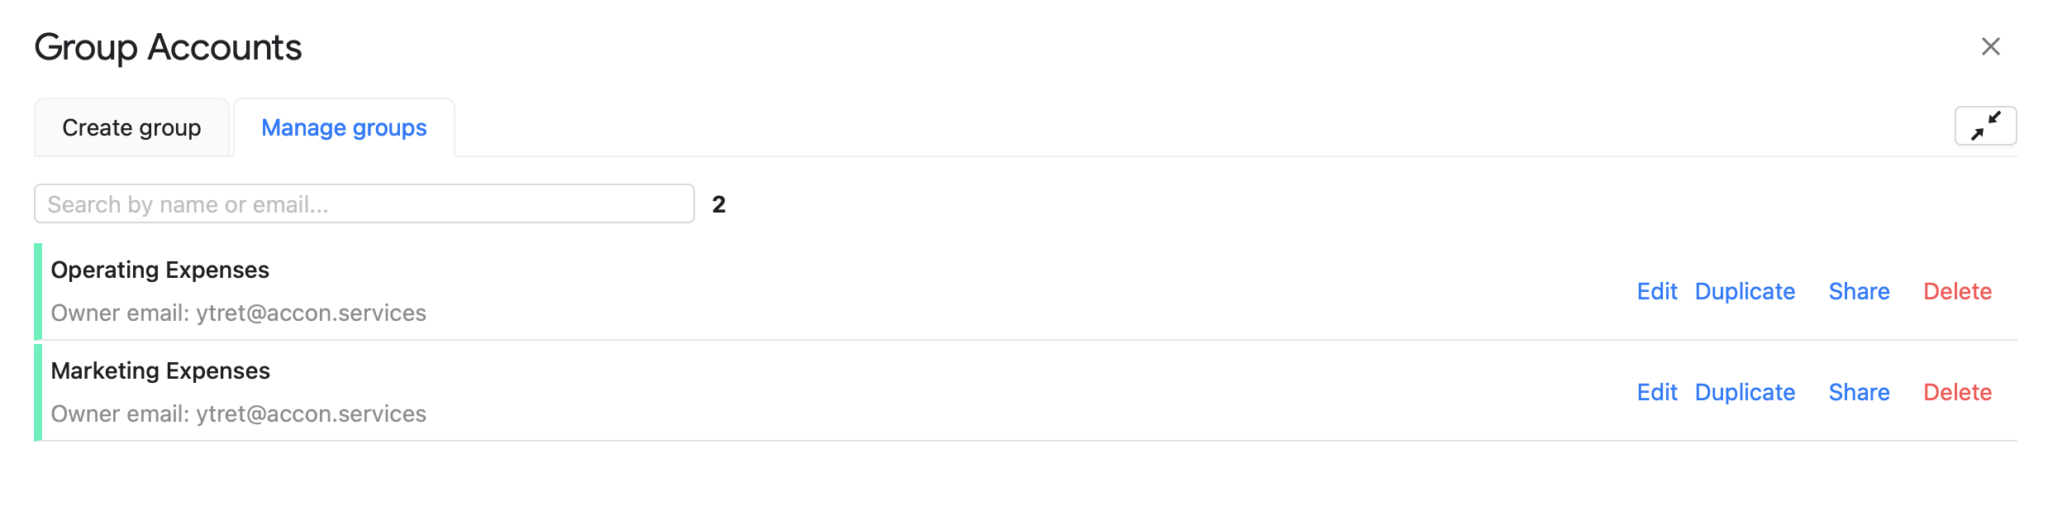
To manage a group of accounts:
These options provide flexibility to organize and adjust your account groups as needed.
Groups of accounts can also be created directly when generating a Consolidated Report under the Consolidated Report section. This allows you to streamline the grouping process as part of the report generation workflow.

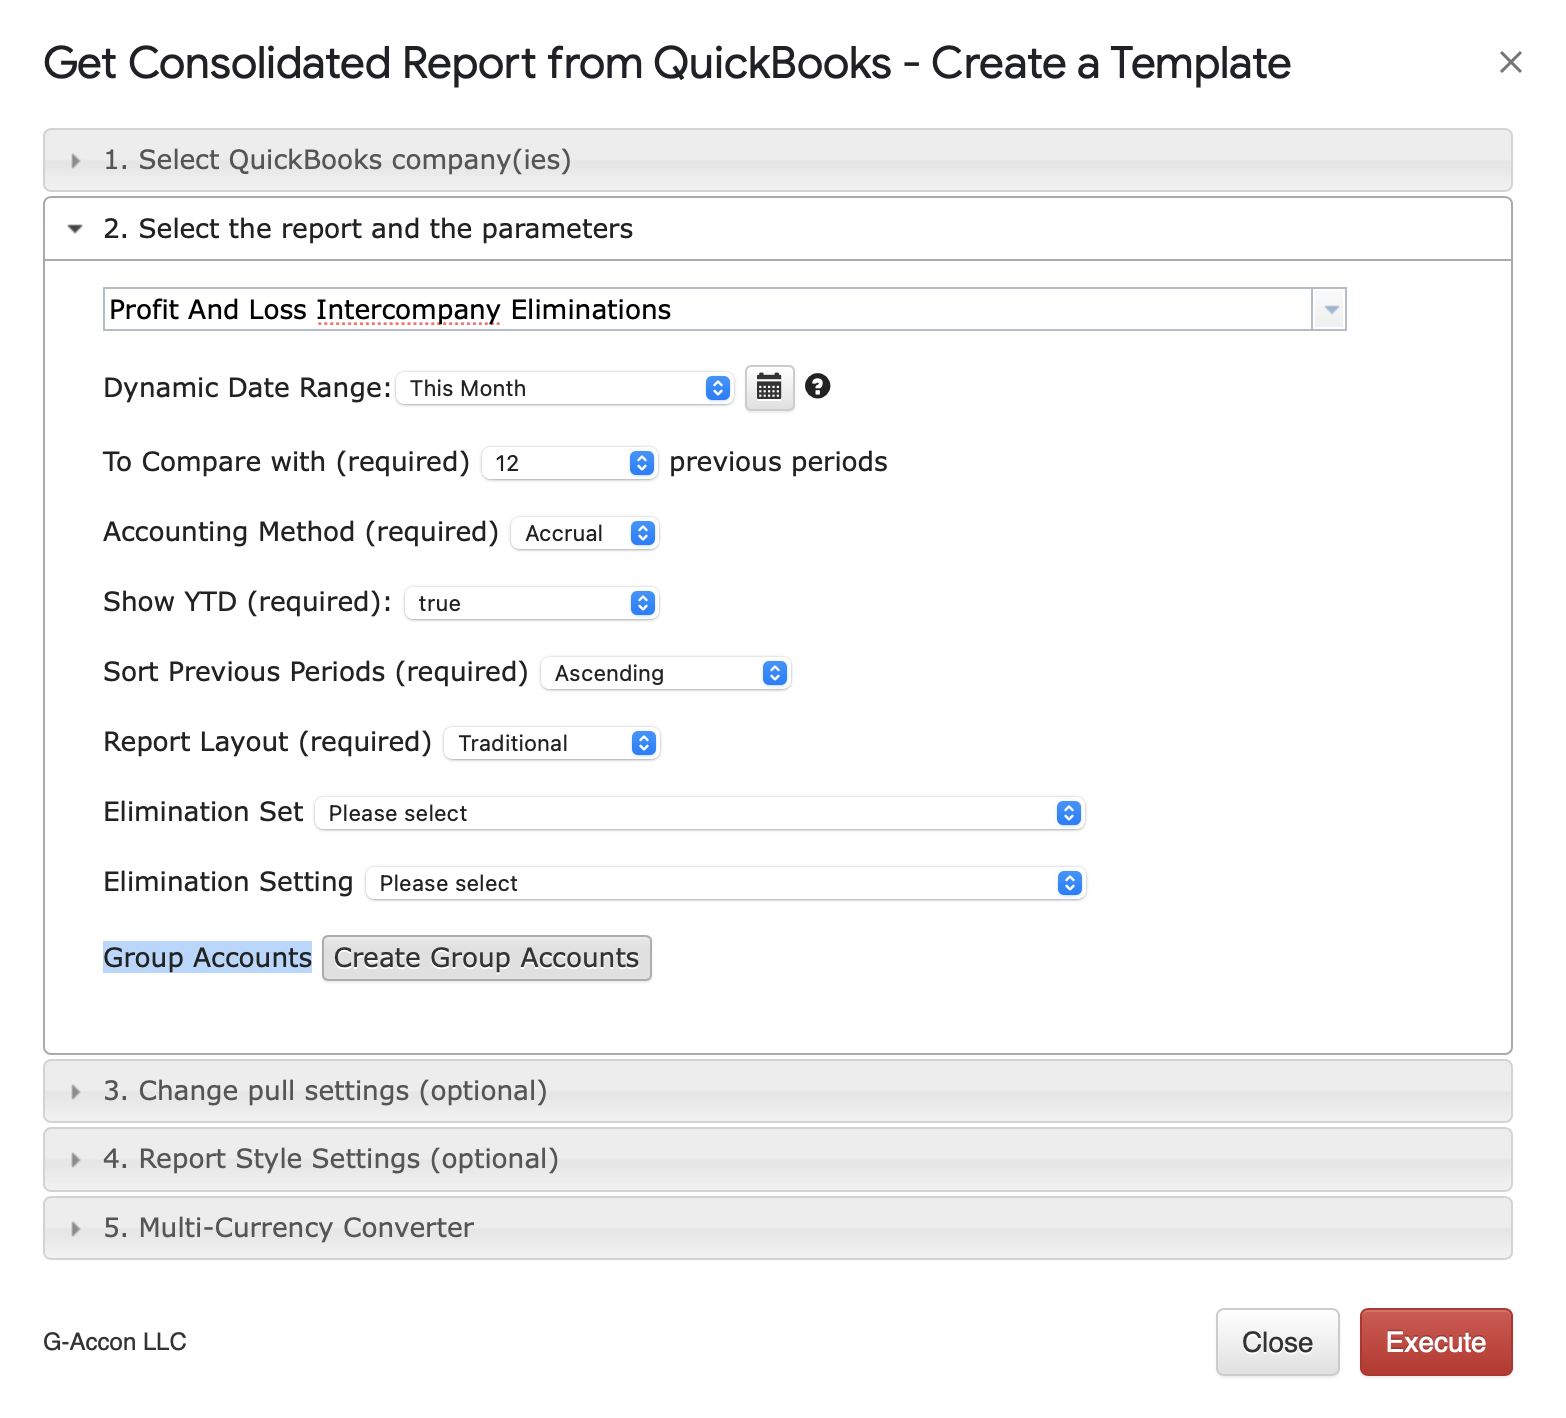
✅ Consolidated Reports generation with Accounts Rollups
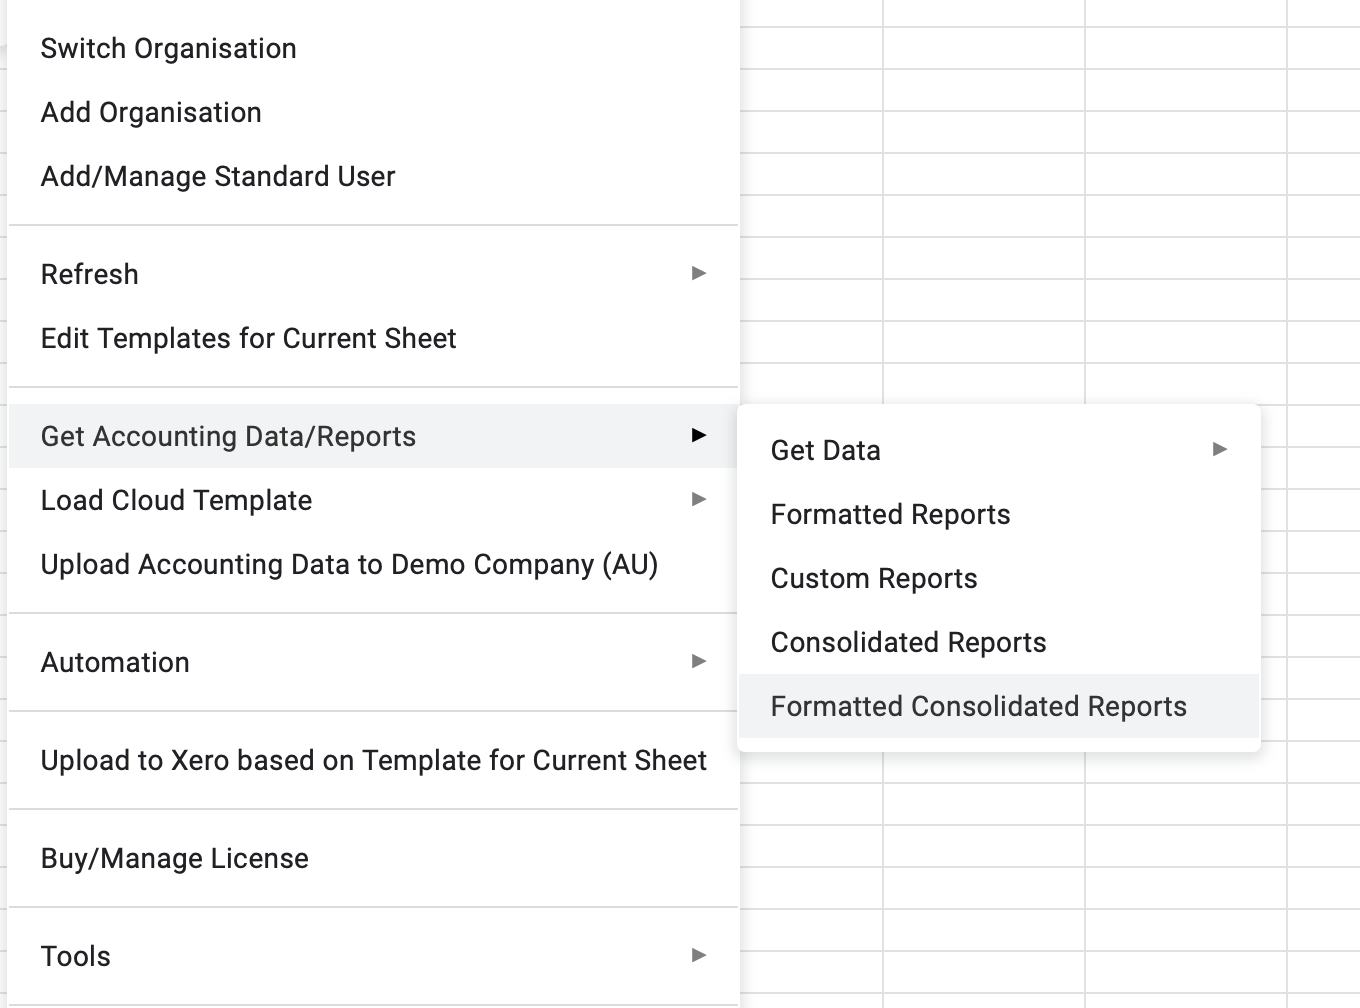
How to Generate Formatted Consolidated Report with or without the Intercompany Eliminations and with White Label (Customer Logo) and with the Group Accounts
Step 1. Create an Intercompany Elimination Set
The primary objective of intercompany elimination in consolidated financial statements is to present a fair and accurate view of the entire economic entity.
These transactions occur between entities within the same consolidated group and involve the exchange of goods, services, or assets. By eliminating them, companies avoid double counting and the distortion of the consolidated financial statements.
A step-by-step guide on creating intercompany elimination rules
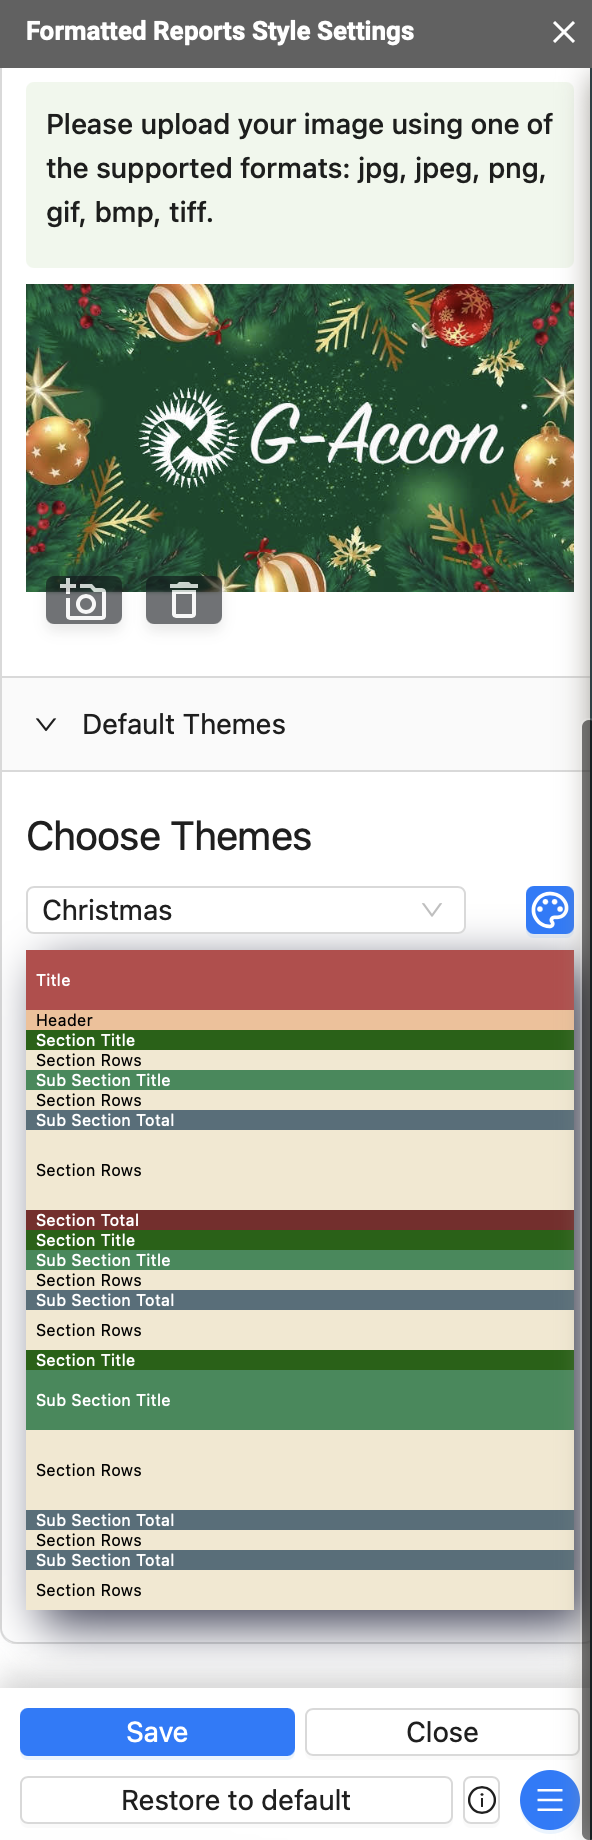
Step 2. Add White Label (Customer Logo) to Consolidated Report
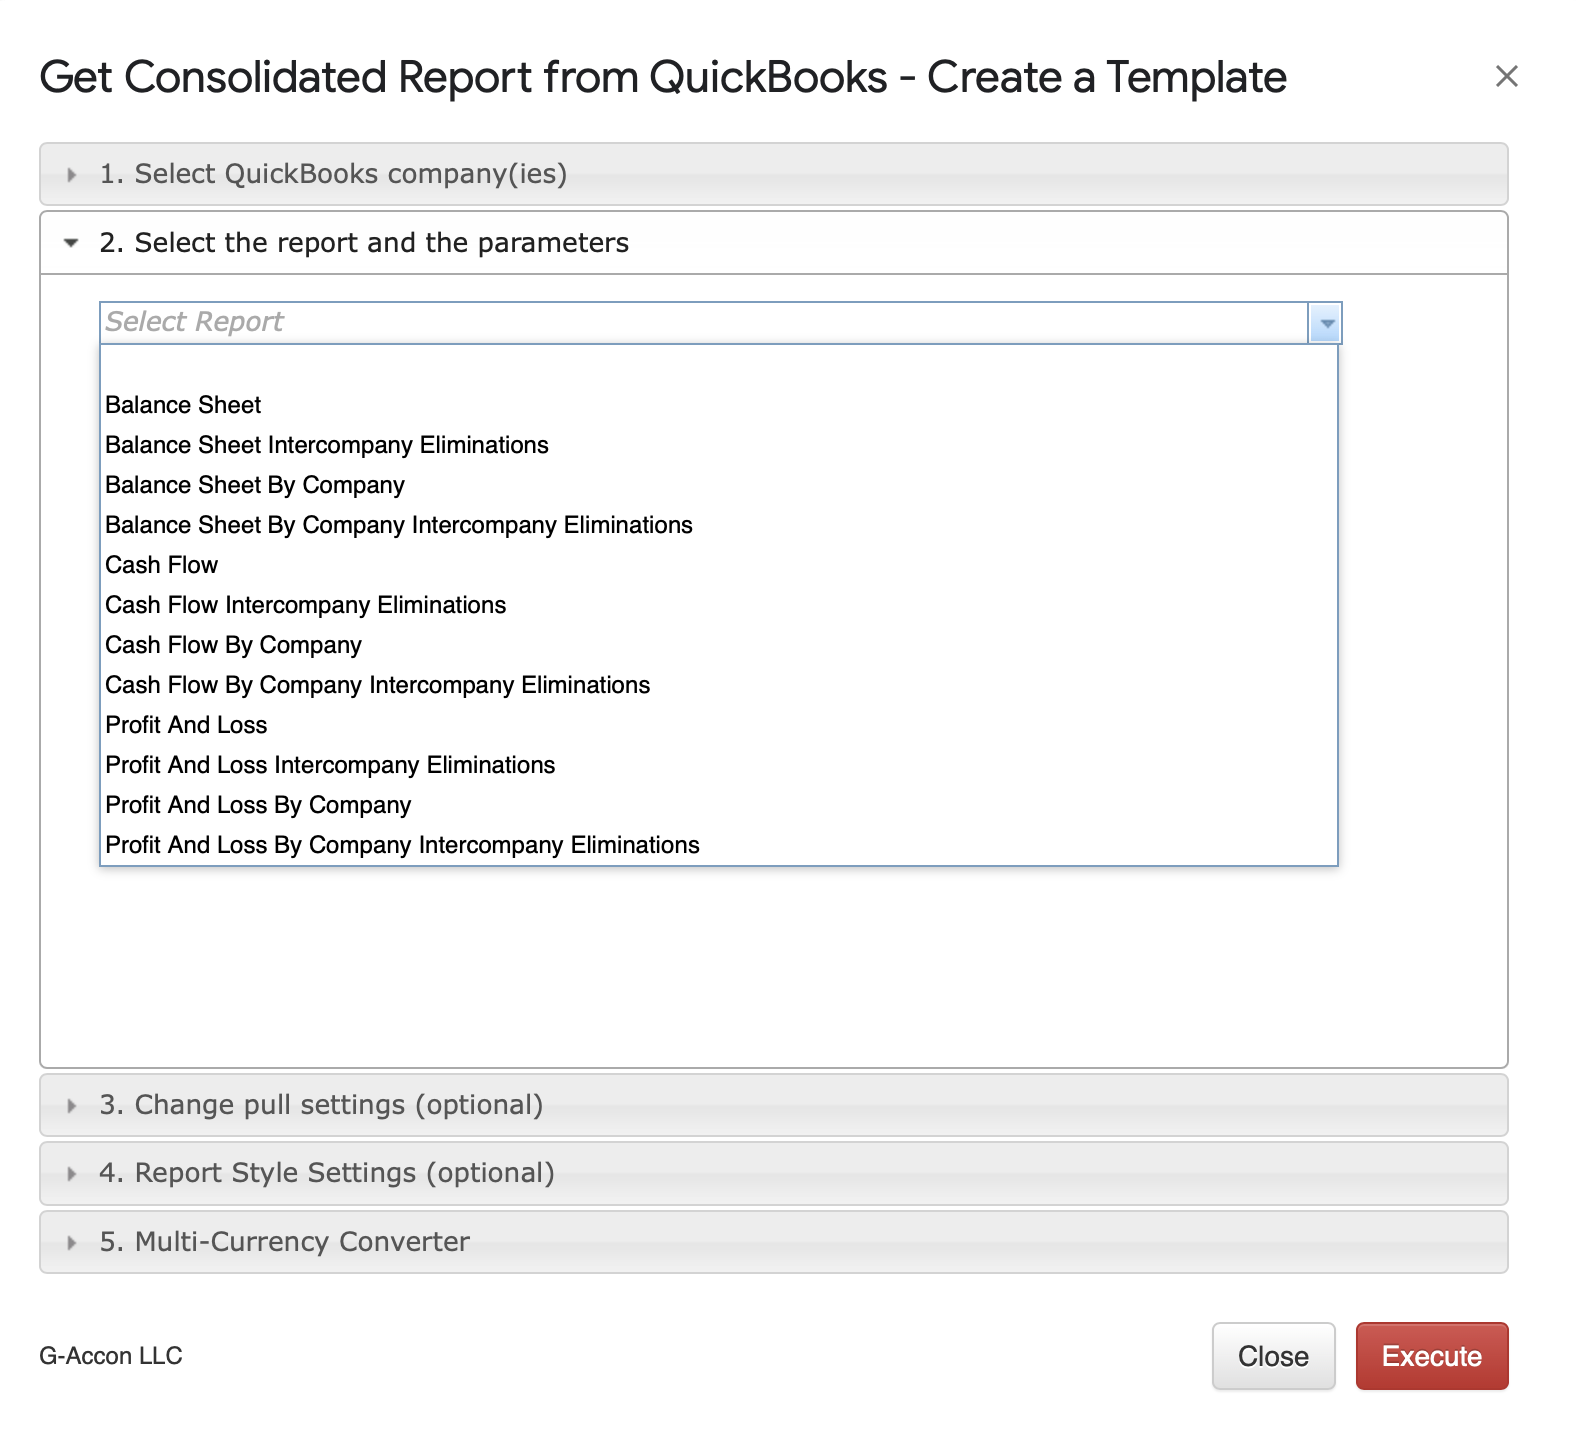
Step 3. Generate Formatted Consolidation Report with Intercompany Eliminations and White Label (Customer Logo)
☑ Balance Sheet
☑ Balance Sheet with Intercompany Eliminations
☑ Balance Sheet By Company
☑ Balance Sheet By Company with Intercompany Eliminations
☑ Cash Flow
☑ Cash Flow with Intercompany Eliminations
☑ Cash Flow By Company
☑ Cash Flow By Company with Intercompany Eliminations
☑ Profit and Loss
☑ Profit and Loss with Intercompany Eliminations
☑ Profit and Loss By Company
☑ Profit and Loss By Company with Intercompany Eliminations
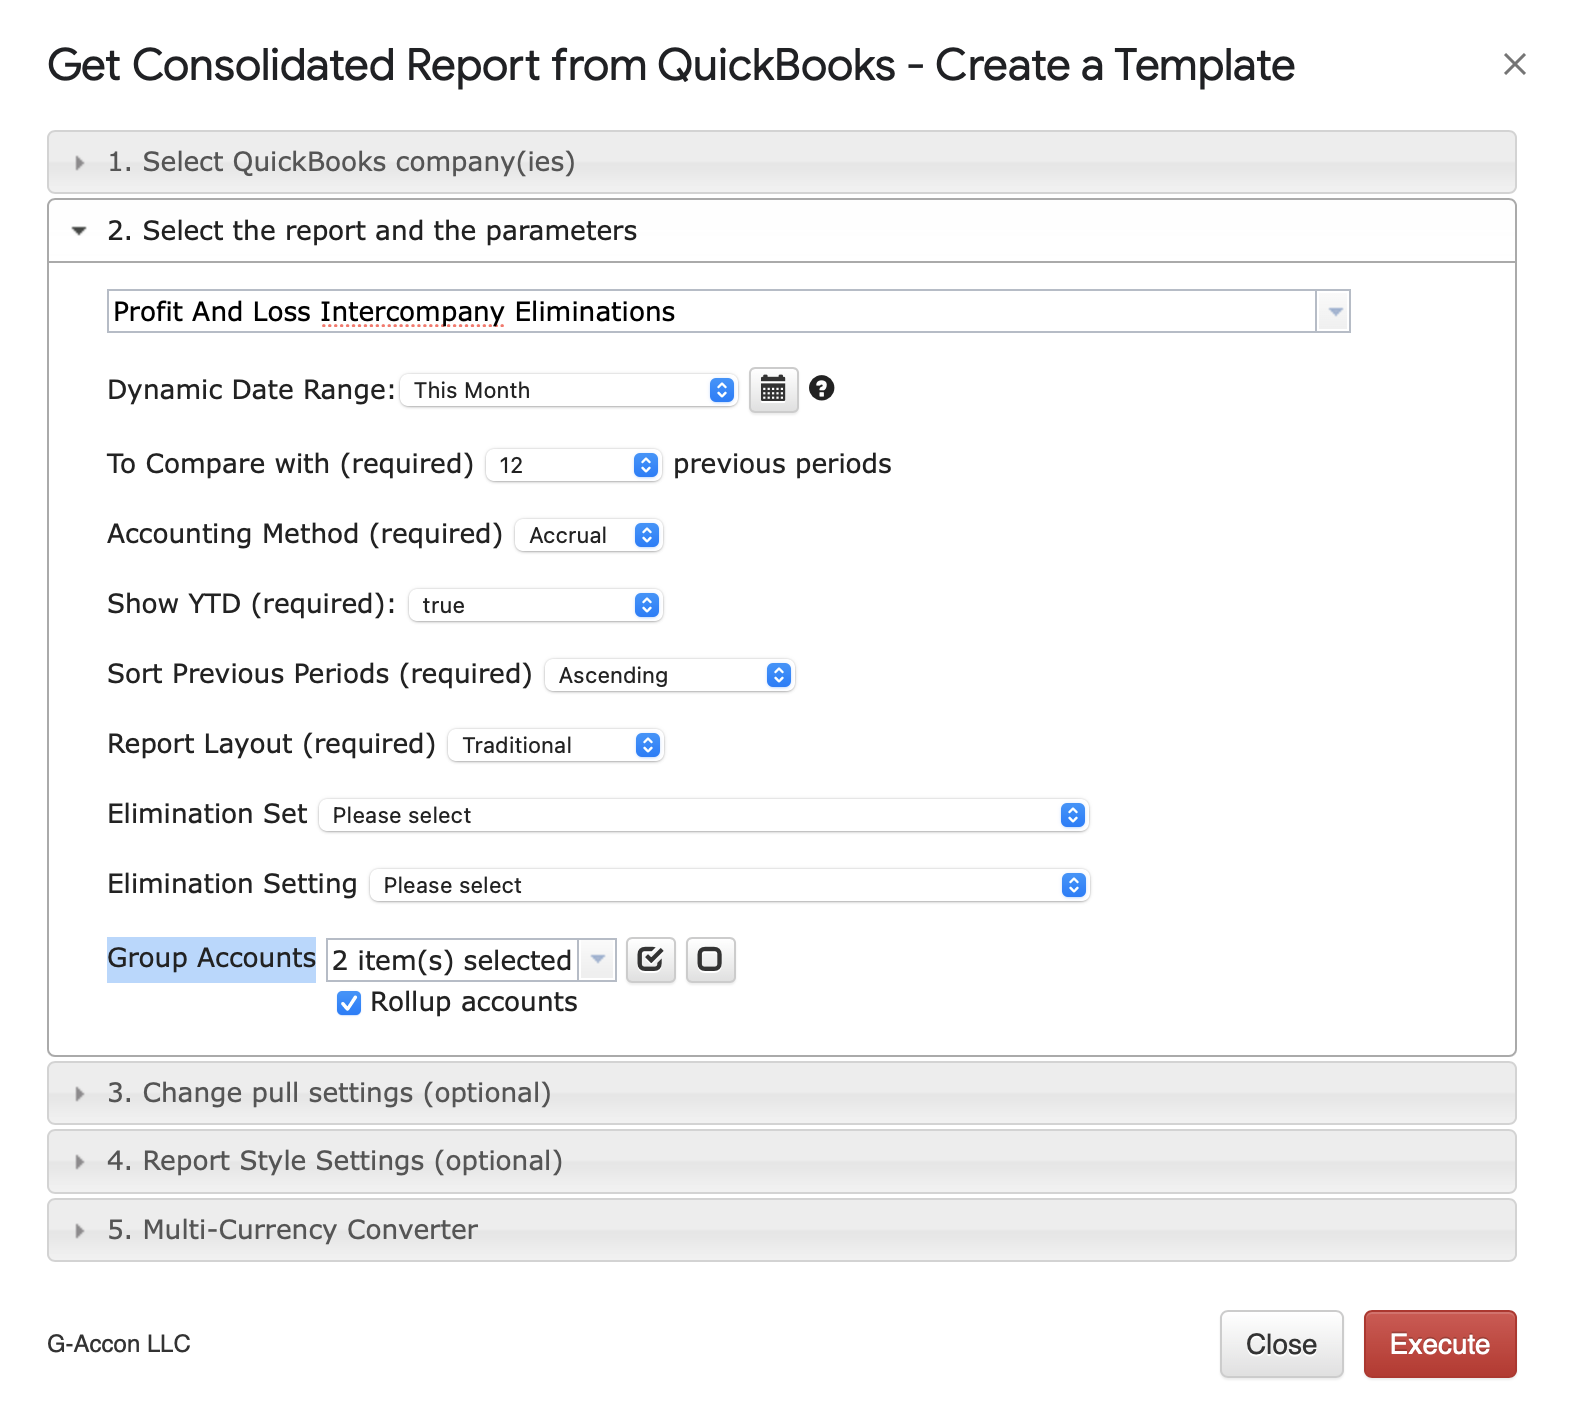
Elimination Set

Next step is to identify Elimination Settings. These settings will dictate what you want to see as part of the reports in Google Sheets.
Elimination Settings

The Elimination Settings options are:
Select Group Accounts using Rollup Accounts feature:

Step 4. Change Pull Settings
Before generating consolidated Xero or QuickBooks reports in google sheets, you can organize your report. G-Accon offers the flexibility to set up Dates Format, Show Negative values in red, add company name, add customer logo, and ect.
The needed feature needs to be selected under the Change Pull Settings menu option.
Select Group Rows By Account if you need automatically combine accounts with identical numbers and names into one transaction.

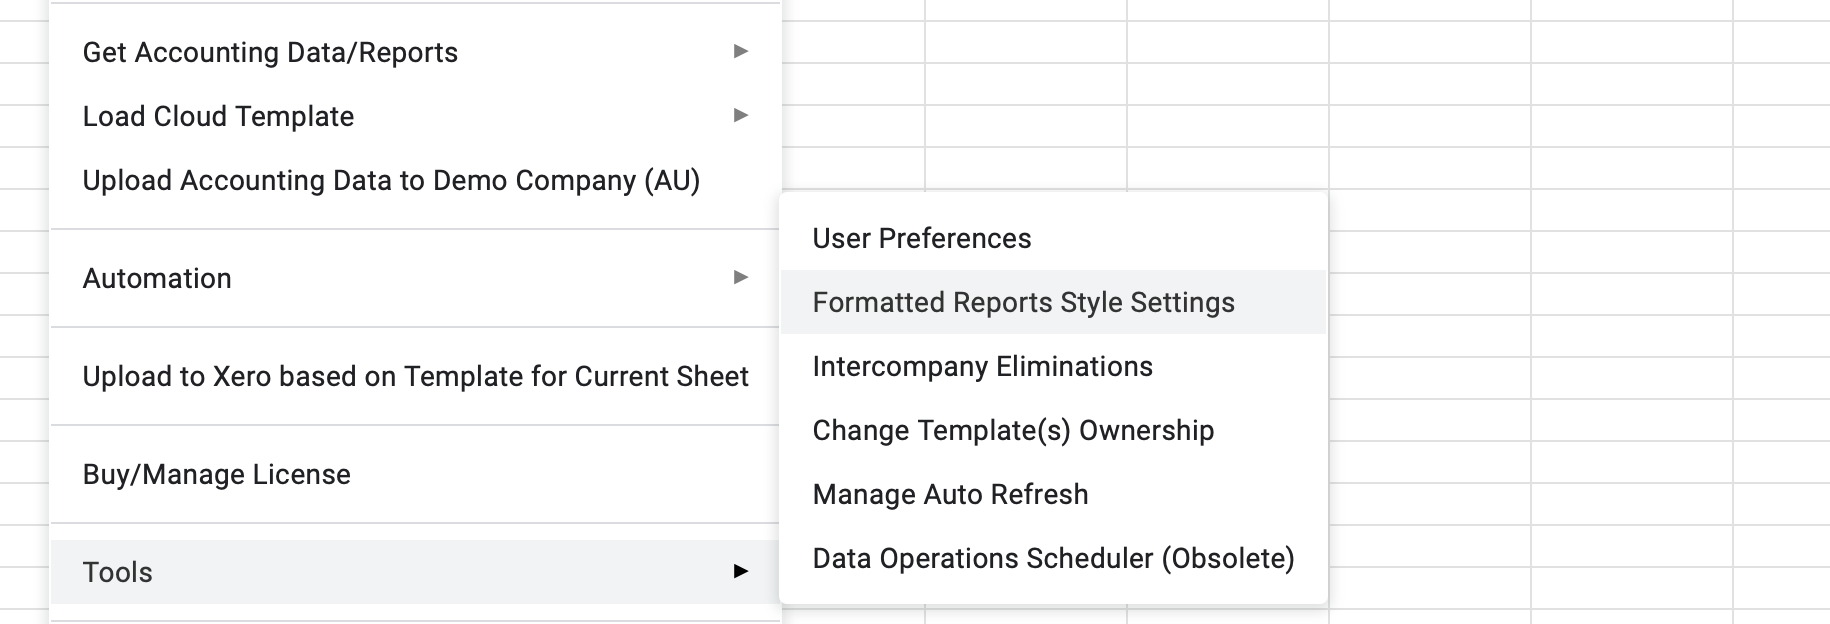
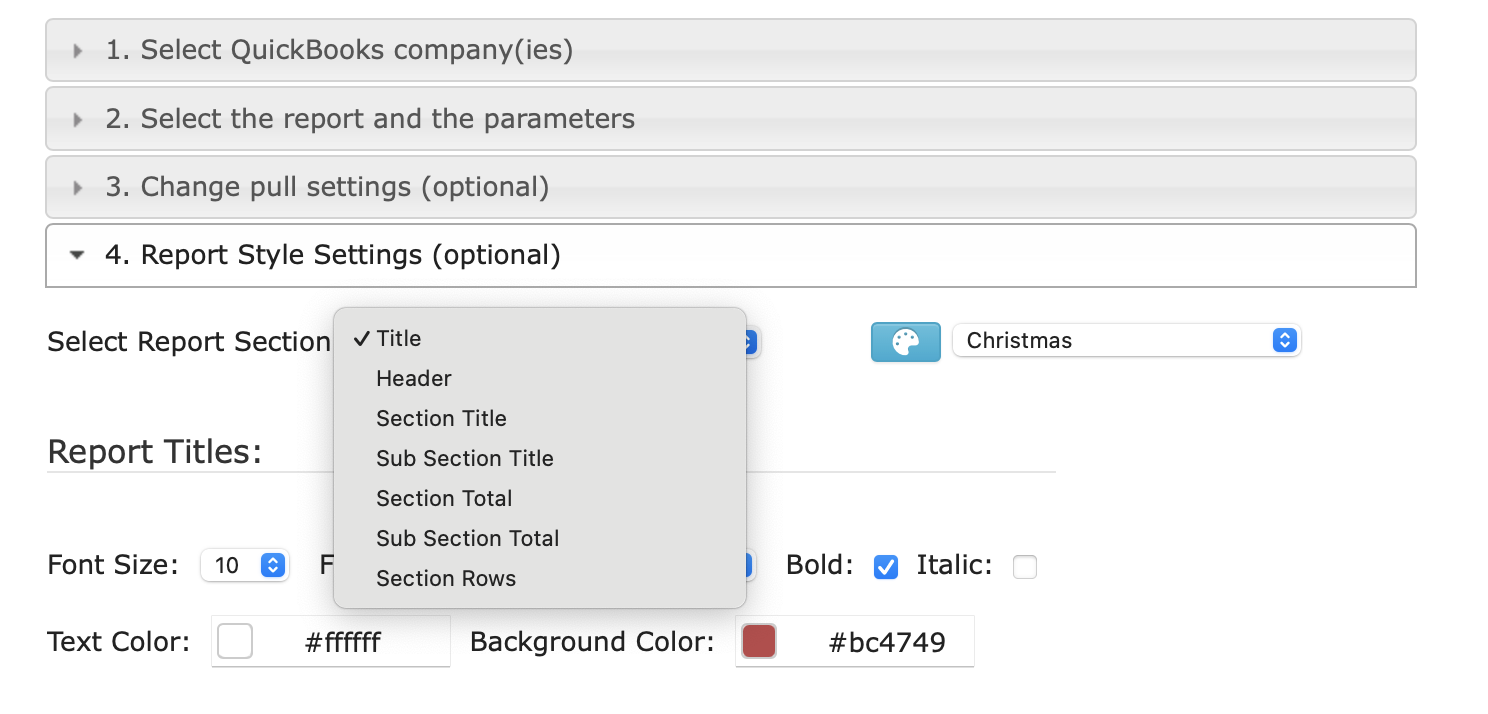
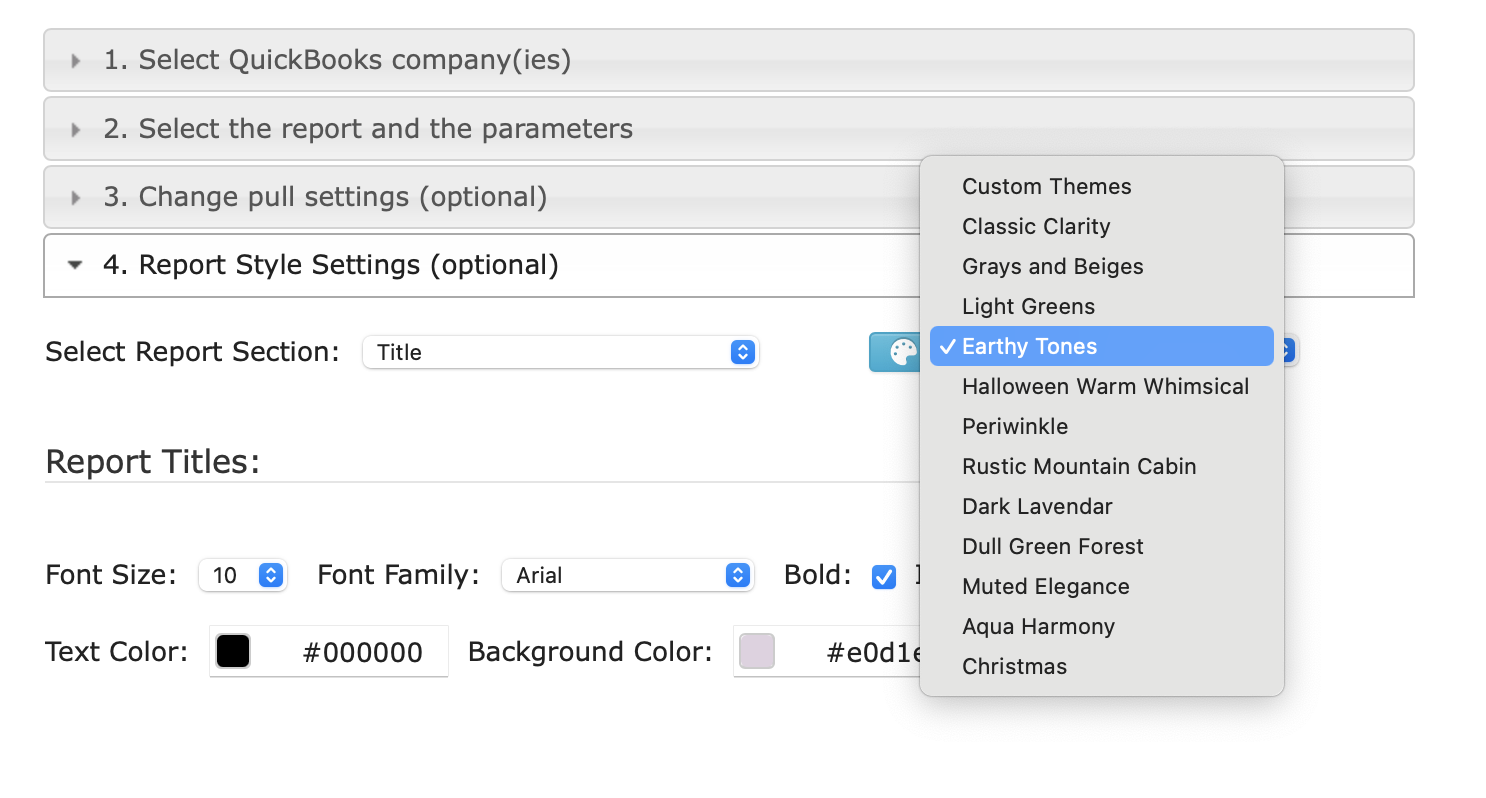
Step 5. Change Report Style by report sections
When customizing a report, you can either adjust the style of each section individually to ensure the document is visually cohesive and aligns with your desired format, or simply select a predefined theme.
This allows you to tailor the appearance of individual sections, such as headers, section title, subsection title, section total, and ect. according to customer's theme and color.
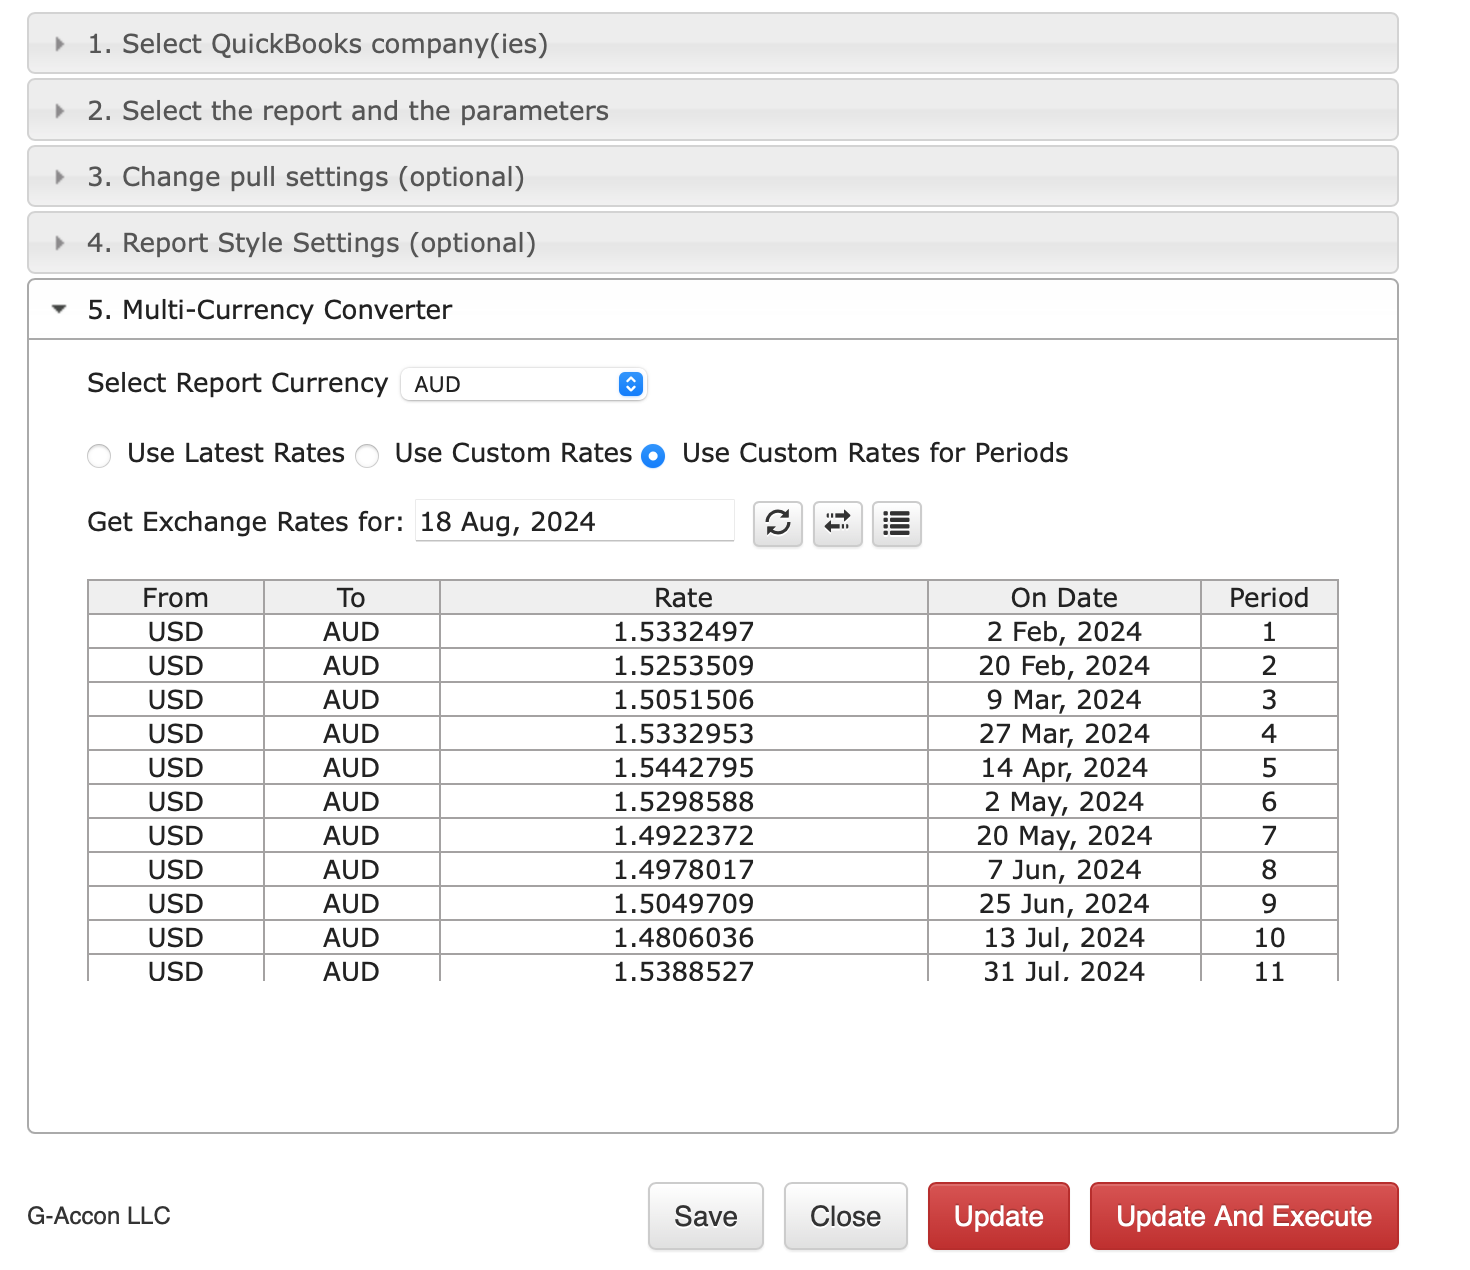
Step 5. Convert the consolidated report in your client's currency
All QuickBooks reports can now be displayed in your chosen currency. Your real-time reports will automatically update to reflect the selected currency without any further action needed.
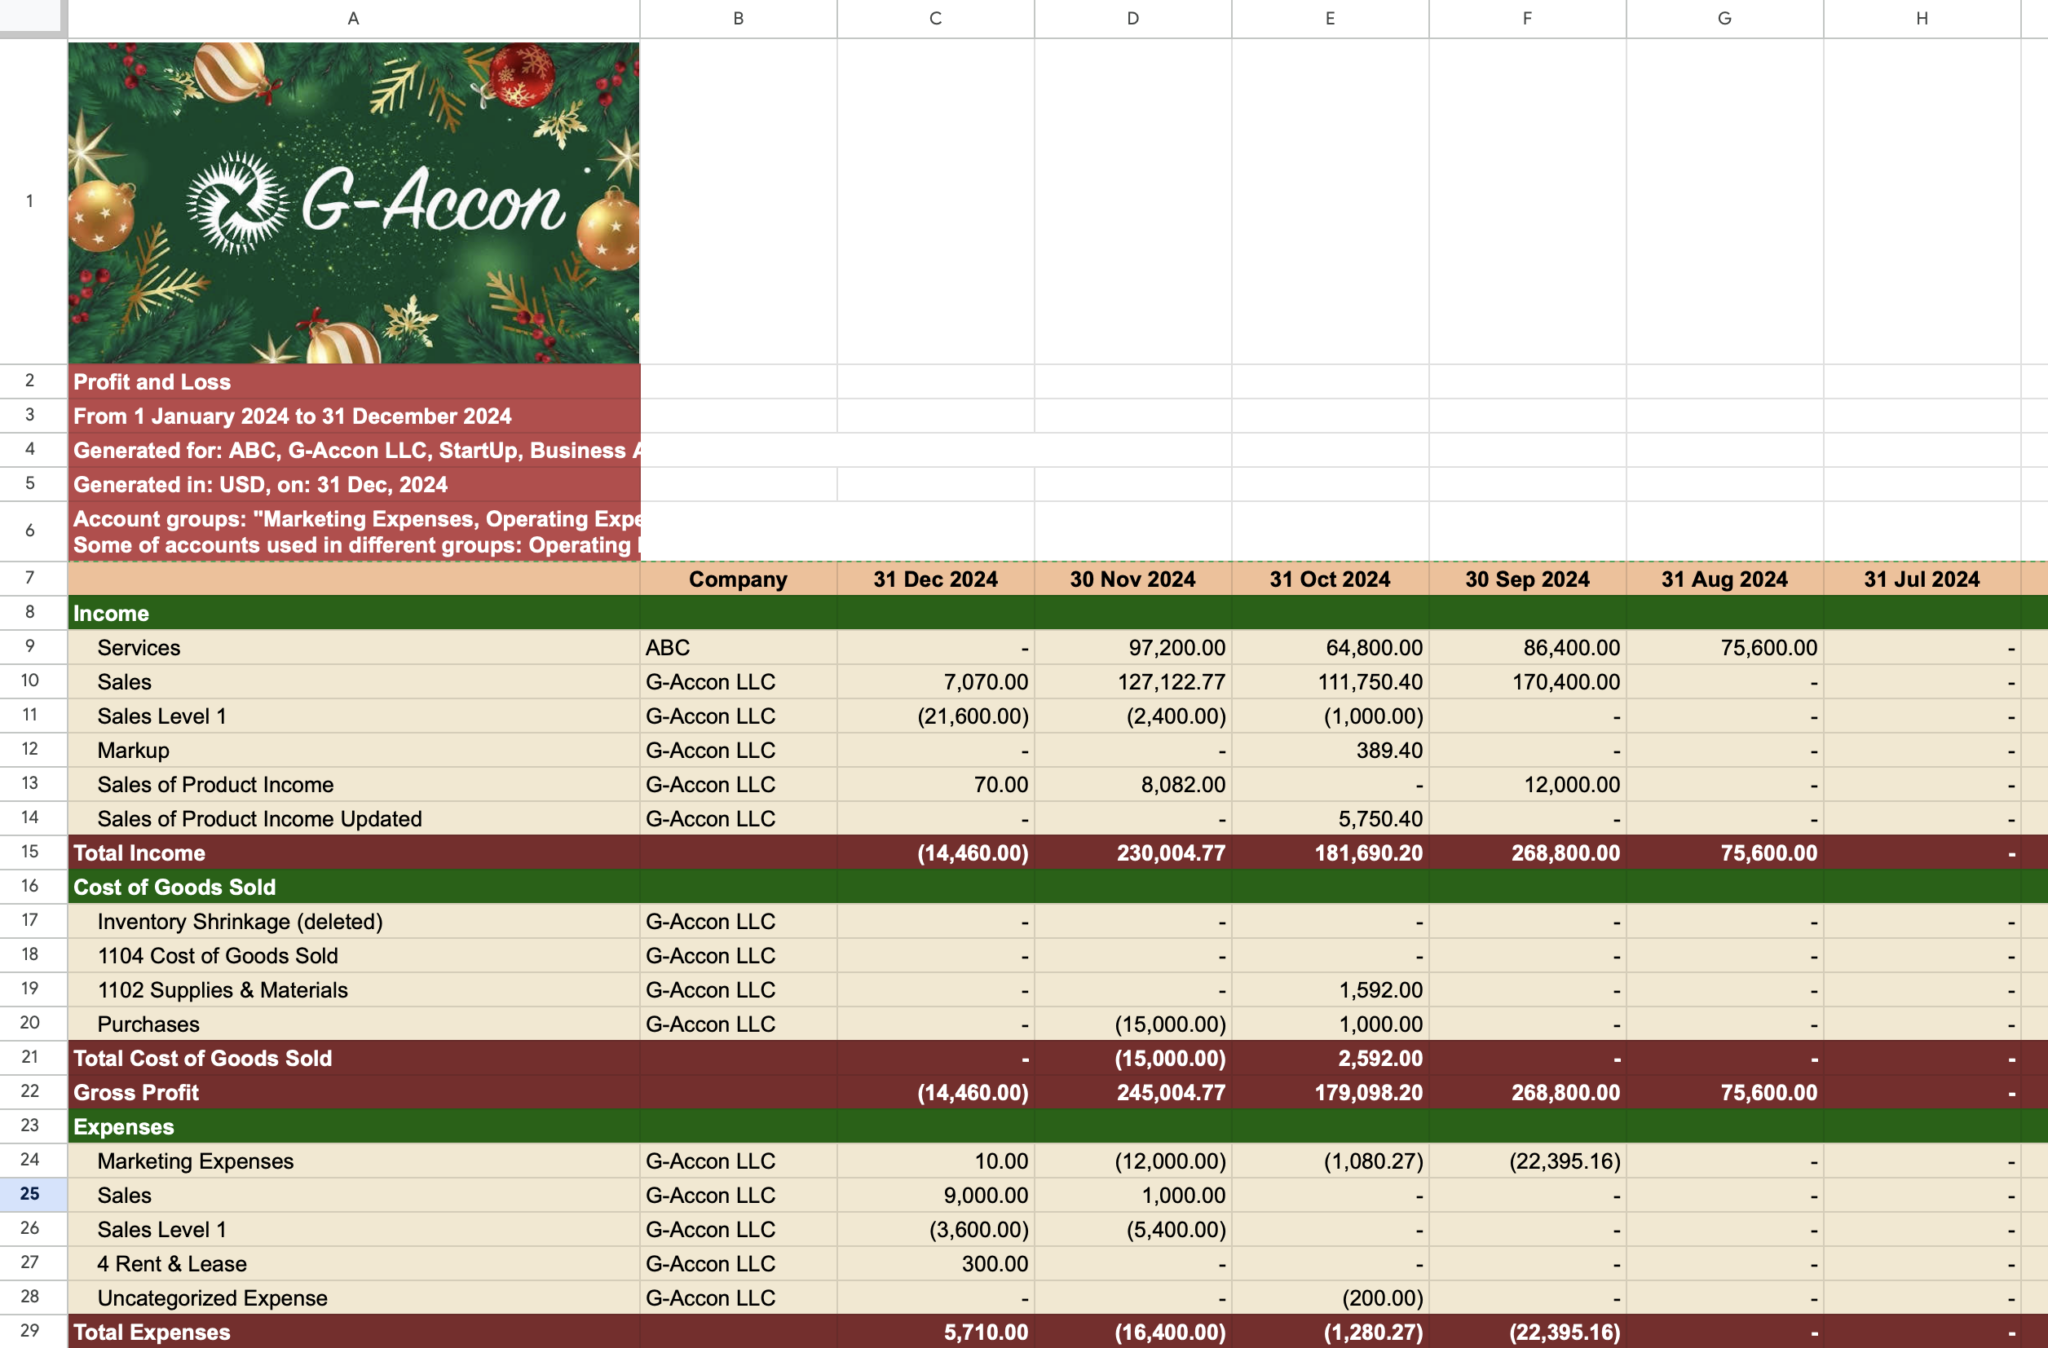
Step 6. Generate Formatted Consolidated Report with White Label
This is the final step of generating a consolidated report that compiles data from multiple QuickBooks organizations into a cohesive, well-formatted report, customized with your client's company's branding through white labeling.
This reports ensures a professional, branded presentation that’s easy to read and ready to share by using G-Accon automatic workflow or google sheets "Share" function.
✅ Gross Profit KPI Now Available in QuickBooks Reports for Canadian Customers
The Gross Profit KPI item has been added to the following reports for Canadian customers:
✅ Enable On-the-Spot Refresh Automation
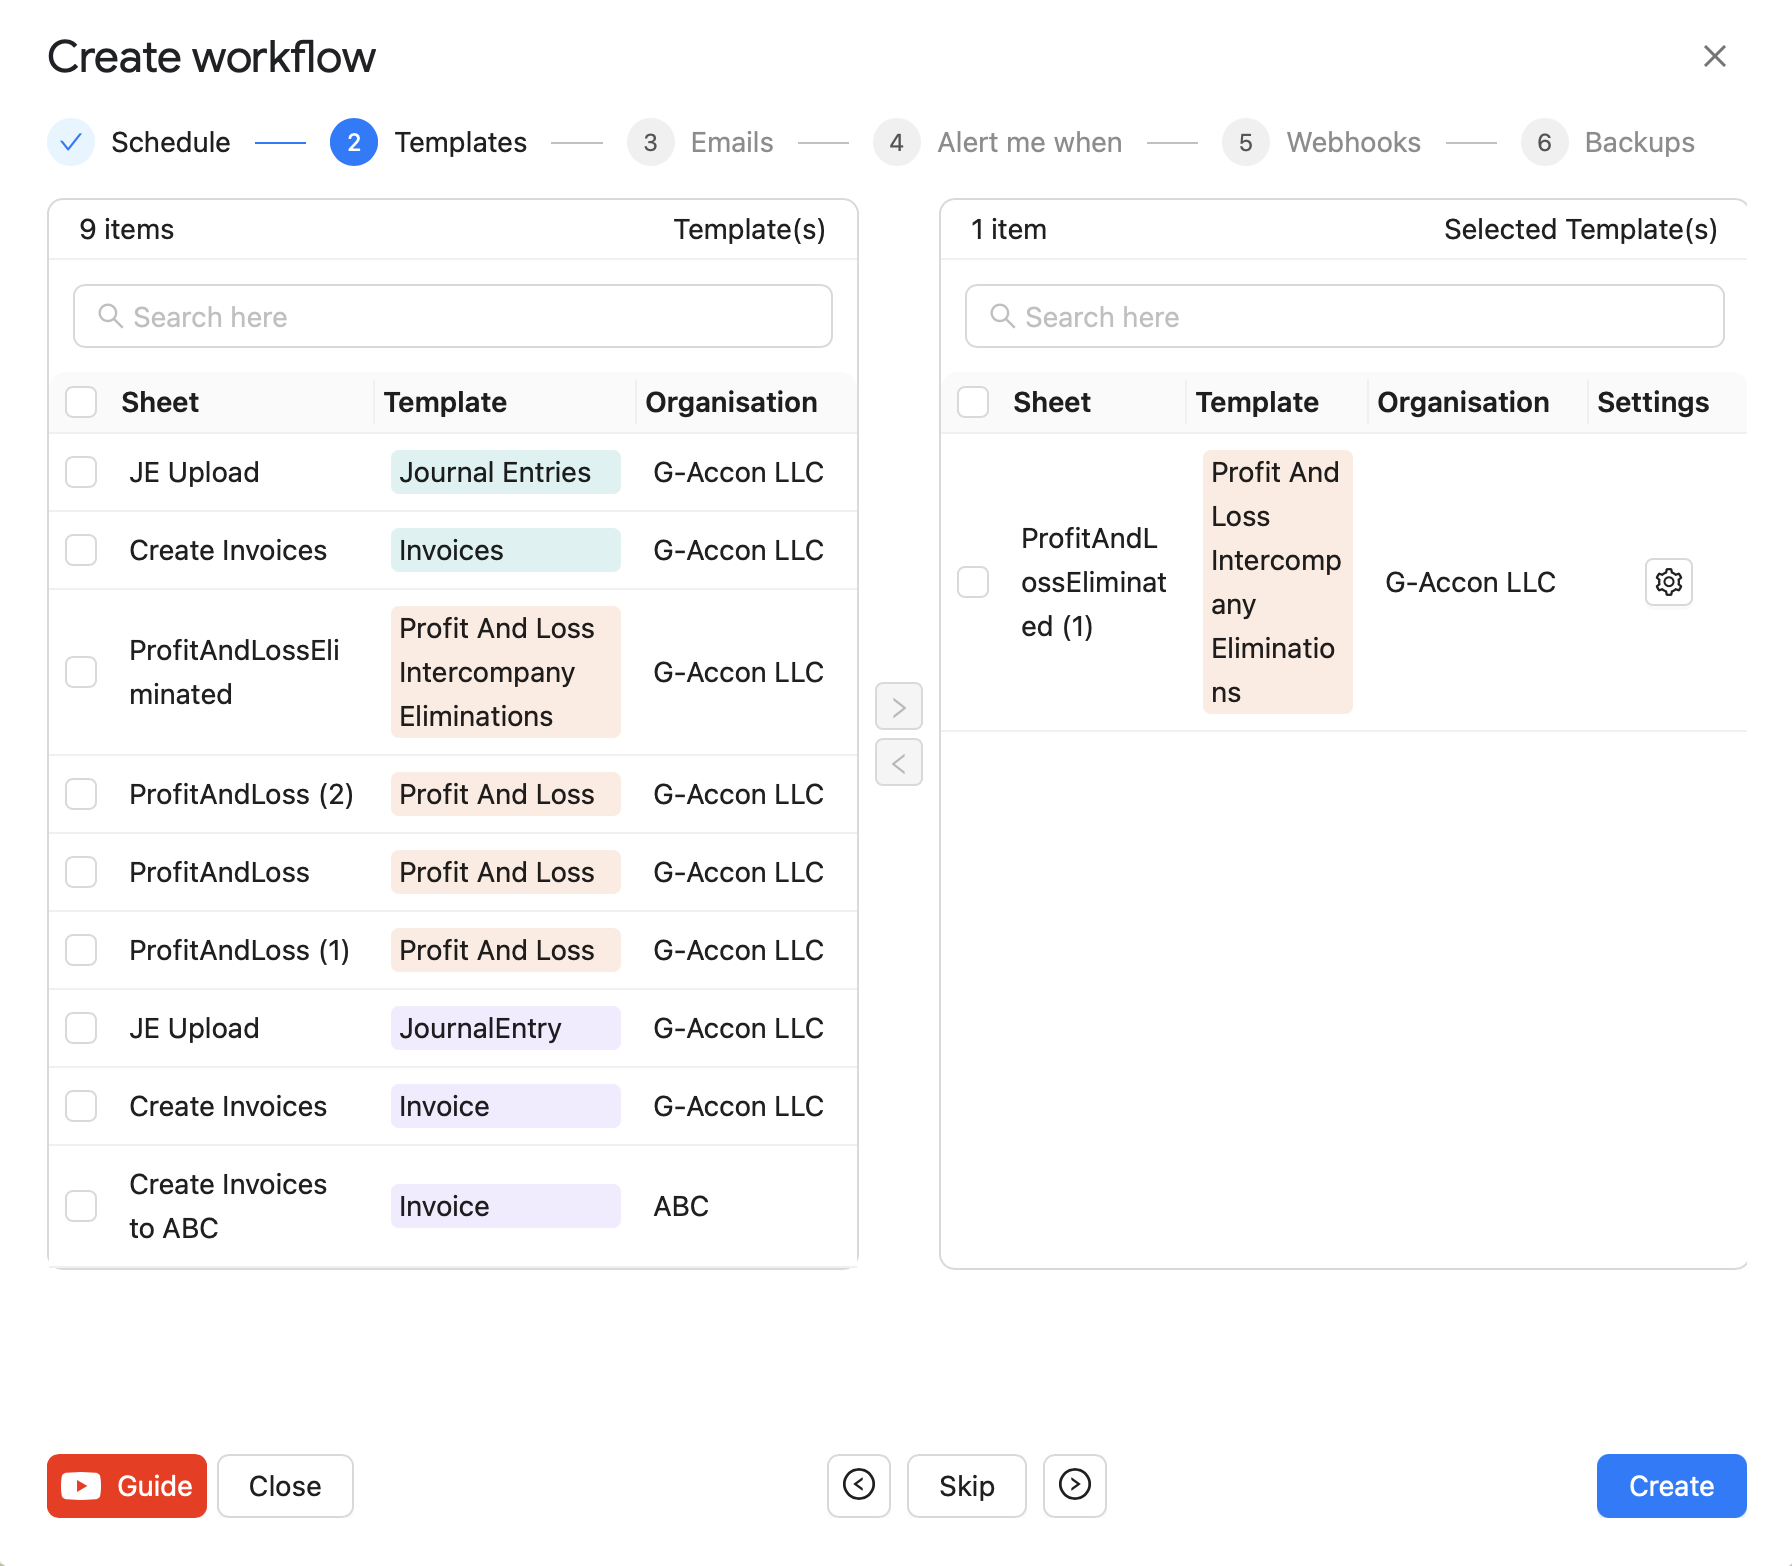
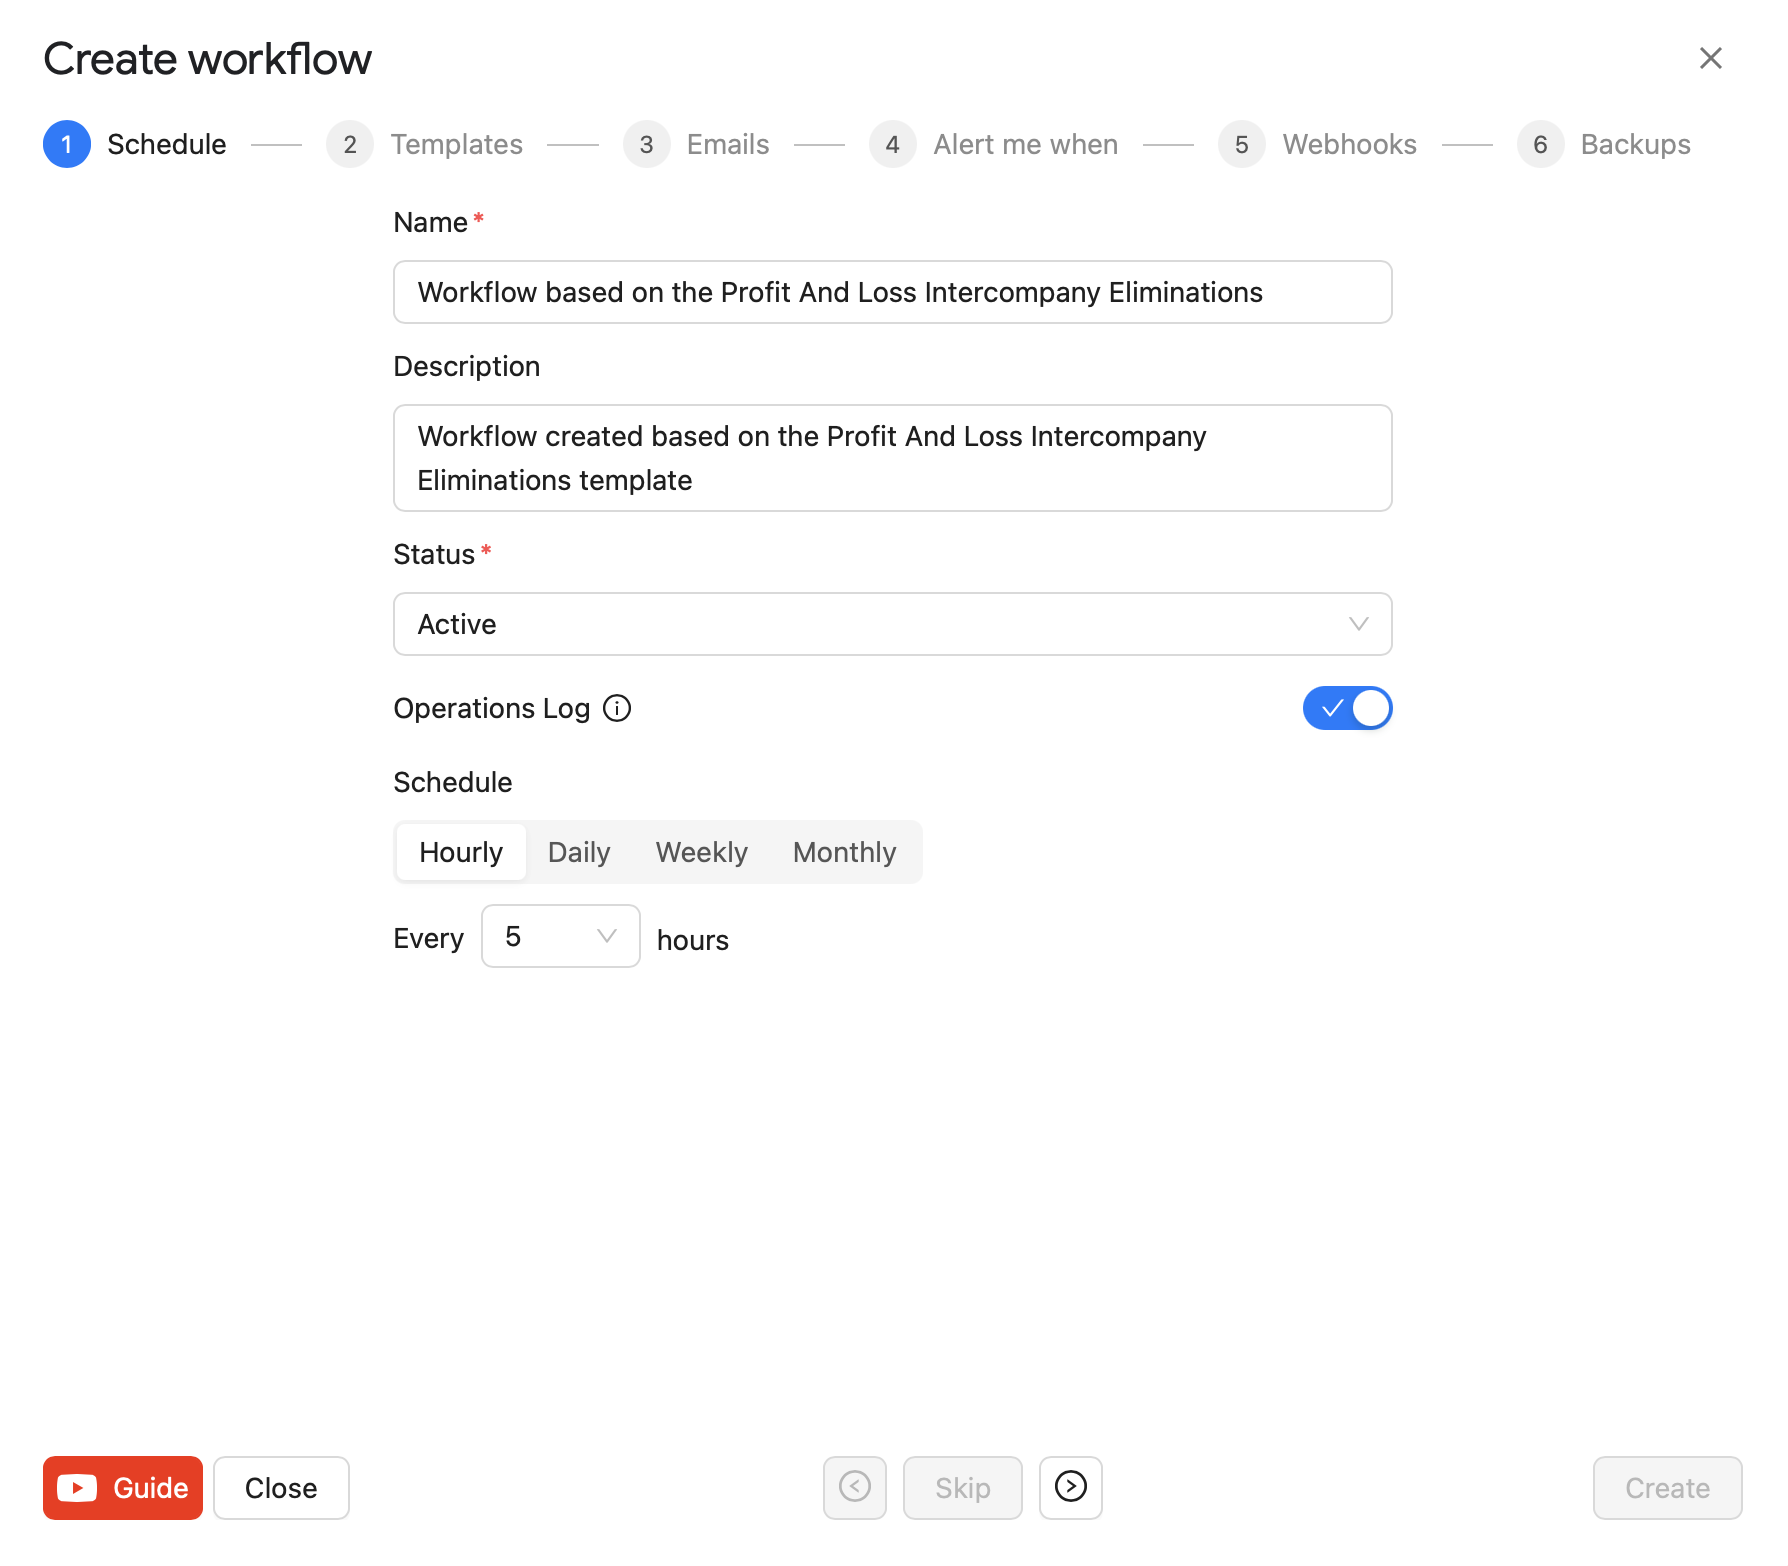
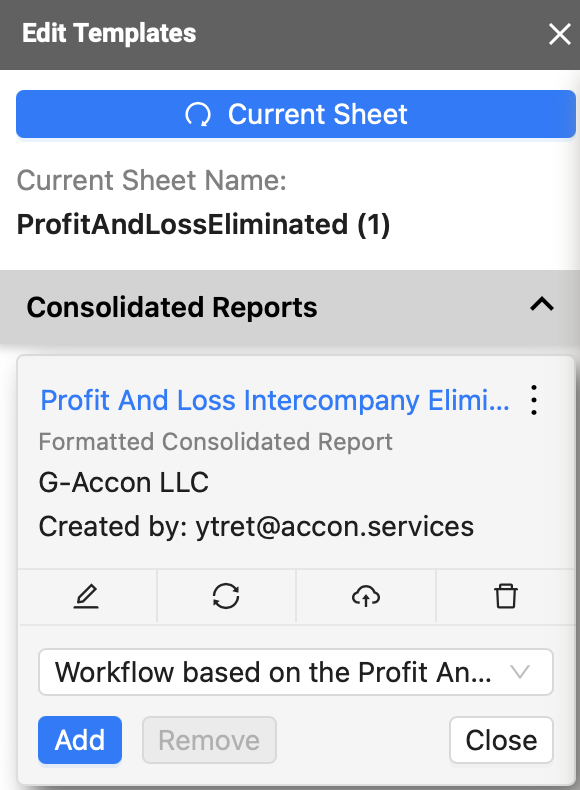
To enable On-the-Spot Refresh Automation, select Edit Template for Current Sheet and click on the three vertical dots. You will have the following options: New Workflow or Add/Remove Template.
Creating a New Workflow will set up a workflow with the default refresh option of every 3 hours for your report. The Add/Remove Template option allows you to include or remove your template to/from an existing workflow.